

- Remove the front cover by gently lifting the tabs at the top and bottom of the CD case.
- Press down on the side of the CD case near a corner to pop out the disk tray and remove the album artwork from the back cover.
- Open a new CD jewel case and place the album artwork inside. Press the disk tray back in and hook the front cover onto the top and bottom of the case.
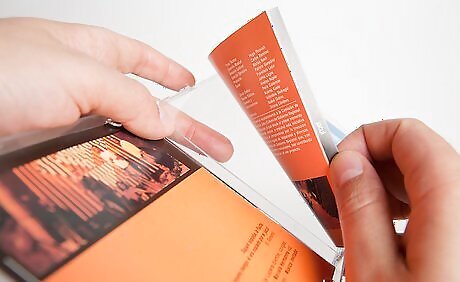
Remove the CD case’s front cover and booklet.

Open the CD case and slide the cover booklet out. Find the tabs on the top and bottom of the cover where it connects to the back of the case. Gently press up on the tabs with your thumb to pop the front cover off of the case. While it’s not required to remove the front of the old CD case, it will make getting the back cover out a bit easier.
Pop out the disk tray to remove the CD’s back cover.
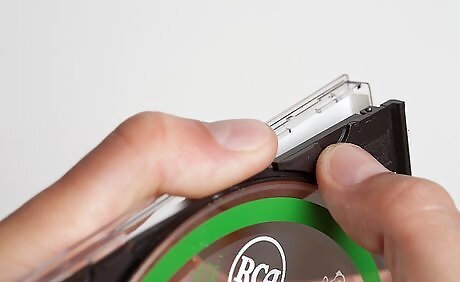
Take the CD out of the disk tray and set it somewhere safe. Pinch the side of the CD case near one of the corners with one hand. Hold the middle of the case firmly with your other hand. Gently push the side of the case down with your thumb until the disk tray pops out of place. If the disk tray doesn’t fully pop out, then repeat the same steps on another corner. Once 2 corners are free, the others will come out easily. After the disk tray is free, simply lift the album artwork out from the back of the case. Once you’ve taken the album artwork out, toss the old, broken case into your trash can.
Open the back of your new CD case.
Get a new CD jewel case or use an old case you already own. Pinch the side of the case near a corner and push it down to pop the disk tray out from your replacement case, just like you did with your old case.
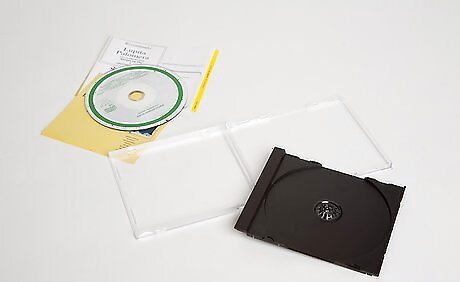
Insert the album art and disk tray.
Place the back artwork into the back cover of the new CD case. Align the disk tray with the back cover, and gently press down on the corners to snap it back in. Once the disk tray clicks into place, put your CD back in. If the disk tray doesn’t snap in right away, try pressing down along the sides of the case. Just avoid applying too much pressure so the disk tray or cover doesn’t break.
Put the front cover back on the CD case.
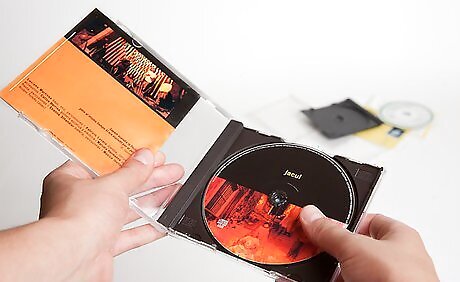
Hook the tabs on the front cover into the holes on the top and bottom of the CD case’s back to reattach it. Slide the booklet back into the slots on the front cover to finish your CD case replacement.


Comments
0 comment