views
What is the easiest gymnastic trick to do?
Try a straddle sit technique. While this is more of a "skill" than a "trick," it's a simple, beginner-friendly exercise that anyone can get down. To do a straddle sit, seat yourself on the ground with your hands flat on the floor and your feet spread apart. Try separating your legs as much as you can until you're stretching comfortably.
Forward Splits
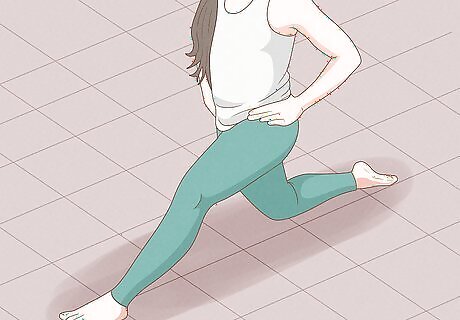
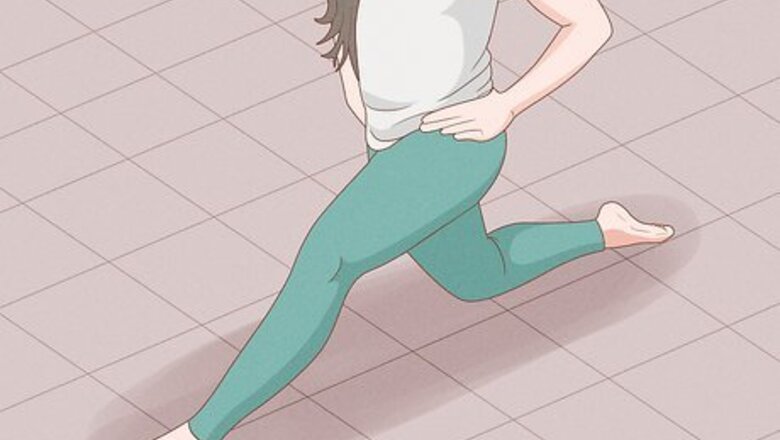
Start in a standing position with one leg forward. When preparing to get into a split stance, stand with your feet shoulder-width apart. Lean forward on your dominant foot. This will be the leg that goes forward in your split. It is best to practice doing the splits on a softer surface, such as carpet or a yoga mat. Try to avoid practicing on tile or hardwood, if possible.
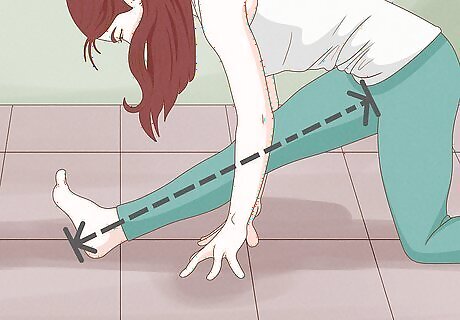
Extend your front leg out. Keeping your front leg straight, slowly slide it forward directly in front of you. Keep your stance controlled and tight; do not allow yourself to wobble back and forth or slip. Try taking your socks off to prevent your feet from sliding. Another option is to try performing the splits on carpet flooring with your socks on.
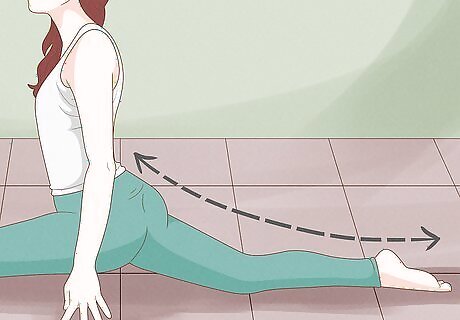
Extend your back leg out. While your front leg is slowly extending, do the same with your back leg. Propel it outwards and straight behind you while staying upright and controlled. Once you begin to feel a tightness in your thighs, refrain from stretching any further. Forcing your body past what feels comfortable is a sure way to injure yourself. If necessary, use a small chair or table to help keep your balance as you lower yourself down.
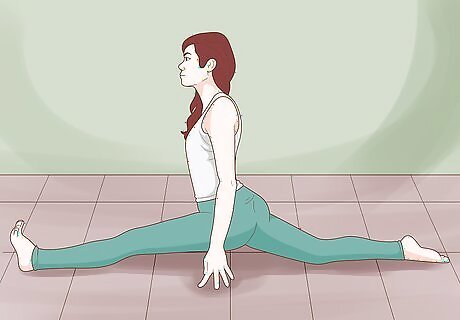
Hold the stretch. When your legs are both extended as far as they can go, pause and hold the stretch. Try counting to 15 or even 30. The point is your body will learn to relax while in the splits pose. Rest your arms on a supportive chair, side table or ground if necessary. Always remember that a stretch will cause discomfort, but not pain. If you feel pain while doing the splits stop immediately. You can ask a partner, friend, relative, or anyone you feel comfortable with to place their index finger on the tip of your shoulders. Then, ask them to gently push down ever-so-slightly. As you practice, ask that person to slightly increase the pressure on a daily basis.
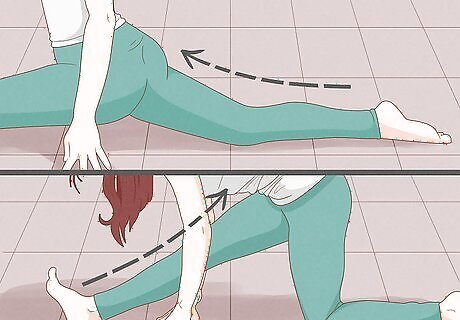
Ease out of the splits. Once you’ve held the stretch as long as possible, slowly ease up back onto your feet. After resting a few moments, you are free to try again if you feel your body is capable. Take your time and focus on technique as you practice. Most people are not naturally flexible. Mastering the splits may take several months of practice. Be patient and don’t be discouraged if you feel that your flexibility is not improving. Depending on your age, flexibility may take a while to improve.
Standing Backbend
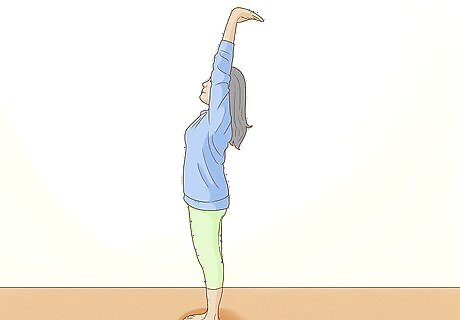
Place your arms over your head. While standing, raise your arms straight into the air. Your palms should be oriented towards the sky and fingers pointing behind you. This exercise is best learned with a friend nearby for support if necessary. Feel free to use a wall as you practice your backbends.
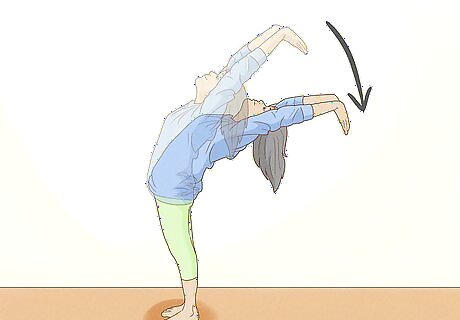
Arch your back and move down. Puff out your chest and slowly lower yourself backwards towards the floor. Take your time and control your movement. Moving too fast can cause you to lose your balance and fall, injuring yourself. If you’re stuck here, you may find it helpful to use a chair or table as a halfway support. You can use the support until you’re confident in your ability to go all the way down. Bending all the way backwards takes some serious flexibility. If you’re stuck, get into a bridge and rock back and forth. Rock all the way onto your hands and feet. This allows your back to really curve and helps prepare for the standing bend.
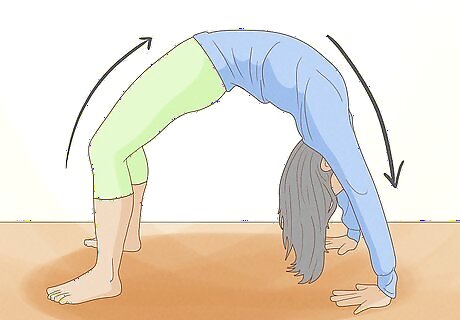
Lock your arms and hold. Once you begin to approach the ground, lock your arms to ensure that you don’t smack your head when you land. After your arms have been locked, keep arching back until your hands are on the ground. Keep your stomach flexed and pointed tight to the ceiling as you hold the position. While in a backbend, keep your feet firmly planted. Imagine your weight being distributed evenly on all four limbs. This will help you stay balanced.
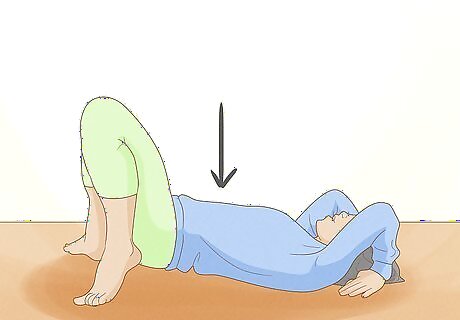
Exit the bend. While professionals can arch their way back up and out of a backbend, you may find it easier to let your knees drop, and unlock your arms. Tuck your head into your chin and cave your body. This will put you flat onto your back and safely on the floor.
Wall Handstand
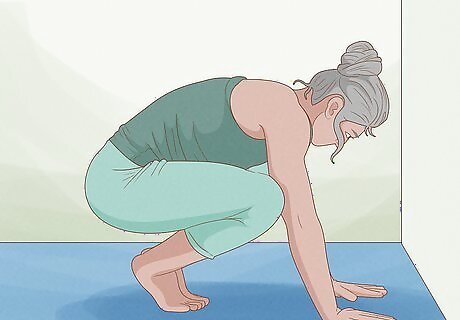
Place your hands flat on the ground. You want your hands to be hip distance apart, and fingers pointing towards the wall. Picture your fingers a couple inches from the wall. Prepare yourself mentally by visualizing the movement while focusing on your breathing. Keep your elbows and wrists locked strong. You may fall on your face if your arms are flimsy and soft when you transition into the handstand. The handstand is one of the core techniques used in gymnastics. Mastering this skill will allow you to move on to walkovers, handsprings and other flip-movements. Learning how to handstand will also be vital for transitioning between bars and floors. Be patient while practicing. The movement can be disorientating and may need time to build the strength needed to complete the movement.
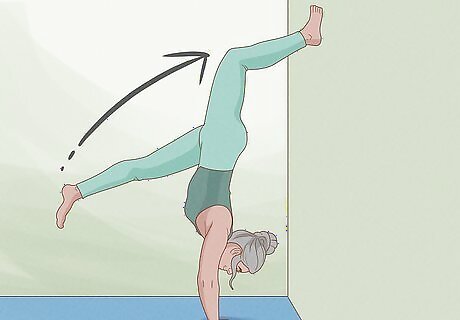
Lock and fling your legs up. Keep your back against the wall for stability. From here, lock your knees and kick them up. Don’t be let down if you are leaning completely against the wall. Keep your abdominal and arm muscles strong and engaged to keep your back strong.
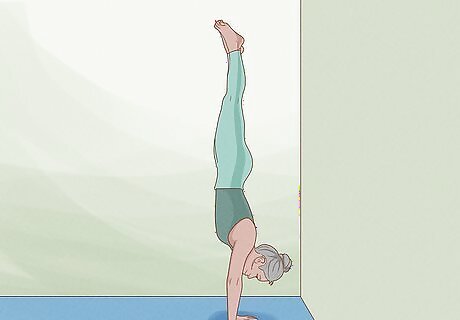
Point your toes and hold. Imagine pointing your toes straight towards the sky. Flexing your ankles, point your toes up. If you’re doing it correctly, the balls of your feet should be pointed towards the wall that is supporting you. Hold for as long as you can. In time, your muscles will strengthen and you will be able to hold the hand stand for longer periods. Keep your chin tucked into your chest and face towards the wall. This will protect your neck in case of a fall. Try not to raise your head or look up when you do a handstand. The rest of your body should feel strong and solid. Keep your back and arms completely straight and strong.
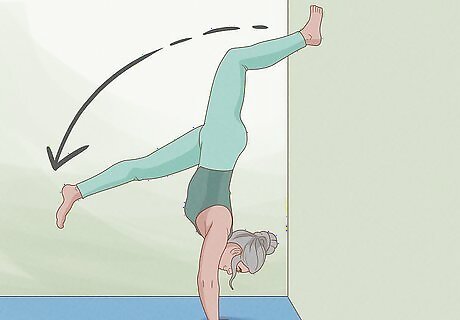
Release and come down. Relax your ankles and swing your legs back towards the ground. Bend the knee in preparation for hitting the ground. Allow the blood to rush back to your head before trying again. Once you’ve mastered 8 reps of 30 seconds each, try moving away from the wall and doing a free-stand handstand.
Trampoline Tricks
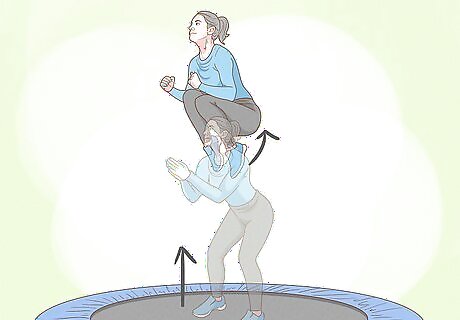
Perform a tuck jump. Jump up as high as you can on the centre of the trampoline. Keep your body straight and push through your arms up over head to maximize the strength of your entire body. At the peak of your jump, touch your knees to your chest and hold. As gravity begins to bring you down, kick your legs back out underneath you before landing back onto the trampoline. Always jump at least 6 ft (1.8 m) in the air before you attempt a flip.
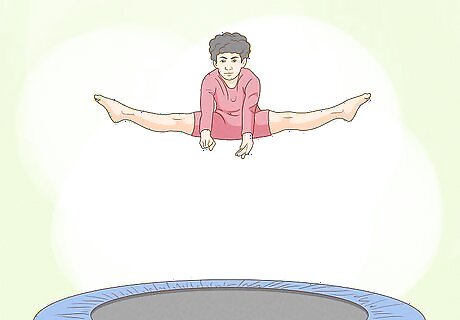
Move on to the straddle jump. Jump on the centre of the trampoline and push your legs straight underneath you. As you reach the peak of your jump, kick your legs forward and out so that they form a V in front of you. Bend your back and reach to your toes as you do this. As gravity begins to bring you down, brace yourself by bringing your legs back together and forcing your hands to your sides.
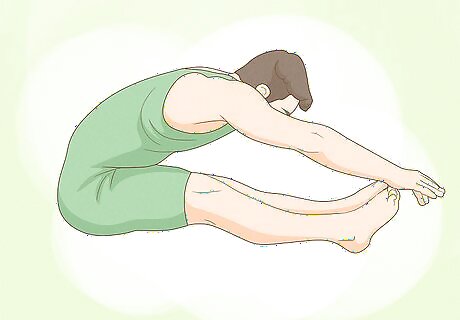
Perform a pike jump. Jump at the centre of the trampoline and push through your legs and out through your arms. As you reach the peak of your jump, your arms should be over your head and pointed towards the sky. Push your hands forward while you simultaneously bring your legs in front of you. Try to touch your toes while keeping your legs straight. Bring your legs back down and arms to the side to brace yourself to land.
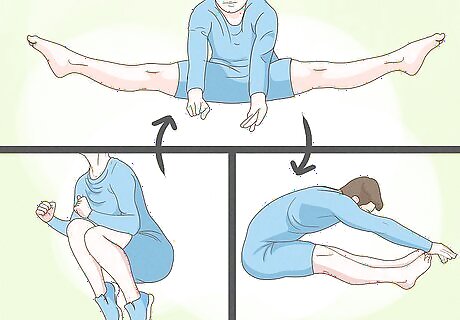
Combine your jumps. Generate more power with each successive jump and practice executing different jumps as your height increases. The more height you get, the easier it will be to focus on technique.
Balance Beam Basics
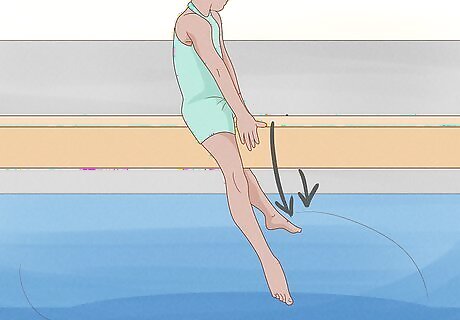
Mount the balance beam with straight legs. When you first get on the balance beam, place each leg on either side. Keep your toes pointed towards the ground and legs flexed.You want to create a straight line with your body and hands in front of you, holding the balance beam for support.
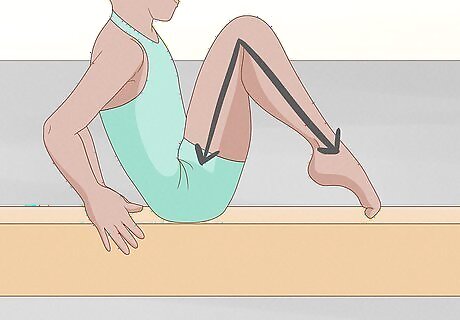
Move right into tuck position. Raise your knees to your chest, keeping your legs together and hands behind you holding beam. Point your toes down and touch the beam. Hold this position for five seconds.
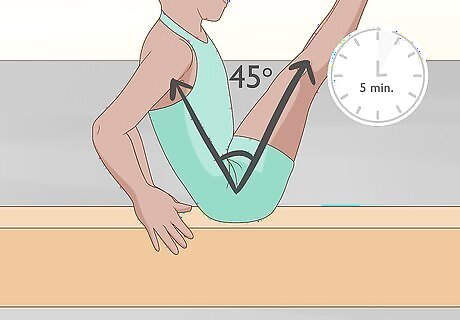
Perform a V hold. As the name suggests, create a V silhouette by crunching your abs, bracing yourself with your hands on the beam behind you. Point your toes with your legs at a 45 degree angle from the beam. Hold this pose for 5 seconds. Depending on your flexibility, this may take time to be able to lean back and raise your legs to create a V shape.
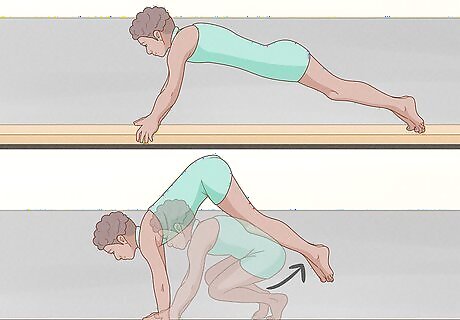
Transition with a donkey kick and finish. When straddling the beam, swing your feet back to get yourself into a pushup position. Hold this position for five seconds and then walk your feet forward inch by inch. Focus on the movement by letting your toes hit the heel of the opposite foot. Once your feet touch your hands, move your hands slightly forward and perform a donkey kick with one leg. Gain your balance and stand up straight to finish.
Other Tricks
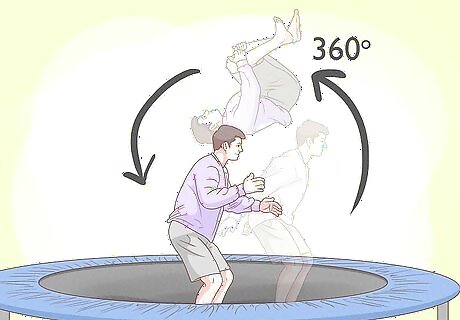
Do a backflip.Also known as a back tuck, a somi, or a salto, a back flip is one of the most impressive and easily recognizable skills in gymnastics. With this move, your body makes a 360 degree rotation, beginning in a standing position and landing in a standing position.
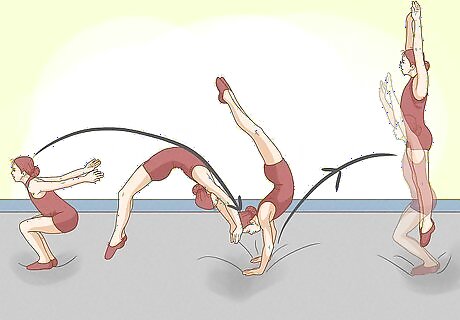
Do a back handspring.The back handspring is a basic building block for many gymnastic or cheerleading routines. To do a back handspring, you have to fall backwards, land upside-down on your hands, and push upwards to land back on your feet. If you want to do a back handspring, you should already have built up your upper body strength, especially in your arms and shoulders, and you should be comfortable doing a backbend, hand stand, and back walkover.
Warm-ups
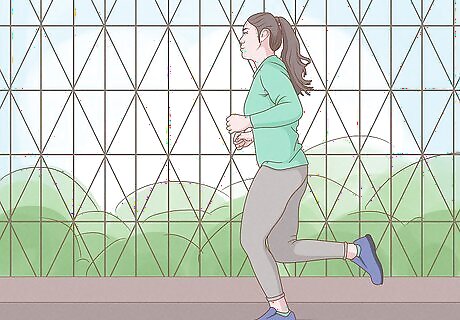
Warm up with cardio. Warm up the muscles in your body with 15 minutes of cardio. Do what you enjoy as cardio can be repetitive. Whether you jog, run on a machine, or walk up stairs, make sure you loosen up your muscles, slowly working them up for more vigorous activity. Add squats, planks, knee jumps, or jumping jacks to increase the blood flow and intensity of your warm up.
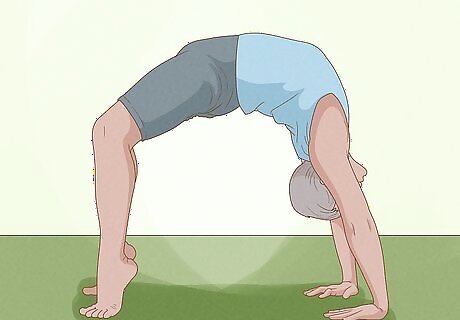
Form a bridge to stretch your back. The bridge is a stretch that looks exactly as it sounds. Lay with your back on the floor, knees bent, feet planted, and hands palms down with fingers pointed at your feet. You should look like you are about to crawl on your back but create a bridge instead by lifting your back off the ground and pushing down through your palms and feet. Keep your elbows pointed at the ceiling and try to stretch your back as much as possible. With time and practice, your flexibility will improve and you’ll notice that your back will bend more and more. Don’t force your back to bend past its capacity. Back injuries can be very debilitating.
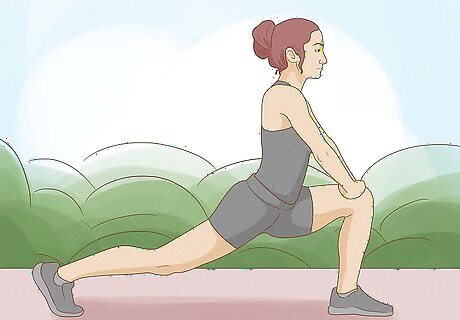
Stretch your lower body with the Runner's Stretch. Take a step forward into a lunge position. Touch the ground with your fingertips or as low as they will allow. Inhale and slowly straighten the front leg, raising your butt. Exhale as you stretch the front leg then lower yourself back into the lunge position. Stretch both sides at least 4 times each.
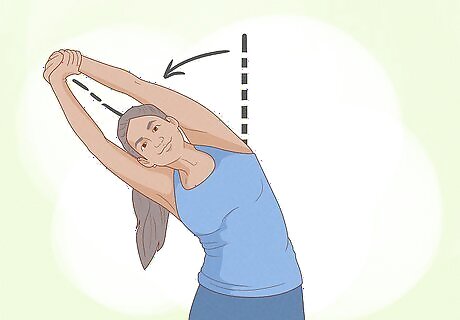
Stretch your upper body with a standing side stretch. From a standing position, reach your arms overhead, clasping your fingers together but keeping your pointer fingers out and extended. Inhale and stretch as long and as tall as you can while you simultaneously bend at the hip to one side. Breath slowly and deeply for 5 seconds and return to a standing position with your arms overhead. Repeat the standing side stretch on both sides of your body.


Comments
0 comment