
views
- Plan your project's scope and design ahead of time. Settle on what type of foundation and materials you'll use and how much they'll cost.
- Set up your end posts first, followed by the nailer and purlins. Nail the rafters to the top nailer.
- Install your roofing material and add trim around the edges as a final touch.
- Finish up your lean-to by adding doors, partitions, floors, and exterior walls.
Plan Your Project

Know your local zoning laws. Consult the local building authorities to learn about code requirements, needed permits and property set backs for storage buildings.

Locate underground hazards. Most lean-tos will require some digging, whether for a concrete foundation, pier blocks, or postholes. Always call a utility location service before you break soil. Digging into a pipe or electric line could cause serious injury or property damage. In the United States or Canada, call 811 toll-free to request this service.
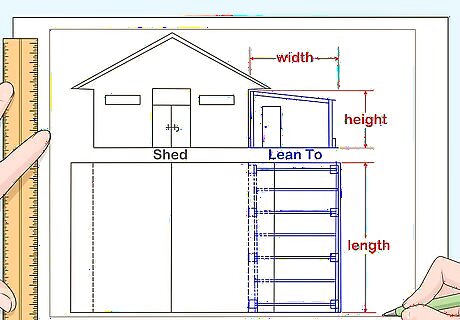
Draw a plan for your project. Plan the length and the width of your lean-to, and where it will attach to the shed.
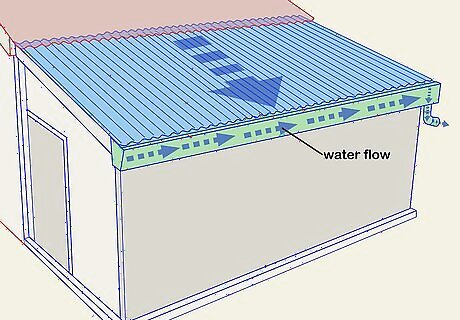
Design the roof to withstand weather. Angle the roof so rain is directed away from the building's perimeter. You may need a simple gutter or downspout drainage piping to prevent pooling at the base of the lean to. If your region receives heavy snowfall, build the roof to withstand that load. Also decide how the roof of the lean-to will interface with the roof of the shed.
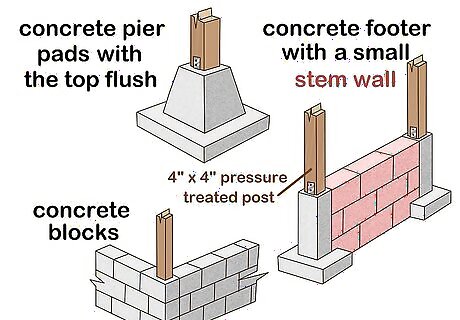
Decide on a foundation. Even though the addition is small, a solid foundation is important. Use the best materials within your budget. Here are some solid examples: Concrete blocks Concrete footer with a small stem wall to prevent water from seeping in Concrete pier pads with the top flush to ground level You can use pressure-treated skids for additional support, but do not rely on them as your sole foundation. You can use a 4" x 4" pressure treated post to establish the vertical upright framing.
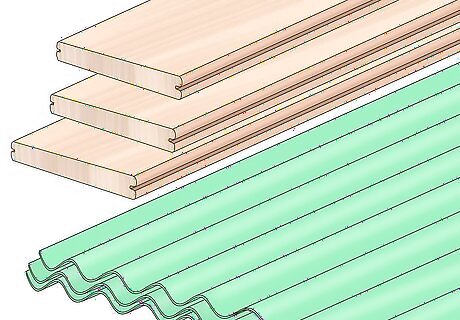
Choose the materials you will use. Lumber is a fairly strong and inexpensive material for framing, and tin is a suitable roofing and siding material. Other options include shingle roofing, rolled roofing, metal flashing to waterproof the join between the new roof and the existing one, metal studs for framing, and cementitious board or composite sidings. Choose the materials that are suitable for your location and climate as well as materials that will match your existing building. Be sure to plan to use a sheath of CDX plywood on the wall that abuts against the structure. CDX plywood resists indirect moisture.
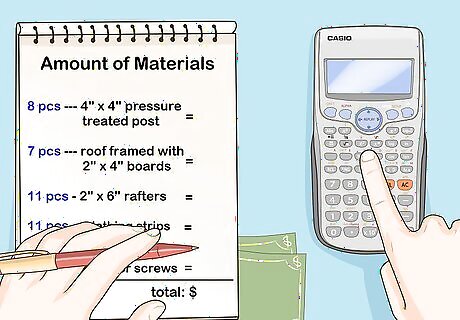
Calculate the amount of each material you will need, price them, and purchase them. Some basic items that a lean-to addition for a tin shed would use include: Poles for supporting the eave framing. 4" x 4" pressure treated southern yellow pine will support a lightweight roof framed with 2" x 4" boards, spanning less than 15 feet (4.6 m) or so. For a longer, heavier roof span, 6" x 6" timbers or even steel columns may be more suitable. Rafters for framing the actual supporting structure of the roof will need to be strong enough to support the weight of the lathing, the decking and the workmen who will walk on the roof while installing it. A somewhat typical span of less than 10 feet (3.0 m) may be framed with southern yellow pine if the rafters are free of large or loose knots and are otherwise structurally sound. You may use Douglas fir, hemlock, or cedar instead. Lodgepole pine, spruce and other softer pine species are too knotty and not strong enough for roofing unless the rafters are from large diameter trees. For roof spans 10 feet (3.0 m) or greater, 2" x 6" nominal framing or larger, should be used. The rafter nailers spanning between the posts on the eave side of your lean-to must be strong enough to support the load of multiple rafters. Use a minimum size of 2" x 6" nominal southern yellow pine or other strong wood. Nailers attached directly to the wall of the building onto which the lean-to is being added can be the same size lumber as the rafters themselves as long as the nailer is attached securely to the wall of your building. Local building code and the existing wall material will determine which anchors to use. These may include lag bolts (to attach to large diameter wooden beams), threaded bolt nuts and large diameter washers (drilled into hollow concrete blocks), or hurricane anchors. Lathing strips, or the framing members that lay across the rafters that the metal roofing is attached to should be sound southern yellow pine or a similar lumber. 1" x 4" lathing lumber is sufficient to support a normal load on spans where the rafters are located at 24 inch center spacing or less. 2" x 4" lumber is easier to fasten to (it bounces less when nails are driven into it), and may not be significantly more expensive than the 1" x 4"s. If you are laying a plywood "roof decking" directly onto the rafters, then you only need lathing to brace between the rafters or to prevent side-to-side movement by cross-tying them to the bottoms of the rafters. Nails or screws to act as fasteners. Nails should be large enough to penetrate the attached member and the supporting member deeply enough to secure the two pieces. Screws may be used to attach dissimilar materials, such as metal framing, roofing, or siding to wood framing, or even for joining two separate wood members.
Set the Posts
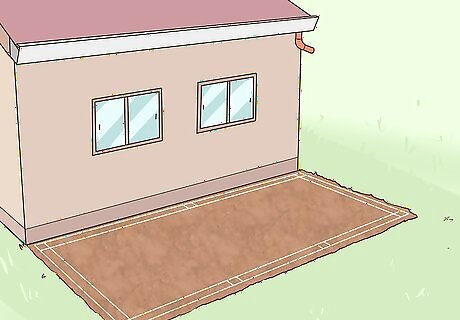
Lay out the area within the footprint of your addition. Remove any debris or vegetation that will be a problem during construction or future use, and grade the soil to a suitable elevation. If you are going to leave an earth floor in the addition, compacting the soil probably will not be necessary. Make sure the floor material will withstand expected weather conditions year-round.
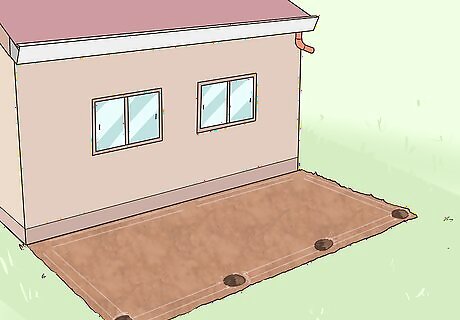
Dig your post holes for the supporting posts. Check the placement before, during, and after you dig. The distance between posts depends on the load of the rafters, roof, and any future snow load. Check your local building code for guidelines. Measure the distance between the wall to which you will fasten the lean-to and the starting corner. You can start by pulling string lines along the planned addition. Use the 3-4-5 rule to confirm the outer corners are square before you dig the holes. If the outer wall is not parallel to the shed, the rafters will be difficult to place.
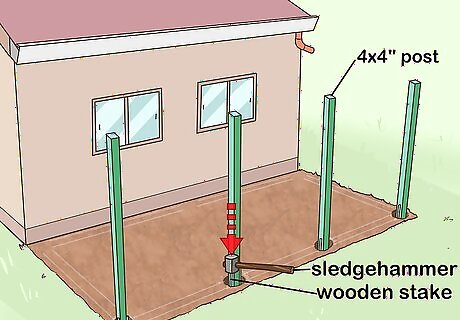
Drive each end post into a hole with a sledgehammer. Secure each post as follows: Plumb two adjacent sides of the post to confirm the post is level. Secure those two sides with temporary diagonal cross bracing, using two 1" x 4" boards. Drive a wooden stake into the ground next to each board. Fasten each 1" x 4" board to a stake and to the post using easily removed nails or screws. Once the end posts are in place, repeat with the intermediate posts.
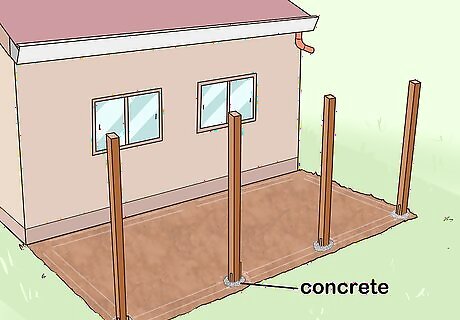
Backfill the post holes with concrete. For best results, mix a "post mix" concrete and pour it into the post hole. Leave the bracing in place for at least 24 hours or until the concrete sets, then remove it. If your lean to is small and your area does not experience strong wind or severe storms, you may be able to backfill the post holes with dirt instead.
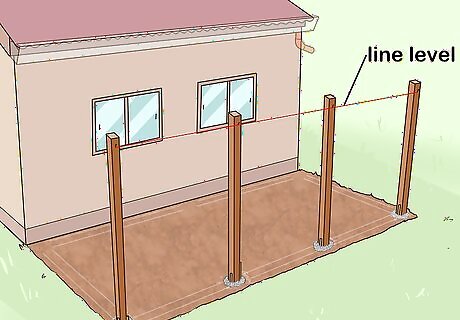
Use a line level or builder's level to mark a bench elevation (a reference grade) on each post. This line will determine the bearing height of the rafters. Start by marking the end posts, and use either a plain line or a chalk line to mark the intermediate posts.
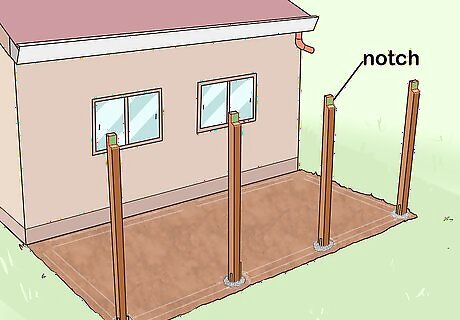
Notch the top of your posts so the rafter nailer or rafter supporting joist will rest on the notch. Draw a notch about 1-1/2" (about 4 cm) deep into your post. Use a circular saw set to a 1-1/2" (about 4 cm) depth to cut into the post at the base of the notch. Set the circular saw to maximum depth. Measure out 1-1/2" (about 4 cm) on the top side of your post and cut into the top of the post on the same side as you made the first cut. When your saw blade meets the first cut, the wood block should fall off, leaving the notch for your nailers. If necessary, finish the cut with a hand saw or a reciprocating blade saw. Repeat the process with each post. If you choose to, you may simply nail directly into the side of the post, but doing so places all the weight on your fasteners. You could also use metal hangers or brackets to attach the top beam or plate to the posts, using heavy gauge TECO nails.
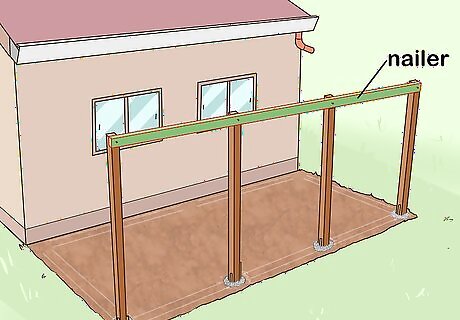
Set the nailer on the notches. If the nailer is not long enough to span the total length of your shed, make sure any joints are set against a post to ensure maximum bearing potential for the nailer. Nail the nailer into place, making sure the spacing between your posts remains correct.
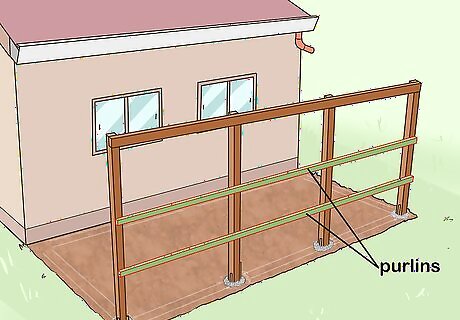
Attach any purlins you plan to use on the outboard side of your lean-to. Remember to nail everything solidly as you install it, so you will not overlook a critical connection before moving to the subsequent step in the project.
Construct the Roof Supports
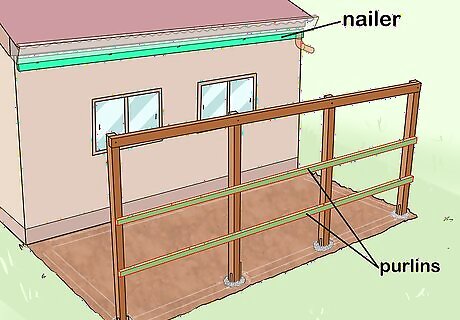
Fasten the nailer to the side of your existing building where you will attach the upper end of your rafters. To attach a wooden nailer to a metal-sided building, use a self-drilling screw with sufficient threads to hold the nailer tightly. If possible, nail through the siding into the building's framing members. Regardless of what method you choose to attach this member, make sure it is fastened securely. This is critical because the nailer it will support the weight of the roofing, the framing and the person performing the installation.
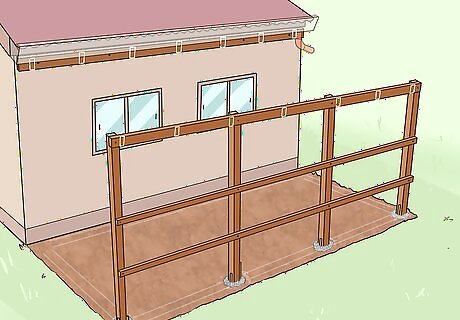
Lay out the rafter spacing on the upper and lower nailers. Starting at 1 end, measure the span you determined to use when you designed the building, and mark each space. Marking the edge of the rafter rather than its center will make the mark more visible when you position the rafter.
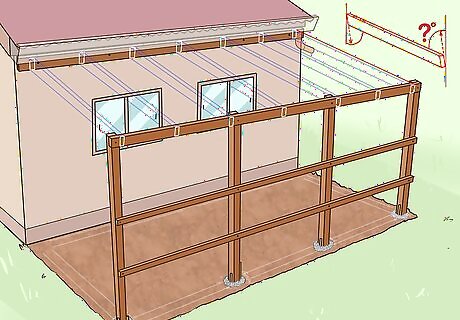
Determine the roof pitch by stringing a line from the top rafter attaching point to the bottom one. Hold a speed square (also known as a rafter square) plumb against the top nailer where your string is fastened. Read the angle on the square's angle scale.
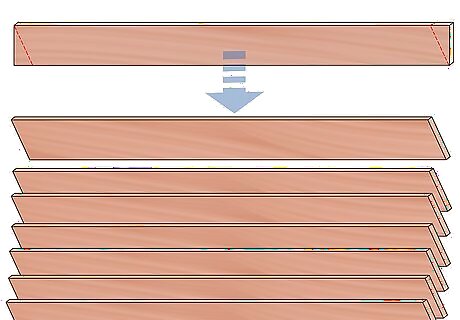
Cut 1 end of the rafters at the angle given to you by the speed square. Test the cut by holding the rafter in position. If the cut does not fit tightly, adjust it. A good fit will increase the hold of your nails when you attach the rafters. When you have established the best angle for the top cut of your rafters, cut each one using that angle. Unless you are certain both nailers are exactly parallel, do not cut the lower end of the rafter. This can be done after the rafters are installed, if cutting them is necessary.
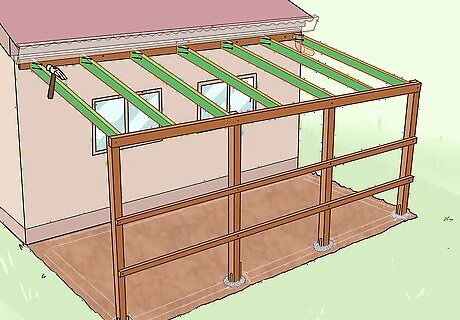
Nail the rafters against the top nailers. For best results, use metal brackets attached to a ledger board. Alternatively, use the toenail nailing method. Use a pencil to mark the position where you want your boards to join at a right angle. Place the rafter about 1/4" (6 mm) in front of the nailer. Place the nail about 1/2" from the connection point and nail it in straight into the rafter. The key to toenailing is to drive the nail in straight and then at an angle. Tap the nail into the wood about 1/4" (6 mm). Pull the nail up at about a 50-degree angle. Drive the nail in until it protrudes slightly from the rafter. Reposition the board to ensure that the angle is exact. Finish driving your nail through the rafter and into the nailer. Avoid starting the nails too close to the end of the board, as this may split it, and make a strong connection impossible. If this is unavoidable, pre-drill the hole at the correct angle first.
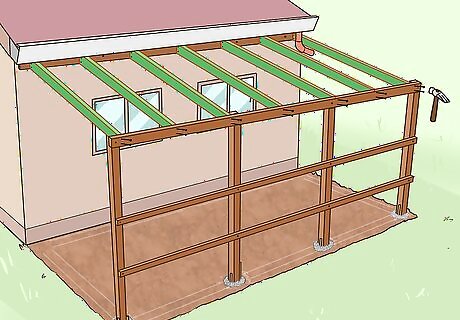
Space the lower end of your rafters on the layout marks and toenail them into place. Use as many nails as possible without splitting the rafter, especially if you are not planning to use a structural anchor like a hurricane clip to supplement the nail's holding ability.
Add the Roofing Material
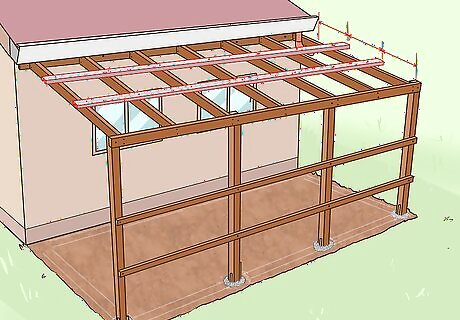
Lay out the spacing of your lathing. These are the strips that span perpendicular to the rafters to which you will fasten the tin or other roofing material. For 29-gauge metal roofing, spacing can be up to 30 inches between centers. Nail the lathing securely, with a minimum of two nails at each rafter, being careful to keep them aligned.
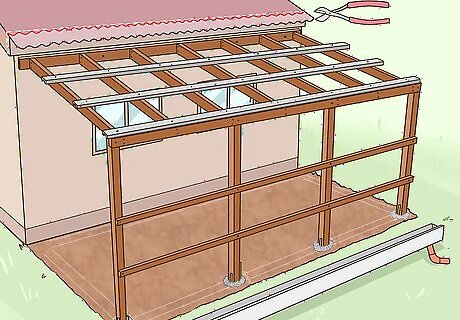
Cut back the roofing on the existing building if needed so that the new roof can fit correctly beneath it. Typically, a lean-to roof will lay at a different pitch than your existing roof. The lean-to's roofing will need to fit fairly snugly underneath the existing roof to prevent rain from blowing into your addition. You may need to install metal flashing to help ensure water proof joining of the two roof pitches.
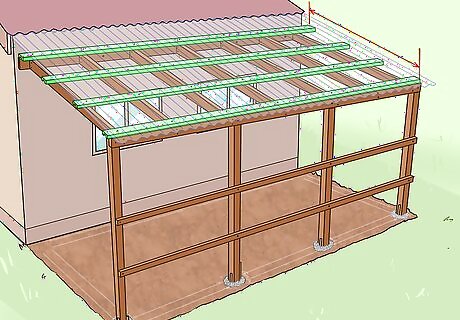
Lay your metal on the lathing, beginning at one end. Some roof metal profiles have a "direction of run," so that the laps fit correctly to guarantee a good, weatherproof roof system.
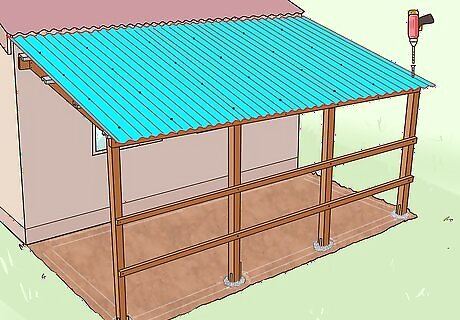
Fasten your metal roofing with a suitable fastener. Wood screw threaded hex screws with neoprene gaskets are ideal.
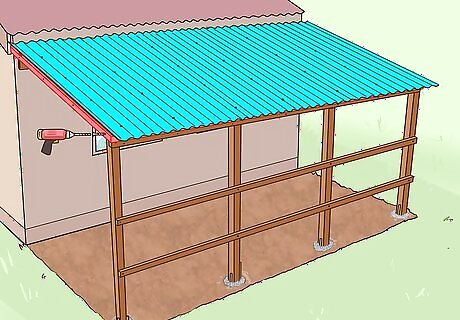
Install trim of your choosing to finish off your lean-to's roof. Use a piece of break metal configured in the right dimensions to provide a decent finished appearance to these areas. The metal should also close any gaps between the lathing strips and the roofing so that water will not blow in through them.
Complete the Interior and Exterior
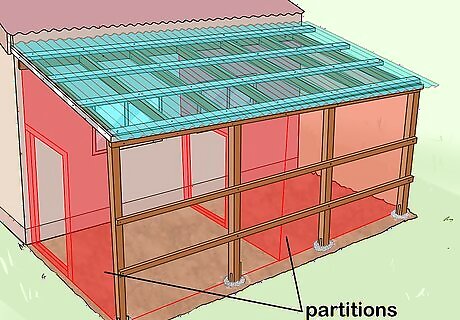
Install any partitions you will use to divide the lean-to's floorspace into different usable areas. The shed in the photos is 10 feet (3.0 m) wide and 21 feet (6.4 m) long, so a partition was installed to create a 7x10-foot space on one side, and a 14x10-foot space on the other. This partition was created by installing steel stud purlins between one of the outboard support posts and a nailer fastened vertically to the existing shed wall.
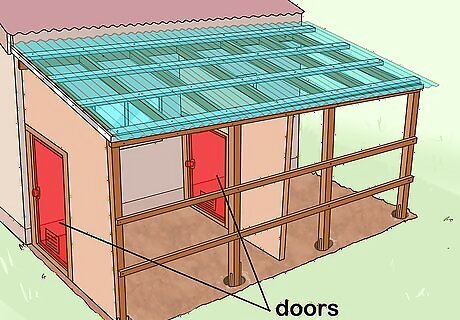
Add doors as needed. Choose a pre-framed exterior door to make the job simple. You will still need to install some kind of framing yourself.
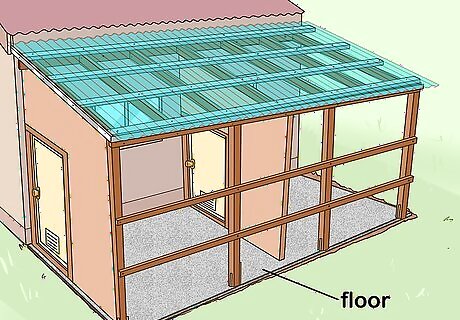
Add flooring. If you want an earth floor, then you can skip this step. If you prefer a wooden floor, then lay your flooring material over the skids that served as your foundation.
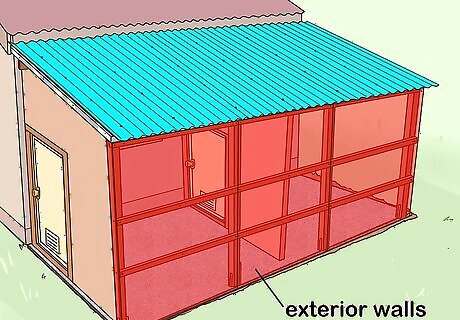
Add the exterior walls. You can nail wide boards the studs to construct exterior walls. You can also add siding if you prefer.
Finish the Job

Check all of the fasteners to make sure none were missed during construction. Pay close attention to the screws or nails that attach the roofing components. Also check the siding, if used, and any trim installed on corners or edges. Make sure any metal corners (if you side the lean-to with tin) are rolled or formed in such a way that no sharp edges are exposed.
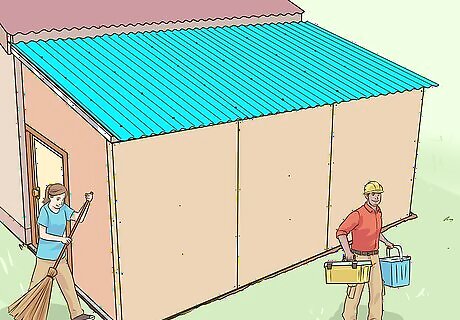
Clean up the work site and put away your tools.


Comments
0 comment