
views
Changing Fonts for Pages

Open Mozilla Firefox. Double-click the shortcut icon on your desktop to launch the browser.
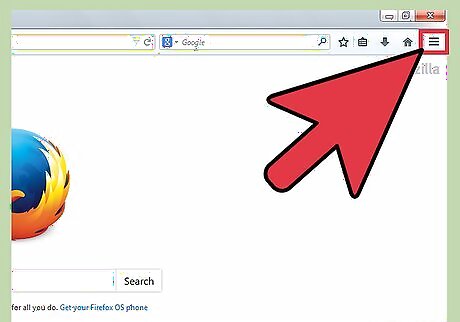
Click on the "Menu" button. The Menu button is on the upper-right corner of the screen. For older versions of Firefox, click on Tools on the menu toolbar on the upper part of the window.
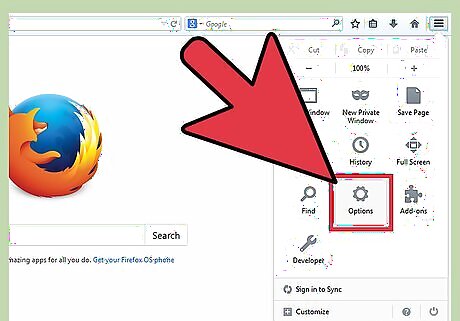
Select "Options." This will bring up the "Options" window.
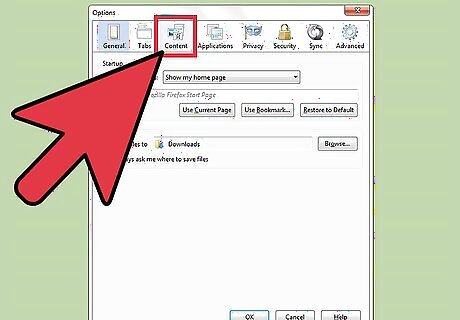
Click "Content." Here you’ll find different options for changing how fonts are displayed on the browser.
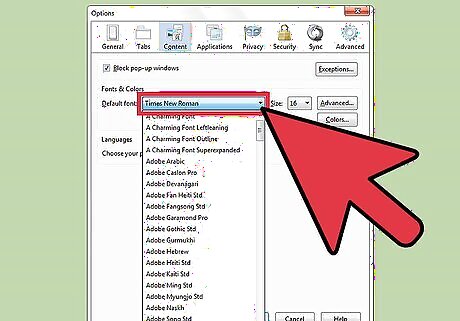
Click on the "Default Font" drop-down box. This will show a list of fonts you can choose from. Just scroll down and select the font you want. If you want to change fonts for all websites, proceed to the next part.
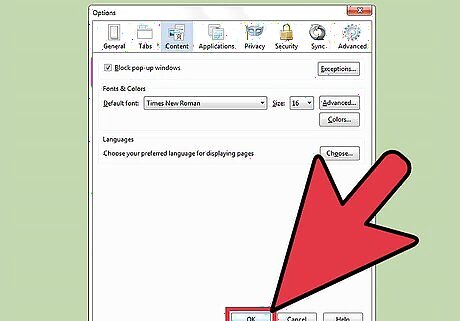
Save changes. Just click on "Okay."
Changing Fonts for All Web Pages
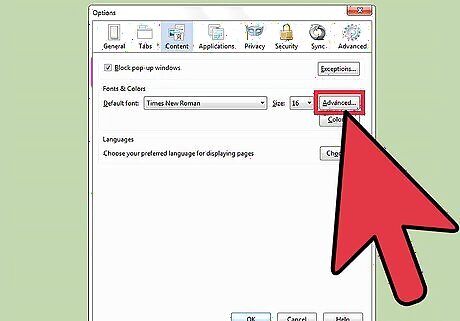
Click on the "Advanced" button. After choosing the font you want, don’t save just yet. Click on the Advanced button next to the Font Size button. This will open the advanced options for fonts.
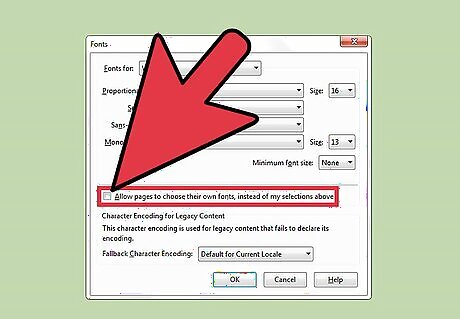
Uncheck “Allow pages to choose their own fonts, instead of my selections above.” Websites have their own predefine fonts. If you don’t uncheck this setting, the default font you set will only apply to pages and websites that don’t have a preset font.
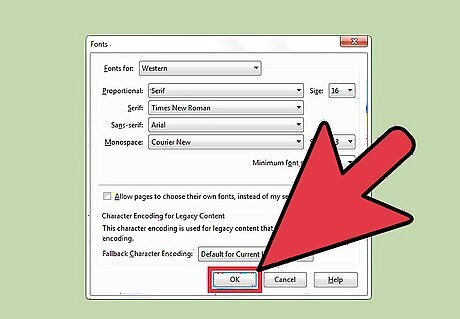
Save your changes. Click on "Okay" to save the advanced settings changes. Once on the "Content" tab again, click on "Okay" to save all the changes you made. Visit any website you have in mind. You’ll notice that the fonts have been changed to the style you’ve selected.


Comments
0 comment