
views
X
Research source
To clean high gutters with a ladder, you’ll need to ensure the ladder is stable and then methodically clear the gutter by hand. To clean gutters from the safety of the ground, make a homemade gutter vacuum using a wet/dry vacuum, then pass the gutter vacuum over the gutter to remove debris.
Prepping to Safely Clean High Gutters with a Ladder

Put on work clothes and rubber gloves. Cleaning gutters can be dirty work. Additionally, gutters can be quite sharp. For these reasons, wear work clothes that you won’t mind getting stained and durable rubber gloves. Even in hot weather, wear a long sleeve shirt while cleaning. This will provide additional protection from insects and from the sharp edges of gutters. When cleaning gutters on dry days, especially in dusty areas, wear eye protection and a face mask to prevent dust and pollen from aggravating your eyes and lungs.
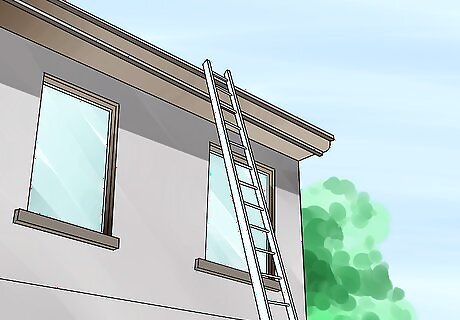
Set up the ladder. Position the ladder where you plan to begin cleaning. Lean the ladder against the wall of your house, if possible. Otherwise, lean the ladder on the gutter where it is attached to the house with a fastener, like a nail. Be sure the ladder is at the correct angle, especially if you’re using an extension ladder. Put your toes against the feet of the ladder and extend your arms out straight. The ladder is in the proper position when your palms can comfortably reach the rungs. Before climbing your ladder, test it for stability by carefully climbing a step or two. If the ladder leans or wobbles, reposition it until it is sturdy. If the ground is soft, the ladder may dangerously sink. Place same-sized pieces of scrap wood under the feet of your ladder to prevent sinking, then test the ladder again for stability. Reposition the ladder as needed. Uneven or sloping ground may cause your ladder to lean. Level out the ladder by putting pieces of scrap wood underneath the leg on the leaning side of the ladder. Test the ladder for stability and make any necessary adjustments.
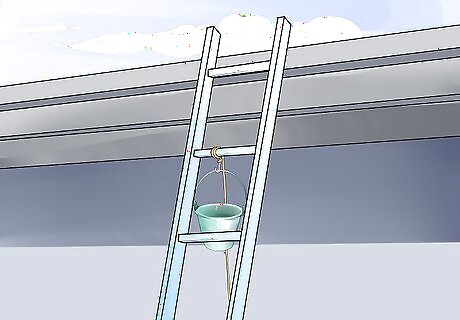
Attach a bucket to your ladder for debris disposal. Straighten the body of a wire coat hanger but leave the hooked end as is. This should form a straight piece of metal ending in a hook. Bend the hook-opposite end around the handle of your bucket. Hang the bucket from the second rung from the top. Most of the debris in your gutters will be biodegradable. Should you desire to do so, debris can be thrown on the ground and left to decompose or composted. If more convenient, place a large garbage can, tarp, or wheelbarrow beside your ladder. Throw cleared debris in/on these receptacles. A plastic bag will work in a pinch as a substitute, but these can be awkward and dangerous to manage, especially if there is wind.
Removing Debris from High Gutters with a Ladder
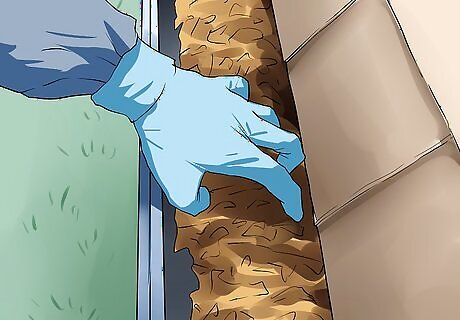
Remove debris from the gutter by hand or with an air compressor. Scoop buildup and debris from your gutters with your gloved hand or blow it out using the nozzle on an air compressor. Alternatively, use a tool to clean the gutters, like a garden trowel, hand spade, or plastic spatula. Do not reach for debris. Only remove debris from areas comfortably within your reach. For the safest gutter cleaning, have a friend or relative hold the ladder for you while you work to provide additional stability. Over reaching while on a ladder could compromise its stability and cause it to fall, potentially causing a serious injury.
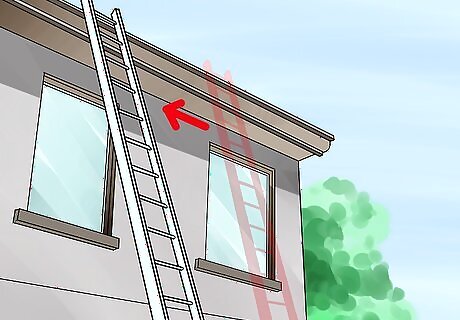
Reposition the ladder and continue removing debris. When a section is clear of debris, descend the ladder and move it so you can reach the neighboring section of gutter. Clear the gutter as described. Continue repositioning and cleaning until your gutters are completely clean.
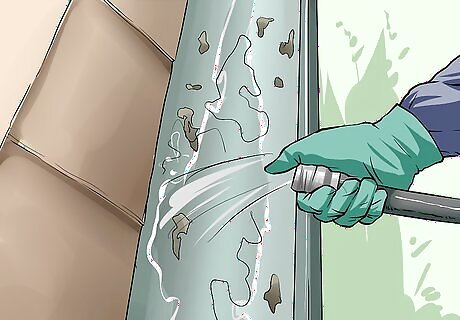
Flush your gutters with water. Fasten a garden hose to a pole, tree trimmer, or a sturdy branch. Attach a nozzle, turn on the hose, and raise it to the gutter. In this fashion, flush the entire gutter to finish your cleaning. Note downspouts that flow unevenly or weakly; these may still have blockages. If you suspect a downspout blockage, set up your ladder beside the spout. Tap along its length with a screwdriver from the top down. A dull thudding sound usually indicates a blockage. Downspouts can also be unfastened from the house and gutter. Lay the spout on the ground and clear blockages with a long stick, leaf blower, or pressure washer.
Making a Homemade Gutter Vacuum
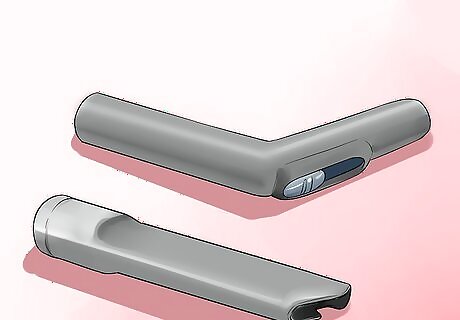
Equip your vacuum with a rigid extension attachment. Only use vacuums that can handle wet and dry materials, like a chipper vacuum or a wet/dry shop vacuum. Position the vacuum where you plan to start cleaning your gutters. Insert the longest hose into the vacuum and fasten the longest rigid extension attachment to the hose. The power cord for your vacuum may not be long enough to reach a power outlet. Use an extension cord to supply your vacuum with power in these cases. Choose a vacuum that has a strong motor for this project. Vacuums with weak suction will not be as effective.
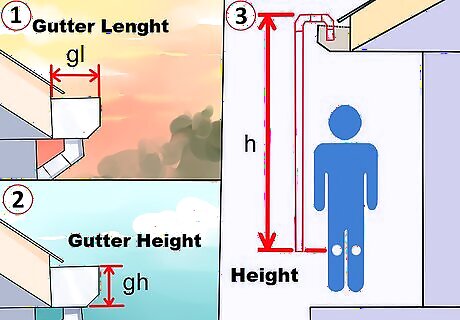
Calculate the measurement of the secondary extension. Measure the total length of the rigid extension attachment. When measuring gutter height, measure from the top of the gutter to about knee height. Subtract the attachment length from the gutter height. This measurement is the total length of your secondary extension. While using the gutter vacuum, you’ll likely hold the attachment at about chest height. Measuring the gutter from its top to the ground will likely result in a gutter vacuum that is longer than necessary, making it more unwieldy.
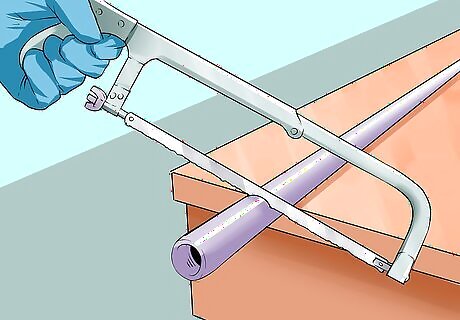
Cut a rigid plastic tube or pipe with a hack saw. Mark the secondary extension measurement (gutter height – attachment length) on the rigid plastic tube or pipe. Use a hacksaw to cut the plastic to secondary extension length. Excess tube/pipe can be reused or thrown away. Cutting your tube/pipe may have left behind burrs. These can cause slivers or cuts. Remove burrs with a file when necessary.
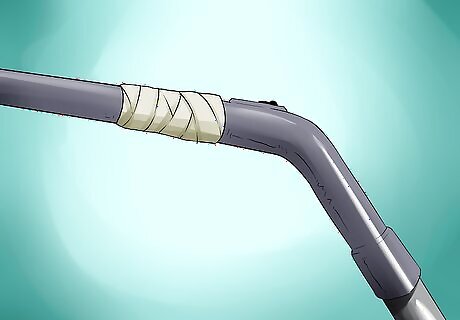
Assemble the gutter vacuum. Slide the end of the extension attachment into the secondary extension. Join these pieces together firmly with aluminum tape. Do the same at the opposite end of the secondary extension with a duct elbow. When the first elbow is in place, similarly add the second elbow to it. Putting these pieces together will result in a long, straight, rigid extension that ends in a hook. The hook formed by the elbows should curve so it is facing roughly downwards. So the tool fits inside the gutter, use a nozzle or flatten the end piece. Be sure to tape the connections of your homemade gutter vacuum thoroughly. Gaps may cause suction to decrease, making the vacuum less effective.
Using a Homemade Gutter Vacuum
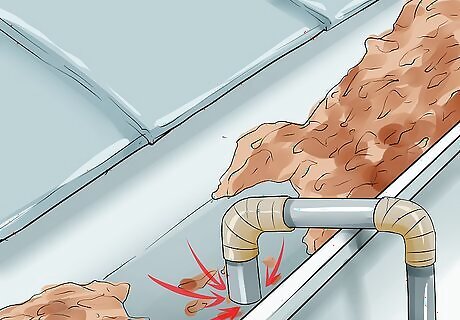
Clean the gutters. Hold your gutter vacuum at roughly the base of the extension attachment. Switch on your vacuum. Pass the downward-facing end of the hook slowly over the gutter to remove leaves, twigs, and other debris. If your gutters are especially clogged, you may need to empty your vacuum while cleaning. Overly full vacuums may have decreased suction and leave behind gutter buildup.
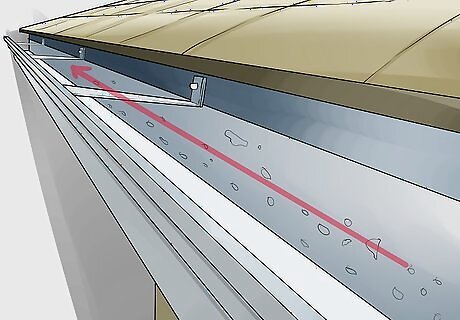
Inspect the gutters for missed debris. Although most of the buildup will likely be gone after vacuuming, stubborn blockages may remain. Lean a suitable ladder against your home and climb it to visually inspect the gutters. Dismount the ladder, then target remaining clogs with your gutter vacuum. Some obstructions may still remain even after being targeted with your gutter vacuum. Use a tree trimmer, pole, or a sturdy stick to poke at and loosen these obstructions. Suck up loosened material with your vacuum.
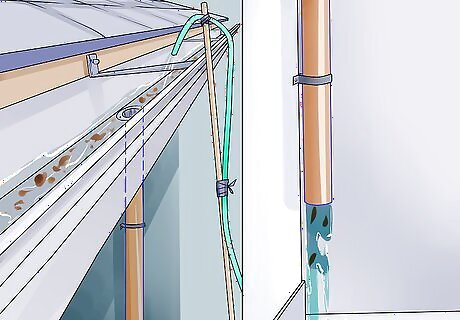
Remove small bits of remaining debris and check downspout flow. Tie a garden hose to a pole or long stick. Turn on the hose and lift it up to the gutter. Rinse the entire gutter with water to remove any small debris remaining. Poor water flow at the downspout may indicate a blockage in the spout. Clogs can be removed from downspouts with a plumbing snake. Use the snake in the same fashion you would to remove a clogged drain.


Comments
0 comment