
Trying Quick Fixes

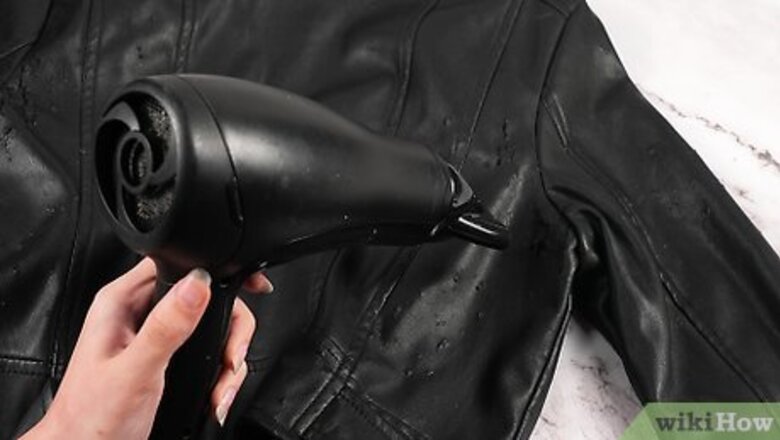
Use a hair dryer to warm and massage a surface scuff. Set the hair dryer to warm and use it to heat the scuffed surface. Using your hands, gently massage the warmed leather to reduce the appearance of the scuff. Avoid letting the hair dryer get too hot. If you holding your hand in its air stream is uncomfortable, it’s too hot for the leather.

Dab the scuff with white vinegar. Dip a cotton swab or ball into distilled white vinegar. Dab the scuffed area to gently swell the leather. Let the area dry, then buff it with a colorless shoe polish. Try using vinegar on scuffed shoes or a handbag.

Use petroleum jelly. Use a clean cloth to apply petroleum jelly to the scuffed area. Rub in circular motions, let it sit for about 10 minutes, then wipe off any excess with another clean cloth. Be sure to use a product without color or fragrance to avoid damaging the leather.
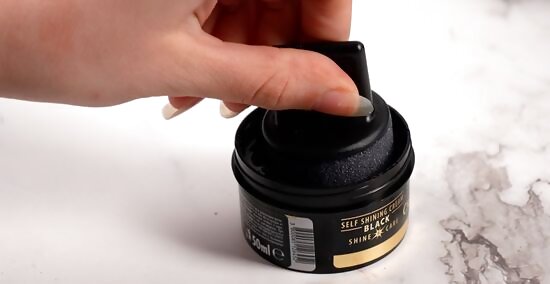
Apply recoloring balm to restore surface scuffs. Purchase a recoloring balm online or from your nearby home improvement or fabric store. If the balm’s container doesn’t have an application sponge, apply it to a clean cloth and rub in a circular motion. Let it set according to instructions, then use another clean cloth to buff the area and remove excess balm.
Using Leather Glue on Minor Scuffs

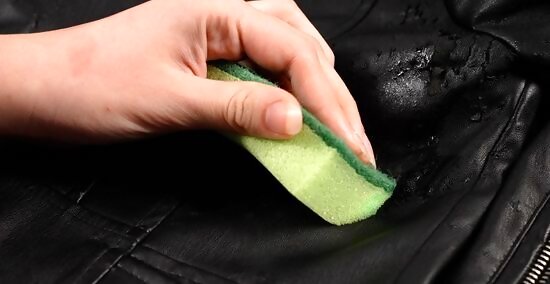
Clean the area with a leather cleaner. Apply a leather cleaner to the scuffed area, using the cleaner according to its label’s instructions. Cleaning the area will remove dirt or oils, which will prevent discoloration and ensure the glue will set properly. It will also open the leather’s pores, making it more receptive to the products you’ll use to repair and recolor it.

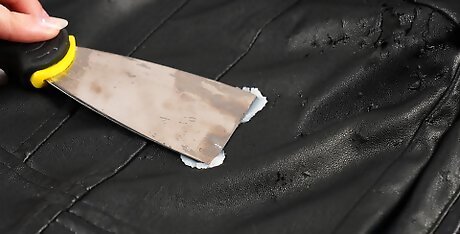
Use a sharp-edged tool to lift scuffed fibers. Gently run a spatula or the back of a knife against the grain of the scuff. Your goal is to carefully lift the scuffed fibers away from the surface. That way, you’ll be able to access the area underneath the fibers with leather glue.

Apply a small amount of leather glue using a spatula or knife. Apply a few drops of leather glue onto the edge of your spatula or the back of your knife. Pull the tool against the grain of the scuff to apply the glue to the underside of the scuffed fibers. Use short, even strokes to thoroughly and carefully apply the glue.

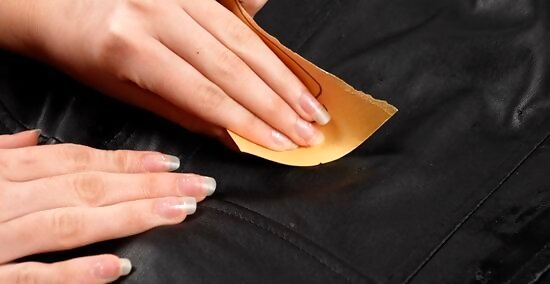
Rub the repaired surface to remove air bubbles and excess glue. After applying glue against the grain, rub the tool with the grain of the scuff to flatten the area and remove air bubbles. Rubbing with the grain will lower the scuffed fibers back into place, so they’re even with the leather surface. Use your finger to gently massage the area and remove excess glue.
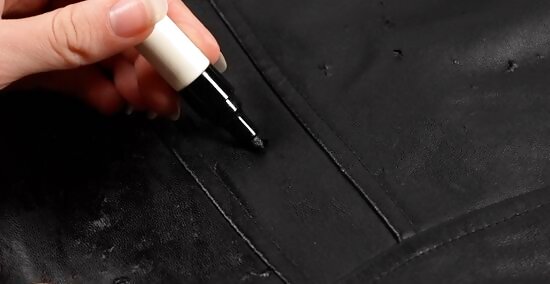
Use a leather marker to recolor the damaged area. If you can match a recoloring marker to your leather, apply it in thin coats. Feather the outer edges of the recolored area to blend it with the surrounding leather. Light scuffs might not need any recoloring at all, so use your judgment after applying the leather glue.
Repairing Deep Scuffs and Scratches
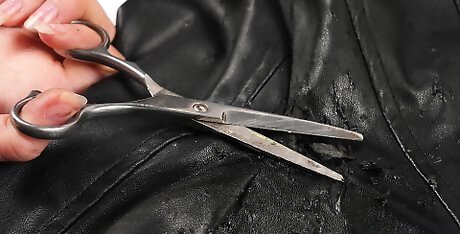
Clean the area and trim away loose fibers. Use a leather cleaner to remove dirt and oil before you begin your repair. Use a small pair of scissors to trim any long fibers hanging from the surface. Leave loose fibers that are shorter, or that you can’t access with the scissors, as they won’t interfere with your repair. You can purchase leather cleaner, binder, filler, and sealer separately or together in a professional repair kit. You can find the products you’ll need online or at your local home improvement store.
Use a sponge to apply 8 to 10 coats of leather binder. Apply a small amount of leather binder to a clean, dry sponge, then coat the entire affected area. Check the product’s label for instructions about drying time, and allow it to dry completely before applying the next coat. For best results, apply 8 to 10 coats of binder to the scratched surface.

Sand the area using a fine grain sandpaper. Use a 1200 grit sandpaper to lightly sand the area where you’ve applied the binder. Use gentle, circular motions. Sand until you’ve created a smooth, even surface across the area undergoing repair. Blow away any residue or wipe the surface using a microfiber towel after sanding.
Apply heavy filler to deep scratches. Use a palette or putty knife to spread a thin layer of filler over deep scratches or gouges in the surface. Wait 20 to 25 minutes for the filler to dry. Apply as many coats as you need until the scratches or gouges are level with the surrounding surface.
Sand and wipe with an alcohol-based cleaner. After applying filler and letting it dry, sand the surface once more with a 1200 grit sandpaper. Use an alcohol-based leather cleaner to wipe down the repaired area, then give it several minutes to dry. The cleaner will remove any residue and prepare the leather for recoloring.

Recolor and seal the repaired surface. If its container doesn’t come with an applicator, use a clean, dry sponge to apply a thin layer of leather colorant. Let it dry according to its instructions before applying additional layers. When you’ve colored and blended the repaired area, apply three to four thin layers of a leather sealer for a robust, flexible finish.


Comments
0 comment