views
Adapting Your Bread Dough Recipe

Use your favorite bread dough recipe as your base recipe. While there are adjustments you’ll need to make to ensure the bread dough rises properly after freezing, you can use any bread dough recipe you choose as the base for your frozen dough. Therefore, first follow the instructions for your favorite recipe to make the dough, making adjustments to the flour and yeast content as desired to get the results you want. You may be able to successfully freeze the dough without making any adjustments to the recipe. The only way to really know, however, is to try it out. If the dough doesn’t rise and bake properly after freezing, however, you’ll likely need to make some adjustments to the flour and yeast to get the taste and texture you want.

Substitute high protein flour for regular flour to get the right texture. When freezing bread dough, the cold can cause the gluten in the bread to weaken, which can result in dense, flat bread. To avoid this, use flour with a higher protein content, such as whole wheat, durum or rye. The high protein content will prevent the dough from losing too much of the gas produced during fermentation (rising). Many bread recipes call for lower protein content flours, such as all-purpose white flour or bread flour. In most cases, you can substitute the flour in the recipe for a higher protein flour without making any changes to the flour measurement.

Use slow rise yeast or double the yeast to ensure the dough will rise. Freezing your bread dough may damage some of the yeast, which can prevent the dough from rising a second time after it thaws. To make sure that the dough is able to rise after being frozen, you can either double the amount of yeast called for in your favorite recipe, or use a slow rising yeast instead of the quick-rising yeast called for in many recipes. If you use a slow rise yeast instead of quick-rising yeast, use the same amount called for in the recipe.
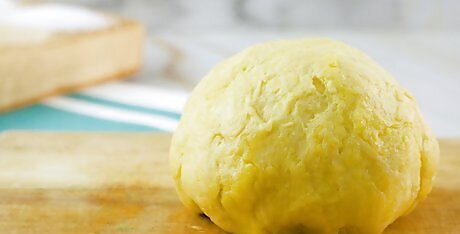
Leave the dough to rise for 45 minutes. Set the dough out in a lightly greased bowl or on parchment paper at room temperature for about 45 minutes to allow the dough time to rise (also referred to as fermenting or proofing). This will allow you to shape the dough into a loaf or rolls, and will save you time when you thaw the bread. Some bread recipes call for bread dough to be left to rise twice. If this is the case, you’ll likely need to leave the dough to rise for another 45 minutes after it’s thawed.
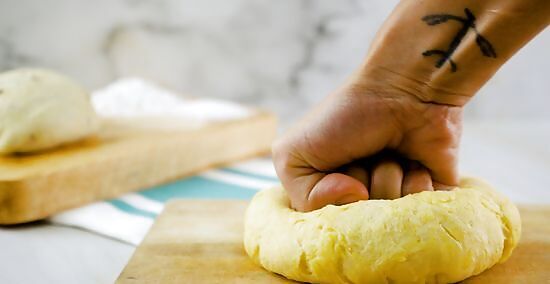
Punch down and shape the bread dough into your desired shape. Following the instructions for the specific recipe you’re using, punch down the dough once it’s risen for about 45 minutes. Then, separate the dough into several small sections and shape it into balls if you want to freeze the dough into rolls. If you’re freezing the dough in a loaf pan, you don’t need to shape the dough after punching it down, as it’ll get its shape once it’s in the loaf pan.

Transfer the dough onto a greased baking sheet or into a loaf pan. If you’ve shaped the dough into rolls, line them up on a lightly greased baking sheet. If you’re making a loaf, put the dough into a lightly greased loaf pan, pressing it down into the corners to remove any extra space or air pockets). If you’re shaping the dough into rolls, make sure that you spread them apart so that none of the rolls are touching to keep them from freezing together.
Storing, Thawing, and Baking Frozen Bread Dough
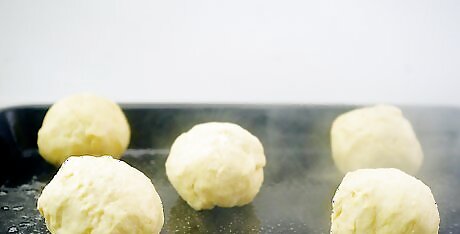
Transfer the bread dough into the freezer uncovered for 1 to 2 hours. Once you’ve shaped the dough into rolls or put it in a loaf pan, put it in the freezer immediately so it won’t have time to start rising again. Then, leave the dough in the freezer until it’s completely frozen into your chosen shape. Allowing the dough to rise a second time could make it too hard and tough to freeze. Therefore, it’s important that you freeze it as soon as you’ve finished shaping it.

Package the frozen dough into plastic freezer wrap or bags. Remove the dough from the freezer. If you’ve shaped the dough into rolls, you can transfer the rolls into large sealable freezer bags for easier storage. If the dough is frozen in a loaf pan, remove it from the pan and wrap it tightly in plastic freezer wrap.

Write the date on the plastic so you know when to use the dough. Use a permanent marker to write the date on the plastic. That way, you’ll know when you made and packaged the dough so you’ll know it needs to be thawed and baked.

Put the dough back in the freezer for up to 6 months. Return the dough to the freezer immediately so it doesn’t start to thaw. Thaw and bake the bread dough within 2 to 6 months. While the dough may stay fresh in the freezer for up to 6 months, keep in mind that the longer it’s stored, the greater the chance it’ll develop freezer burn. Therefore, you may want to plan to thaw and bake the bread sooner, within 2 to 3 months.
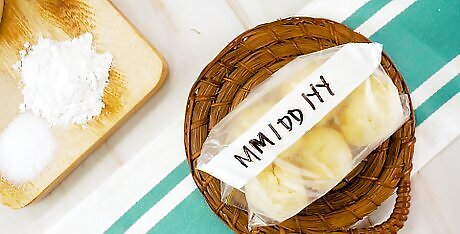
Thaw the dough for at least 4 hours at room temperature. Before baking the frozen bread dough, remove it from the freezer. If you froze the dough into rolls, let them thaw for about an hour in the plastic and then separate them onto a piece of parchment paper to finish thawing. If you froze the dough in a loaf pan, leave the dough in the pan and set the pan out to thaw. Thawing time will depend on how you froze the dough and how warm the room is. Therefore, start checking the dough after about 4 hours. Some recipes call for the dough to rise a second time after it’s thawed. If this is the case, set the dough in a lightly greased bowl or on parchment paper for about 45 minutes after it’s completely thawed to let it rise again.

Bake the bread dough according to the recipe instructions. In most cases, thawed bread dough will bake as normal. Therefore, after it’s thawed and risen again (if required), follow the instructions for the recipe you used to make the dough. In some cases, thawed bread dough may take a bit longer to bake. Therefore, if the bread isn’t quite done after the instructed baking time, add another 10 to 15 minutes to the baking time. Once the bread dough is thawed, you can use it to make fresh-tasting rolls or a delicious loaf.


Comments
0 comment