

Collecting Latex from a Tree Daily
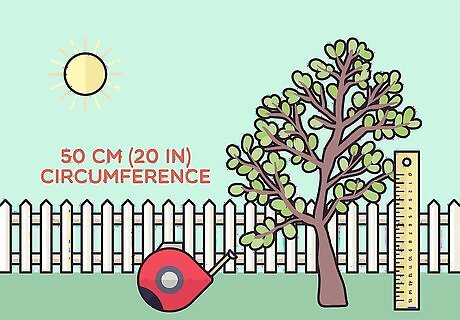
Tap a tree that is at least 6 years old and 50 cm (20 in) in circumference. In theory, you can harvest rubber from a tree that is younger and/or smaller than these recommendations. However, the amount of latex you'll harvest is very unlikely to be worth your time and effort. Also, since younger trees can be more tender and have thinner bark, you're more likely to cut through into the cambium—the very thin layer between the bark and wood that's responsible for the tree's growth. Doing so is bad for the tree's health.
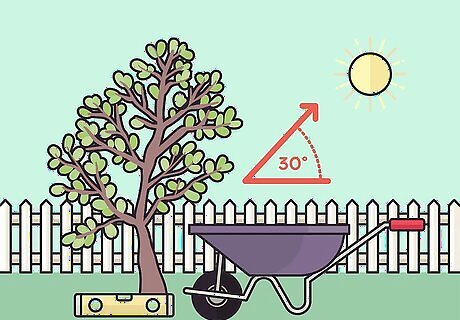
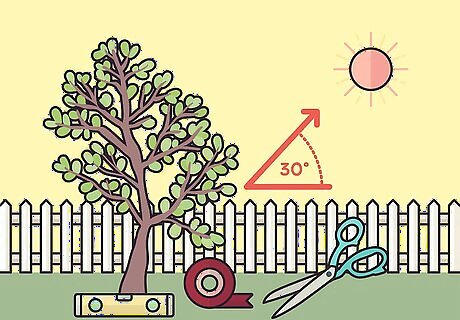
Visualize your cut, 30 degrees downward from left to right. Face the tree, and plan a cut that will descend from your left to your right, no more than halfway around the tree. The cut should descend at a 30-degree downward angle from left to right, since the latex-containing lactiferous vessels descend at a slight angle from your right to left. Use a level, a protractor, and a piece of chalk to mark out your cut, if you want to ensure greater precision. The planned cut can be made at any height.
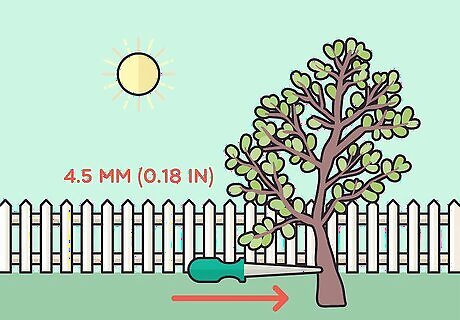
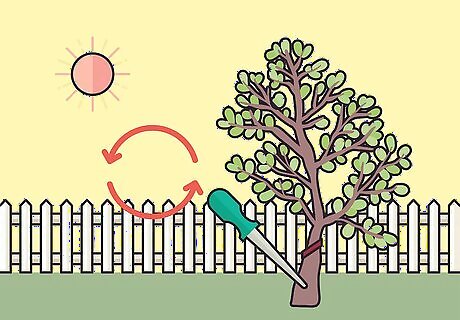
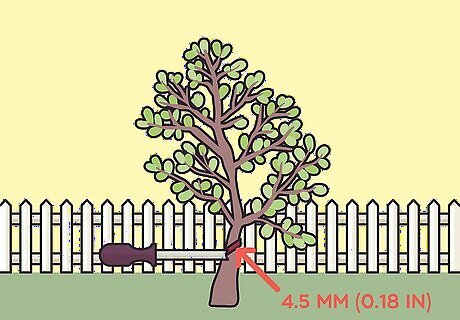
Make your cut 4.5 mm (0.18 in) into the bark. Use an awl (a sharp, pointed tool) to cut along the line you made, just barely breaking through the surface of the bark. Other sharp-ended implements will work as well, but may offer you less depth control. If you cut more than 6 mm (0.24 in) deep, you'll pierce the cambium and damage the tree. You'll know you've pierced the cambium if the latex doesn't flow well and the area turns dark brown. If so, leave the tree alone to heal (for several months, at least) before tapping it again in another area.
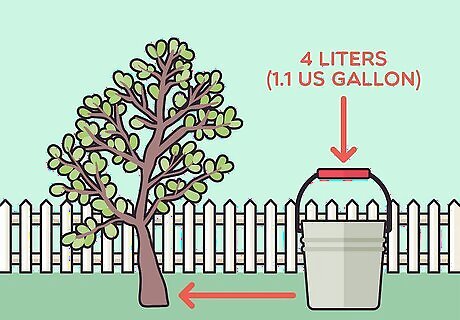
Attach a 4 L (1.1 US gal) bucket to the tree. The latex will flow down the channel you've just made, so you need to place a collection vessel at the bottom right end of the cut. Traditionally, metal collection buckets are tied securely to the tree with sturdy rope. The bucket will be fairly heavy when it's filled with latex. So, if you're concerned that you may not be able to tie it securely enough to the tree, consider supporting the bucket from beneath with scraps of wood, other buckets, concrete blocks, etc. Alternatively, you can plan out your cut so that your collection bucket will rest on the ground. But you should still tie it snug up against the tree bark.
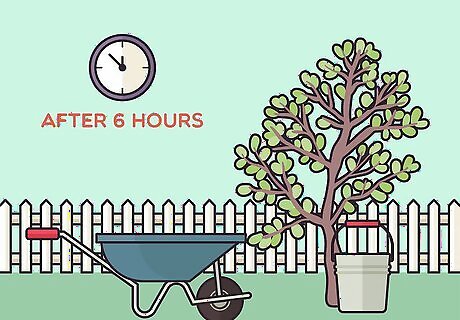
Retrieve the bucket of latex 6 hours later. Latex will flow for about 6 hours from a fresh cut until it coagulates, so check back after that amount of time to see how much you've collected. If you're lucky, the 4 L (1.1 US gal) bucket may be more than half full! For the best results, you should make your cuts early in the morning and collect your bucket around mid-day or early afternoon.
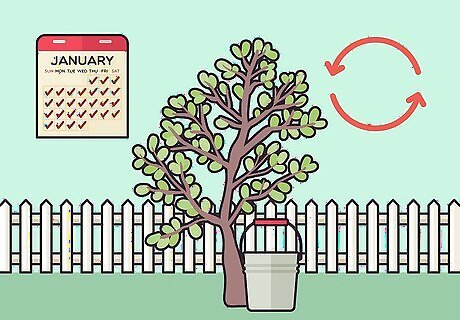
Repeat the process with a fresh cut each day. You can, for instance, make a cut at the same height on the opposite side of the tree on the second day, then make a new cut on the original side (but either higher or lower on the trunk) on the third day. Over time, the original cut will heal over and you can create a new cut there. If the latex production reduces noticeably, give the tree several days of rest before tapping it again. Creating new cuts each time you collect won't produce the same quantity as an alternative method—creating a single channel that you'll use to collect on a set schedule over a long period. However, the daily cut method is easier to do and can still produce ample latex.
Harvesting More Latex on a Set Schedule
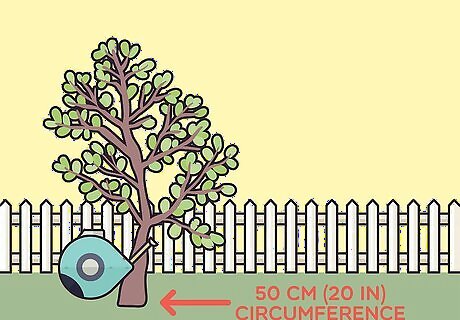
Use trees that are at least 6 years old and 50 cm (20 in) around. Trees that are younger or smaller than this simply don't produce enough latex to be worth the effort of collecting it. Be patient, and you will be rewarded with a lot more latex! On rubber plantations, a tree can be used for latex harvests for up to 28 years before it becomes uneconomical to continue. The tree is then cut down for lumber and replaced with a new planting.
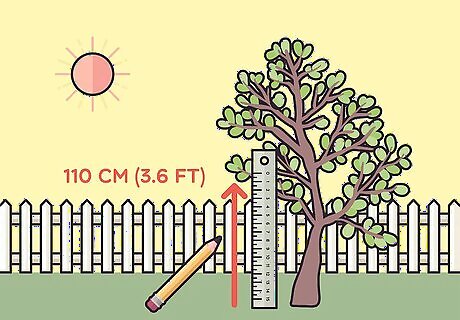
Mark a spot on the trunk 110 cm (3.6 ft) from the ground. This will be the meeting point of the spiral you'll cut around the tree and the channel leading down to the collection bucket. This measurement will produce a low but fairly comfortable working height for the average adult. Over time, new cuts will be made higher on the trunk, but never lower than this starting point.
Use a ribbon to mark a 30-degree spiral around the tree. Use a protractor and a piece of chalk to mark a 30-degree upward angle to the left of the starting point. Tack or tape one end of a piece of ribbon or string at the starting point, then wrap it in a 30-degree upward, clockwise spiral around the tree. Tack or tape the ribbon/string at the point where it is in vertical alignment with its starting point (meaning it has spiraled around the tree trunk precisely once), then cut off any remainder. Traditionally, a flexible metal ribbon is used here, but a fabric ribbon will work just fine.
Trace the ribbon's path into the bark with an awl. Just slightly scratch the surface of the bark as you mark the spiral path with the sharp-tipped awl. Your goal here is to create a guide and a small channel to place your sharpened gouge tool into. If it's easier for you, you can trace the spiral with chalk, remove the ribbon/string, then trace the chalk with the awl. In either case, remove the ribbon or string before using the gouge.
Cut the spiral to 4.5 mm (0.18 in) deep with a sharpened gouge. A gouge is a handheld tool that has two strips of metal that form a V-shape at the end opposite the handle. The “V” end should also be fairly sharp so it can cut into the bark. However, the channel you gouge out cannot be more than 6 millimetres (0.24 in) deep, so work slowly and carefully. If you cut into the ultra-thin cambium that is just beneath the bark, the area will turn brown and little latex will accumulate by the end of the day. In this case, you need to leave the tree to heal completely before attempting to tap it again.
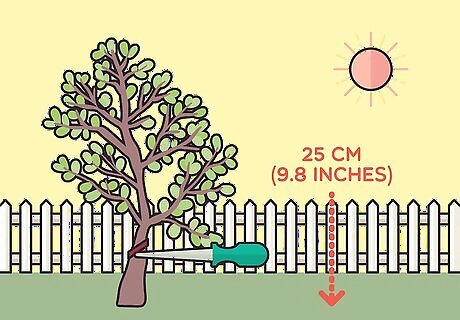
Create a short vertical channel and a “gutter” with the gouge. Use your awl to score a 25 cm (9.8 in) vertical line straight down from the original starting point (now the bottom of the spiral), then follow up with the gouge at a depth of 4.5 mm (0.18 in). At the bottom of this vertical channel, gouge out a V-shaped “gutter” at the same depth. The gutter will help direct the flowing latex right into your collection bucket.

Place a 4 L (1.1 US gal) bucket just beneath the gutter. Make sure the bucket is pressed up against the tree, then tie it in place with a sturdy rope. To give it extra support—remember, it will be full of latex!—consider propping it in place with wood, blocks, or empty buckets. A bucket with a prominent lip around the opening will be easier to hold in place with rope. Come back to collect your latex 6 hours after attaching the bucket. The sap will be done flowing for the day due to coagulation.

Re-open the same cut every third day. Sap coagulation will close off some of the channel you've created. So, when it's time to tap the tree again (after a few days of rest), use your gouge to clear out the original 4.5 cm (1.8 in) deep channel. The latex should then flow again as before. Because you've made a fairly substantial cut around the entire tree, it's best to give it a break between harvesting sessions. For the best results, skip at least 2 days after each harvest day—for instance, collect on Monday, Thursday, and Sunday. When the flow reduces noticeably, you can move a bit higher on the tree and create a new collection spiral and channel. On rubber plantations, harvesters typically work their way up the tree over a period of about 7 years, then repeat the process from the original starting point.


Comments
0 comment