
Crafting a Stand with Cardboard
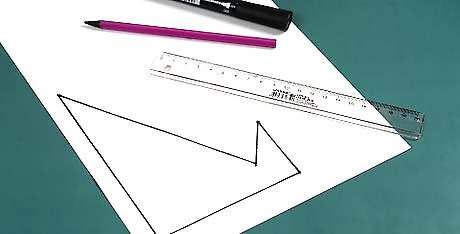
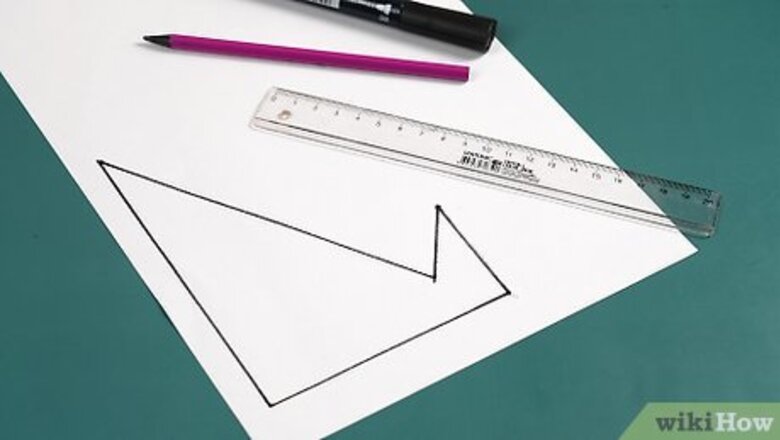
Print and cut out a hooked, triangular template to use for your project. Search online for a downloadable template of a small easel or stand that you can trace onto some cardboard. Try to print the design on cardstock or some other type of sturdy paper, as regular paper may be too flimsy. You can find a template for download here: https://www.sophie-world.com/sites/default/files/easel%20template%20copy.pdf. This stand isn’t very big, so it’s best for frames that around 6 in (15 cm) or so wide.

Cut off at least 1 edge from a cardboard box. Set out a mat, board or other sturdy surface that can absorb any scratches from a box cutter. Lay a flattened cardboard box on top, and slice along the edge of the flaps with a box cutter. Feel free to remove all the flaps, or just 1. You’re only going to be using a corner of the cardboard box, so you need to remove a minimum of 1 flap. If you’re using the sample template, the cardboard stand’s total length will be 22 in (56 cm). If you’re creating that kind of stand, make sure you’re cutting from a cardboard box that’s large enough. You don’t need to use any of the flaps you cut from the box.

Trace the template along the edge of the box. Find the edge of the flattened box where the cardboard is folded and stacked on top of itself. Since most templates are designed to be cut on a folded edge, arrange the shorter, vertical side of the template along the folded edge of your cardboard. After this, trace around the template with a permanent marker. Keep in mind that the sample template is designed to be cut on a folded edge.
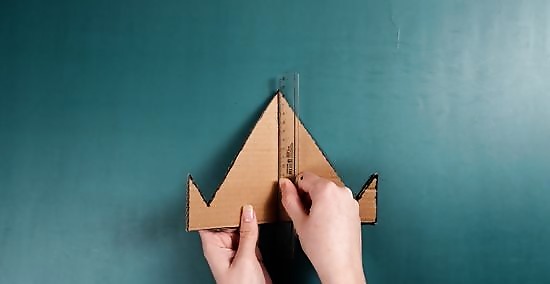
Use a box cutter to cut out the template from the cardboard. Place a flat board or other item beneath the cardboard box, then cut the template out. Since you’re working with multiple layers of cardboard, it might take a few tries before you’re able to cut through the box completely. Just keep working at it until you succeed!

Place the bent cardboard upright so it can hold your frame. Set the cardboard stand on a flat surface, with the tip pointing upwards. Arrange your photo frame along the 2 front grooves, leaning it against the back portion of the stand. If your frame is really bulky and thick, this stand might not be sturdy enough to hold it up. If you’re using a template that’s different from the sample, check the website you found it on for further instructions. Simple Cardboard Pyramid Stand Cut out a 14 by 2 in (35.6 by 5.1 cm) strip of cardboard to create a small stand for one of your photo frames. Fold the cardboard twice, making sure that 1 of the folded sections is at least 2 in (5.1 cm) longer than the other 2. Fold this longer section over the shorter section to create a secure pyramid shape, then glue the strip into its new shape. If you want to make your stand more colorful, consider wrapping it in colorful paper! Prop a flat edge of the stand along the bottom of the frame to provide some extra support. This stand sits behind the lower half of the picture and frame and isn’t visible from the front. This stand works well with horizontal frames that are around 6 to 8 in (15 to 20 cm) wide.
Creating a Basic Wooden Stand

Measure the dimensions of your frame so you can make a stand. You’ll need 6 total pieces to support your frame, including 4 arm pieces, 1 leg piece, and 1 large base. Jot down the frame measurements on a separate piece of paper so you can remember them later on. For instance, if your picture frame is around 8 by 10 in (20 by 25 cm), the top arm can 5 in (13 cm) and the bottom arm can be 4 ⁄4 in (11 cm). It’s important to note that each arm is made with 2 pieces of wood. Your leg piece can be

Set aside 4 pieces for the top and bottom arms of the stand. You’ll need two 1 by 2 in (2.5 by 5.1 cm) and two ⁄2 by 2 in (1.3 by 5.1 cm) planks of wood for both arms, as each arm is made with 2 wooden pieces. Note that the ⁄2 by 2 in (1.3 by 5.1 cm) section of wood for your top arm needs to be 4 in (10 cm) thicker than the width of your picture frame, while the section of wood for the bottom arm only needs to be 3 ⁄4 in (8.3 cm) thicker. For instance, if one of the wooden arms is 4 in (10 cm) long, the other arm only needs to be 3 ⁄4 in (8.3 cm).

Cut out 2 pieces to serve as the leg and base of the stand. You’ll need a 1 by 2 in (2.5 by 5.1 cm) plank for the leg, as well as a ⁄2 by 6 in (1.3 by 15.2 cm) sheet of wood for the base. The top and bottom arms will be secured to the leg, which will then be secured to the base. For the stand to work properly, note that the plank for the leg needs to be 3 in (7.6 cm) taller than the total height of your picture frame. For instance, if your photo frame is 6 in (15 cm) tall, your stand only needs to be 9 in (23 cm).
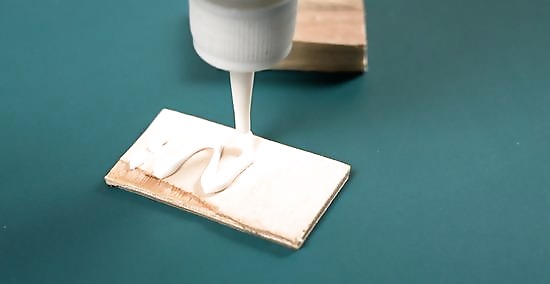
Glue 2 pieces of wood together to create an arm for your stand. Arrange the thin, ⁄2 by 2 in (1.3 by 5.1 cm) section of wood on top of the 1 by 2 in (2.5 by 5.1 cm) piece. Squeeze a line of wood glue on top of the thicker piece, then push the 2 sections of wood together for several seconds. Repeat this process again so you have both the top and bottom arms for your frame. The flat, wide portions of wood should be glued together, creating a thicker section. Follow the recommended drying time listed on the bottle of wood glue. For instance, if your picture frame is 8 by 10 by 1 in (20.3 by 25.4 by 2.5 cm), the top arm would be 5 in (13 cm) long and the bottom arm would be 4 ⁄4 in (11 cm).
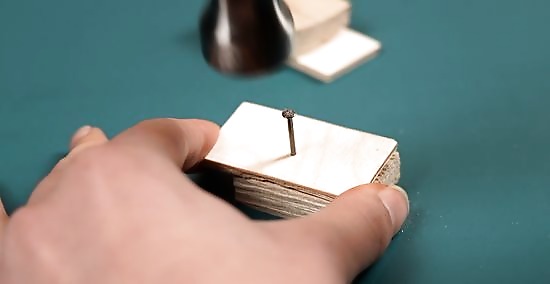
Hammer 2 nails into each arm to make them extra secure. After the wood glue dries, position two 1 in (2.5 cm) nails on the front and back of each arm. Tap on the nails with your hammer to sink them into the wood, creating 2 sturdy arms for your picture frame stand.
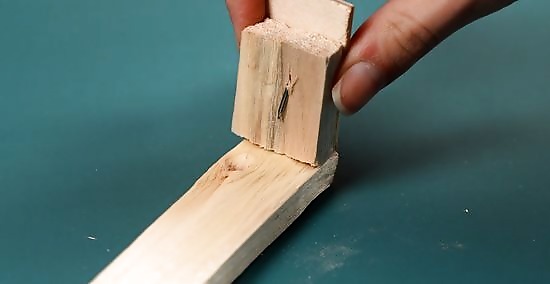
Nail the leg to the top arm of your stand. Place the leg along the back of the top arm so it’s flush with the edge of the wood. Hammer two 1 ⁄4 in (3.2 cm) nails through the back edge of the top arm to secure the leg into place. It may help to clamp the top arm and leg in place with a table vise.

Install an L-bracket along the joint of the leg and arm. Place the top arm and leg upright on your work surface. Arrange an L-bracket along the corner of the 2 wood pieces, where they form a 90-degree angle. Use 2 small screws to connect the bracket to the rest of the stand. If possible, try to use the screws that came with the L-bracket. Don’t use super long screws for this, or else they might stick through the wood. Instead, use screws that are about ⁄4 in (0.64 cm) long or so.
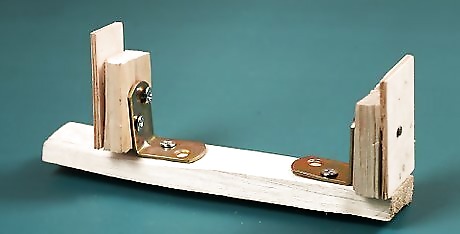
Attach the bottom arm to the leg with glue, nails, and 2 L-brackets. Place the stand flat on the table and slide your picture frame beneath the edge of the top arm. Arrange the bottom arm along the other side of the picture frame, then glue the arm into place on the leg. Let the wood glue dry, then hammer two 1 ⁄4 in (3.2 cm) nails into the back of the leg, which secures the bottom arm into place. As a finishing touch, use an electric drill to screw an L-bracket into the 90-degree joint on both sides of the bottom arm.

Glue and hammer the base to the bottom of the leg. Arrange the base along the bottom of the leg, letting the thin wood hang over the edge of the leg by 1 in (2.5 cm). Apply a line of wood glue to stick the pieces together. Once you’ve waited for the glue to dry, hammer two 1 ⁄4 in (3.2 cm) nails into the base and leg.

Screw in an extra L-bracket along the back of the leg. Set a third L-bracket along the bottom of leg where 1 in (2.5 cm) of the base wood hangs over. Use an electric drill to secure the bracket into place, which will make your stand more stable.
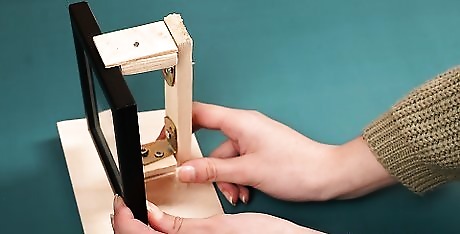
Slide the frame into the stand and add glue on the arms for security. Check to see if the frame fits snugly. If it feels wobbly at all, add a few squeezes of wood or hot glue to hold the picture frame securely in the arms of the stand.


Comments
0 comment