
views
Putting Rice in an Airtight Container

Place an opened bag of white rice into a plastic zipper bag. If you’ve already opened the bag of rice and plan to use the rice often, simply put it into a larger zipper bag for easy access. Seal it up most of the way and then push out as much air as you can before sealing it completely. Toss it in the pantry for up to 2 years or in the refrigerator for up to 10 years. Even though rice lasts a long time, it’s best to use it sooner rather than later. This will work for brown rice as well, but it will only stay fresh or 6 months in the pantry and 1 year in the refrigerator or freezer. If you often wash and reuse plastic storage bags, make sure the bag is completely dry before putting the rice in—any moisture can cause mold to grow on the granules.
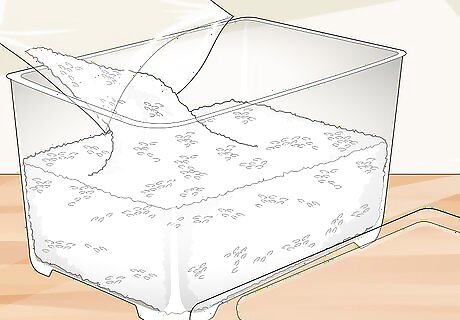
Pour uncooked rice into airtight plastic bins for easy access. Choose sturdy plastic bins with well-fitting lids to ensure the rice is exposed to the least amount of air as possible. Make sure the bins are washed and dried beforehand and don’t have any holes or cracks that pests can sneak into. This is a great option if you cook rice often since you can scoop out what you need and reseal the container with ease. You can buy food-grade storage bins online or from any superstore with a cookware section. Stored this way, brown rice will last 6 months and while rice will last up to 10 years. However, you should always check it for signs of spoilage (discoloration, odd smell, weevils) before cooking it. Pests can be the biggest menace when storing large amounts of dried goods like rice, so take the time to thoroughly examine the container for holes or cracks before pouring your rice into it.
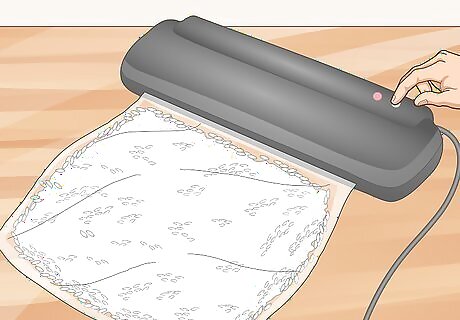
Vacuum-seal white rice in food-grade bags for long-term storage. Pour the rice into food-safe vacuum bags and use a vacuum sealer to suck all the air out of the bag and seal it up. If you plan to use small portions of the rice sooner rather than later, you may want to put the bulk of it into a large food-grade vacuum bag and dole out single or double portions into smaller bags. The rice will stay fresh for 10 years or longer if you store it in a cool, dry place. This is a great option if you’re looking to save space in your pantry—you can pile multiple vacuum-packed bags into a large basket or bin to keep them organized. Toss the vacuum-packed bag of rice into the freezer to make it last 30 years or more. This isn’t a good option to store brown rice because the natural oils will cause it to spoil.

Pour white rice into mylar bags with oxygen absorbers for long-term storage. Transfer the rice from its original packaging into mylar bags, toss in 1 to 3 oxygen absorbers (depending on the size of the bag) and then seal them shut using a hot iron. Store the individual mylar bags in a large food-grade bin with a lid. For smaller bags that only hold 3 to 5 cups of rice, use 1 (100cc) oxygen absorber. Larger bags require 3 to 5 oxygen absorbers (300cc to 500cc) to work properly over a long period of time. This is a good option if you’re planning to store rice for 30 years or more. Don’t put brown rice into mylar bags—the oils will seep out of the granules and cause the rice to spoil.
Storing Rice at Room Temperature

Put airtight bags and containers in a cool, dry area with good ventilation. Place the airtight bags or containers of rice in a pantry or cupboard—anywhere away from heat or light is a good spot. Make sure the room is air-conditioned or at least has a fan to ensure good air flow. Stale or stagnant air could increase the humidity in the room and can cause the rice to go bad faster. Use a dehumidifier if you live in a hot, humid area—especially if you’re storing the rice in a garage or separate storage facility outside of your home. Check the room for any signs of condensation, leakage, or moisture.
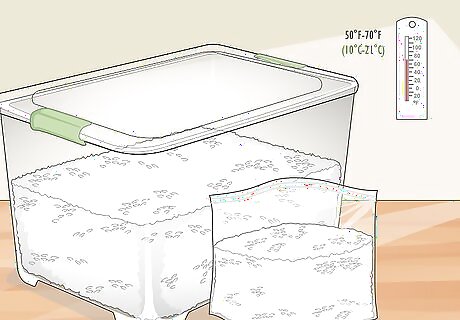
Make sure the temperature is between 50°F (10°C) and 70°F (21°C). If you’re storing the rice inside your home and you have air conditioning or live in a cool environment, the temperature should be just fine. If you’re putting the rice in a garage or other storage facility, install a thermometer so you can make sure the temperature is appropriate and stable. If you’re storing the rice in your garage, make sure it’s away from any sources of heat like laundry machines, heating units, or generators.
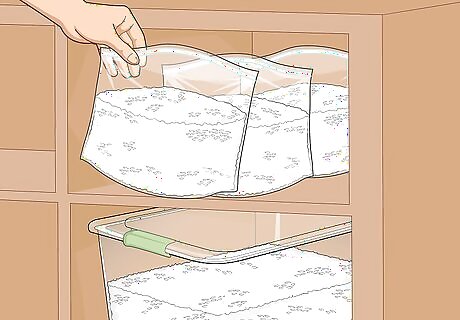
Place the containers or bags of rice on a shelf rather than the ground. Store the rice anywhere off of the ground to make it harder for pests to access it. Storing things vertically is also a big space-saver and will allow more airflow around the room. It’s especially important to store the containers off of the ground if you live in an area that’s prone to flooding.
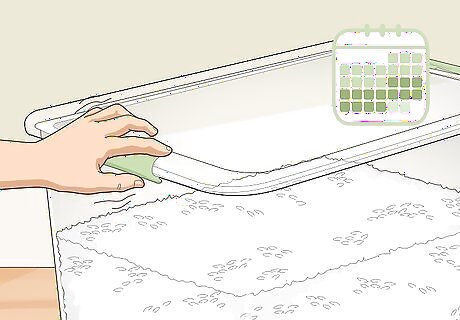
Examine the storage area and the containers every 2 to 4 weeks. Every so often, inspect the storage area for any signs of moisture or heat. Feel the lids to make sure they’re stuck on tight (but don’t open them). If the container or bag is damaged in any way or if the lid has come loose, inspect and smell the food for signs of spoilage. If it's still good, put it in a new container. If you notice condensation on the containers or anywhere in the room, check to make sure the rice is still good and, if so, transfer it into a new container and store it in a different area.
Freezing and Refrigerating White and Brown Rice
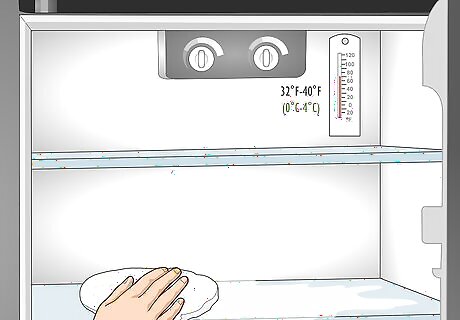
Keep your refrigerator clean and set between 32°F (0°C) and 40°F (4°C). If your refrigerator has a built-in thermometer, check it every day to make sure it falls within the proper range. If your fridge doesn’t have a thermometer, put a separate one inside so you can keep track of the temperature. You should also check the lining on the perimeter of the door to make sure there’s a tight seal. Throw out any spoiled foods that might cause bacteria and moisture to get trapped inside the unit.
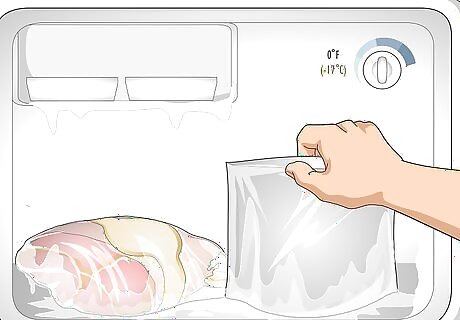
Make sure your freezer is organized and set to 0°F (-18°C). Check the temperature reading every day to make sure each unit is at the ideal temperature. If your freezer doesn’t have a built-in thermometer, put one between 2 bags of frozen goods and check it every day or as often as you can. Don’t overpack the shelves; pack them evenly so there’s good airflow inside the unit. If you notice any frost or signs of a leakage (inside or out), it may be time to call a professional or get a replacement.
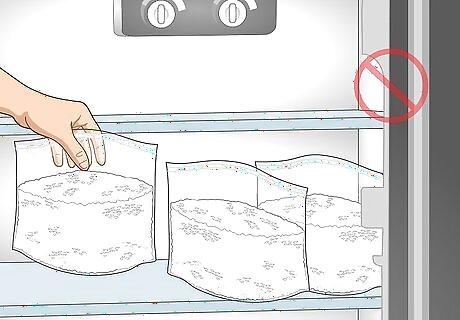
Place the rice bag or container on a shelf, not in the door or in a drawer. Put the rice toward the back of a shelf for long-term storage so you don’t have to move it to get to things you might use more frequently. The center or bottom shelves of the freezer or refrigerator are usually the best spots because they’re colder. The door of your refrigerator or freezer is the warmest spot and experiences more temperature shifts, so don’t put the rice there. Don’t store the rice in crisper drawers because they retain some amount of moisture that can cause the rice to spoil faster.
Preserving White Rice in Pickling Jars
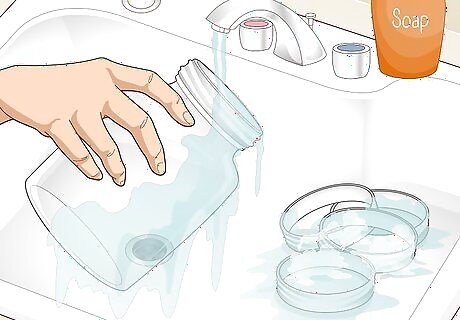
Wash all of the pickling jars and lids with dish soap and water. Use regular dish soap and a sponge to thoroughly clean the insides of each jar and lid. How many jars you’ll need depends on how much rice you’re planning to store. For instance, 20 pounds (9.1 kg) of rice can fit into 6 ⁄2 US gal (1.9 L) jars.
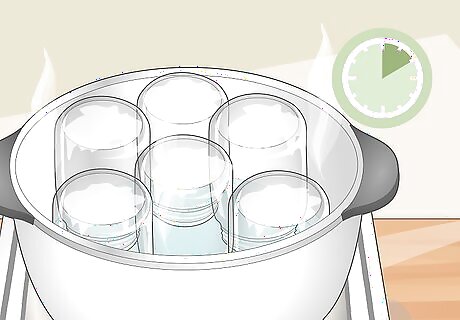
Steam the jars in a bath of water and vinegar for 10 minutes. Pour ⁄4 cup (59 mL) of water and 1 tablespoon (15 mL) of white vinegar into a large stewpot and bring it to a boil. Place each jar upside-down into the water so the steam fills the insides. The water-vinegar steam will sterilize the jars.
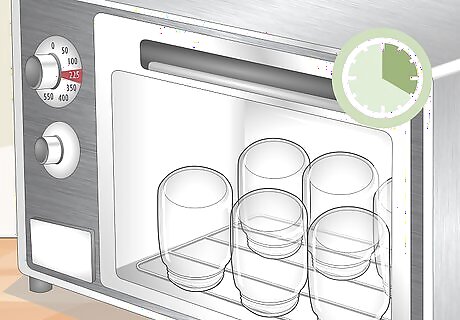
Dry the jars upside down in the oven at 225°F (107°C) for 20 minutes. Use jar-lifting tongs to lift each jar out of the pot, allowing excess moisture to drain out. Use a clean cloth to support the body of the jar as you transfer it to the lowest rack of your oven. Don't touch the jars with your hands—they're hot! Let the jars cool down in the oven after the 20-minute drying session.
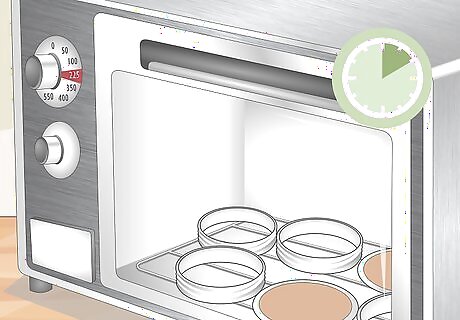
Place the jar’s lid caps in the oven for 10 minutes. Separate the saucer-shaped lids from the circular ring and put them onto a clean, oven-safe container (like a baking tray). Slide them into the oven set to 225°F (107°C) for 10 minutes. The heat will help sterilize the lids.
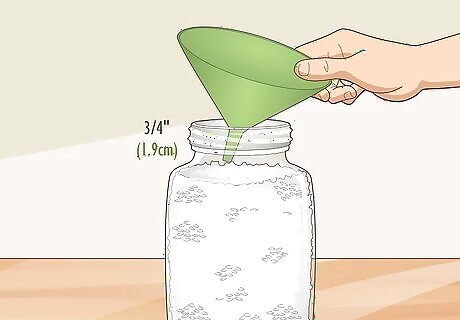
Use a funnel to fill each jar, leaving ⁄4 in (1.9 cm) of headspace. Once the jars are clean and dry (they'll still be quite hot!), turn them upright onto a workspace and use a funnel to fill up each one with rice. Be sure to leave about ⁄4 in (1.9 cm) of space from the top of the rice to the lip of the jar. It may help to slightly shake the jars to even out the rice so you can pack more in.
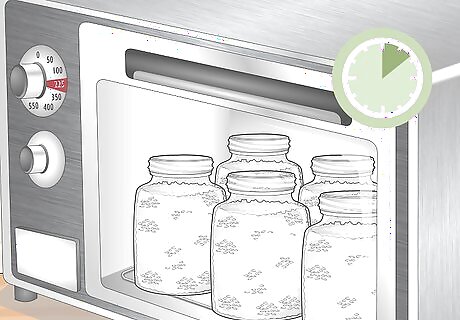
Put the filled, unlidded jars into the oven for 90 minutes to 1 hour 50 minutes. Leave the jars unlidded and place them on the lowest rack of your oven. Keep it set at 225°F (107°C). For half-gallon (1.9 L) jars, leave them in the oven for 1 hour 50 minutes. If you're using quart-sized jars, only heat them for 90 minutes. This extra heat will kill off any pests or eggs that might be in the rice.
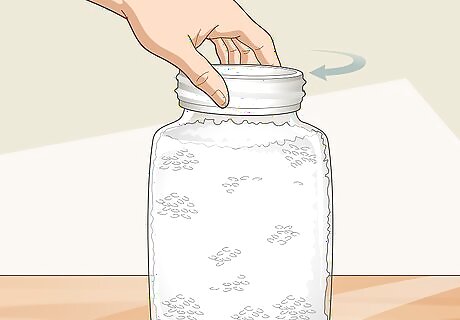
Transfer the jars to your workstation and screw the lids on. Use an oven mitt to transfer the jars out of the oven and onto your workspace. Place the sterilized mid-section of the lids over the mouth of each jar and then screw each lid on as tightly as you can. The jars will be hot so don’t try to use your bare hands to screw on the lids!
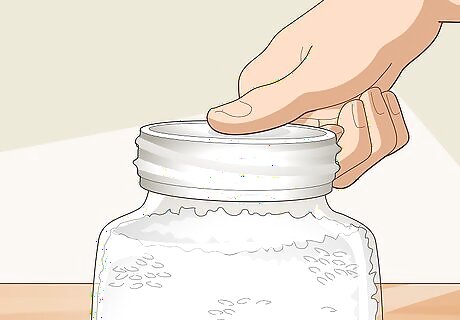
Press the top of the lids to make sure they're airtight. Use your finger to push down on each lid to see if it stays in place. If it springs up, the lid isn't fully sealed and you’ll need to use a vacuum sealer. You can also check by looking at the lid from eye-level. If you see a slight, concave indentation, the lid is good to go! If it's flat or bulging, it's not air-sealed.
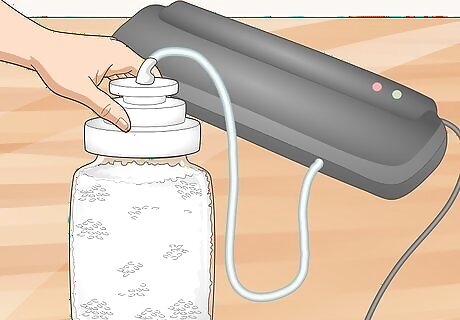
Use a vacuum sealer to seal any loose lids, if necessary. Remove the outer ring of the jar’s lid and leave the small circular disc in place. Place the vacuum sealer attachment (the “wide-mouth” size) over the top of the jar and plug the hose into the sealing cap. Press the activator button to suck the air out of the jar. The vacuum sealer will automatically stop when it's done or you’ll see a green light show up on the console. Once the green light shows up or the vacuum sealer stops, remove the vacuum-sealer attachment and screw on the outer ring of the jar.
Storing White Rice in Mylar Bags
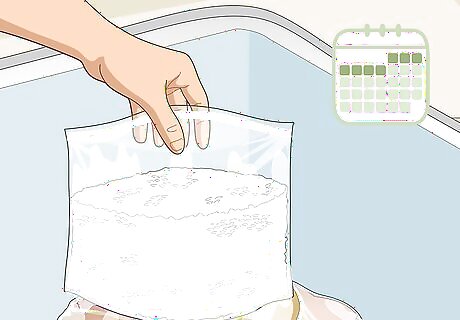
Freeze the rice 1 week before storing it, if possible. Place your bulk rice in the deep freezer (if you have one) to get rid of any pests or eggs hidden in the rice. It's not likely to happen, but pests have been known to get into large bulk bags at grocery stores and in warehouses. If you have a sub-zero temperature deep-freezer, put the rice in there for at least 24 hours and up to 1 week to kill off pests and eggs. If you don't have room in your freezer for bulk rice, divide it into smaller freezer bags.
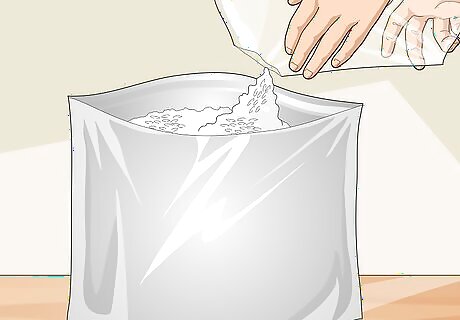
Pour the rice into individual mylar bags. Use scissors to cut open the bulk bag of rice at 1 corner and carefully pour it into the mylar bag. Place one hand at the top of the bag to angle your pouring and use your other hand to support the rest of the bag. Stop pouring when the rice is about 6 inches (15 cm) down from the top of the mylar bag. It may help to have a friend hold the mylar bag or to set it upright inside of a bucket while you pour the rice in. If you plan to use some of the rice in the near future, use smaller mylar bags to hold single or double servings of rice. Mylar bags come in sizes ranging from 4 in (10 cm) by 6 in (15 cm) to 20 in (51 cm) by 30 in (76 cm). You can easily store 20 pounds (9.1 kg) of rice in 3 large 1-gal (3.7-litre) mylar bags.

Put at least 1 oxygen absorber in each bag. The strength of oxygen absorbers is measured in "cc," which corresponds to how much oxygen each pack can remove. For each gallon (3.7 L) of 6.7 pounds (3.0 kg) of rice in the bag, use 300- to 500-cc worth of oxygen absorbers. You can buy a pack of 100 individual 100-cc oxygen absorbers to use for smaller mylar bags. You can also put several packets into each larger bag to meet the cc-requirement. You'll still feel air inside the bag—that's the nitrogen that the oxygen absorbers can't remove.

Set an iron to high heat with no steam and wait for it to heat up. Plug in your iron near an ironing board or any other flat, heat-resistant surface. If your iron has degree settings, set it to 350°F (176°C). If you're using an auto-steam iron, empty out all of the water before heating it up and using it on the bag. If you're using an ironing board, you may want to change the cover or lay down a sheet you don't care about because some of the plastic on the inside of the mylar bag can seep out when you seal it up. As an alternative, use a flat-iron made for straightening hair.
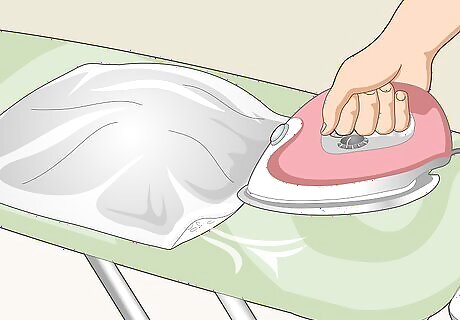
Push excess air out of the bag and iron along the edge to seal it. Turn the bag on its side and press down to expel as much air as you can. Use the long edge of the iron to go over the edge of the bag, covering a strip ⁄2 inch (1.3 cm) to 1 inch (2.5 cm) wide. You should only need to go over the edge once. However, if you see any bubbles in the bag near the freshly-sealed edge or the corners, go over it again. Repeat this for all the filled bags.
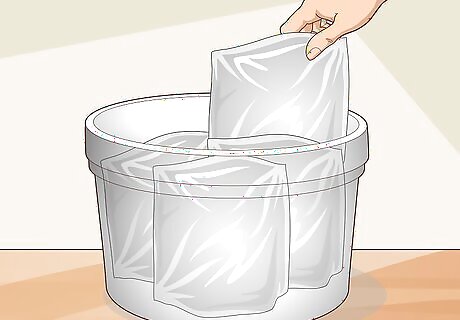
Store the sealed mylar bags in a food-grade bucket with a lid. Look for “food-grade” or “food-safe” somewhere on the bucket’s label or on the bottom near the recycling icons. Place all the sealed bags of rice into the bucket either upright or on their sides. Once they’re packed in, put the lid on the bucket. You can buy food-grade buckets or bins online or at most home hardware stores.
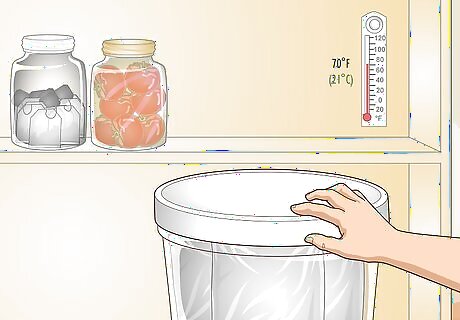
Place the bucket in a cool, dry place that's consistently around 70°F (21°C). A large pantry or a temperature-controlled garage is the perfect place to store your packed rice. With proper storage and the right number of oxygen absorbers, the rice will stay fresh for up to 40 years! It's okay if the temperature inside the storage room wavers in small degrees—just make sure there are no large drops or spikes.


Comments
0 comment