
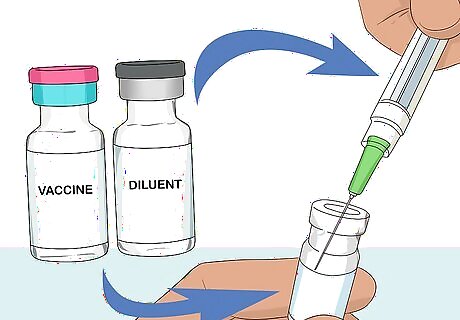
Getting Started with Vaccines
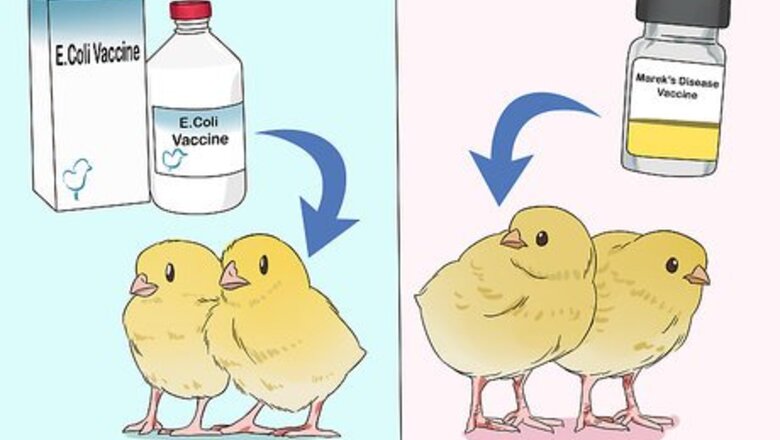
Give chicks their first vaccinations at the right time. Different vaccines need to be given at different times in a chicken’s life. Most vaccines are given soon after the chicks have hatched. Always talk to a veterinarian before vaccinating if you have never vaccinated a chicken before. Common vaccinations include: E.Coli: Given at one-day-old. Marek’s Disease: Given at a day-old to 3 weeks of age subcutaneously. Infectious Bursal Disease (Gumboro disease): Given from 10 – 28 days old in water. Infectious Bronchitis: Given at 16 – 20 weeks of age with eye drops or as a spray. Newcastle Disease: Given at 16 – 20 weeks of age in water or eye drops. Fowl-pox: Given at 10 –12 weeks of age as a wing web. Laryngotracheitis: From 4 weeks of age with eye drops.

Check your chickens’ overall health before you vaccinate. You do not want to vaccinate sick birds, as the virus might be too strong for their immune system to fight. The best way to tell if you should vaccinate or not is to have a veterinarian inspect the chickens to make sure they are healthy. Do not vaccinate hens that are laying eggs. Adult birds should be vaccinated at least 4 weeks before they start laying. This ensures that they are no longer at risk of indirectly transmitting any virus while they are laying.
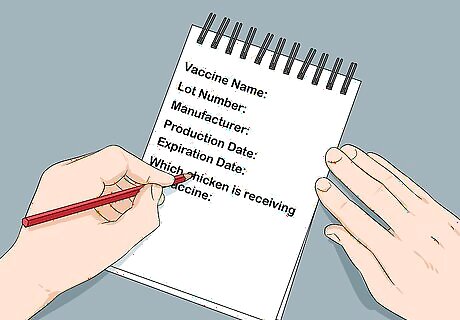
Record the vaccination information. Before you vaccinate, check to make sure you have the right vaccines at right dosages. Record the vaccine information for each chicken. That way, you have it both for your records and should you need the information for a vet. Items you should record include: Vaccine name. Lot number. Manufacturer. Production date. Expiration date. Which chicken is receiving the vaccine.
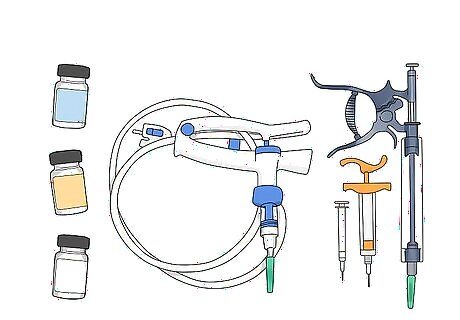
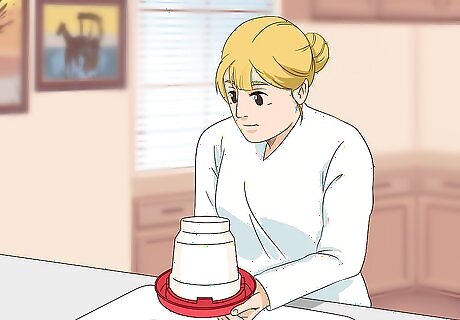
Gather all of your materials. Different vaccines require different vaccination methods and different tools. You should get all your materials, including the vaccines and vaccination tools, ready before you start bringing in your chickens. This helps keep the process quick and minimize trauma for the chickens. Some vaccination methods require that you have another person helping you, so grab an assistant if you can.
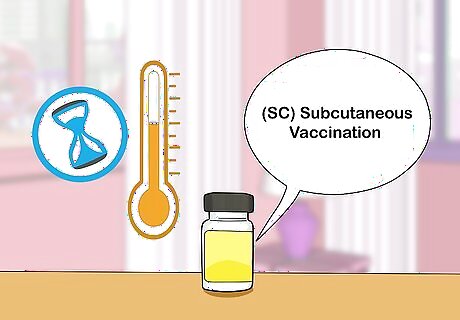
Vaccinating with a Subcutaneous Injection
Prepare the subcutaneous (SC) vaccination. Let any vaccines that required refrigerated storage heat up to room temperature 12 hours before the vaccination process. Then, follow the preparation instructions listed on the vaccination packaging, or those provided by your vet. Before preparing the mixture, double check that the vaccine you have is meant to be injected subcutaneously. Vaccines that require cold storage will be shipped in chilled containers and have an indicator directly on their label. Subcutaneous means that the needle only gets inserted into the chicken’s layer of skin and does not go all the way down into the muscle below the skin.
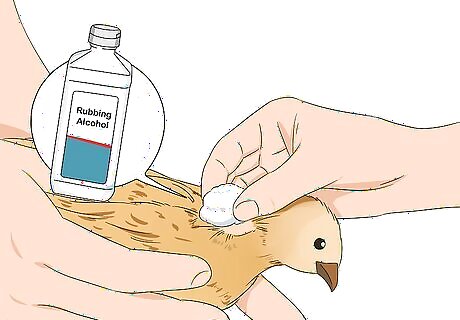
Sterilize your injection site. SC injections can be given in two spots: the dorsal (or top) part of the chicken’s neck, or in the inguinal fold. The inguinal fold is the pocket created between the abdomen and the thighs. Pick the spot that is easiest for you to access and most comfortable for the chicken. Once you’ve picked the vaccination spot, sterilize it by parting the feathers in the area and wiping down the skin with a cotton ball soaked in rubbing alcohol.
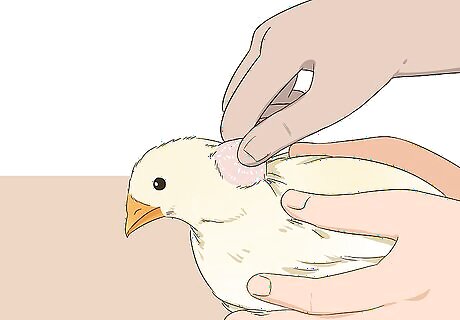
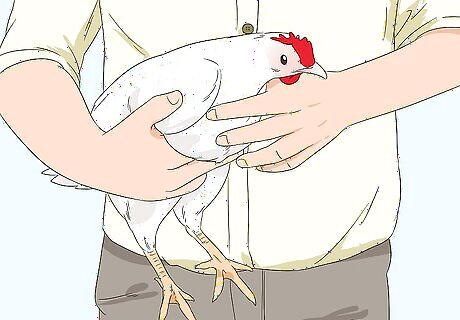
Create a tent with the chicken’s skin. While this might sound odd, doing this will help you to insert the needle. Grasp the chicken’s skin at the injection site and lift it up with the fingers and thumb of your non-dominant hand. It may be helpful to have an assistant hold the chicken for you so that both your hands are free for the vaccination process. Neck: Have someone hold the chicken facing toward you with its wings secure. Lift the skin midway on top of the neck area using your middle finger, index finger, and thumb. This will create a pocket in between the neck muscles and skin. Inguinal fold: Have someone hold the chicken so that its chest is upward, facing you. The chicken should look like it’s lying on its back. Lift the inguinal fold using your fingers, and feel the pocket or space created.
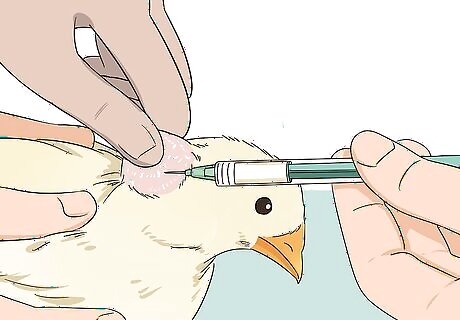
Insert the needle into the chicken’s skin and inject the vaccine. Insert the needle at a 90-degree angle into the pocket of skin you lifted up. You should feel some initial resistance as the needle punctures the skin, followed by smooth movement once it reaches the subcutaneous space. Once the needle is in, press down on the plunger to inject vaccine. Remove the needle in a quick, fluid motion once the vaccine is fully injected. If you still feel resistance (like there is something blocking the needle), it means that you may have gone too deep and inserted the needle into muscle. If this is the case, remove the needle and change your angle of injection into the chicken’s skin. Make sure that all of the vaccine gets injected and that the needle has not come out on the other side of the skin fold. If you’re doing things correctly, you should notice a small bubble forming where the vaccine was injected.
Administering Eye Drop Vaccines
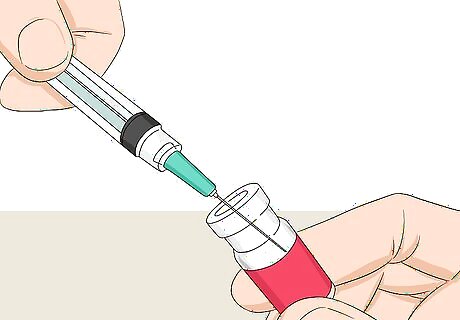
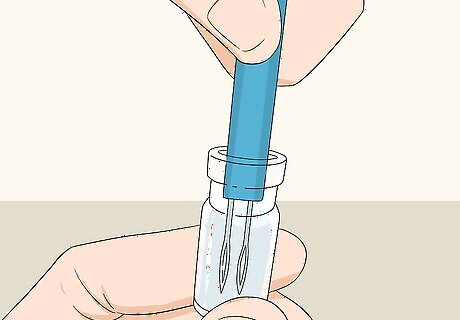
Dilute the vaccine solution. Open the vaccine vial or bottle and dilute it by using a syringe with 3 ml of diluent. The syringe and diluent should come with the vaccine. Make sure that the temperature of the diluent is 2° to 8° C (36° to 45° F). To make sure that the diluent is always cold, always carry it in an ice box filled with ice. If you are going to vaccinate a lot of birds, you can divide the diluted vaccine into 2-3 clean bottles and keep them on ice. That way, the vaccine will stay at the right temperature.
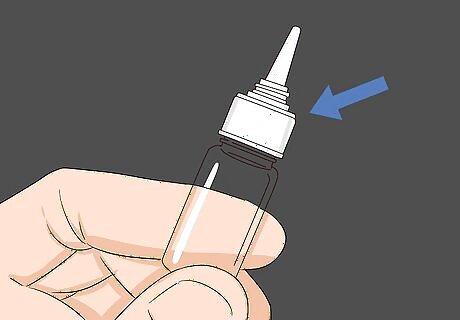
Attach the eyedropper to the vaccine vial. Gently shake the vaccine vial several times before attaching the dropper. Then, attach the eyedropper, which should have been provided with the vaccine and diluent. You should be able to attach the dropper by pulling it over the lip of the vaccine vial or by twisting it on.
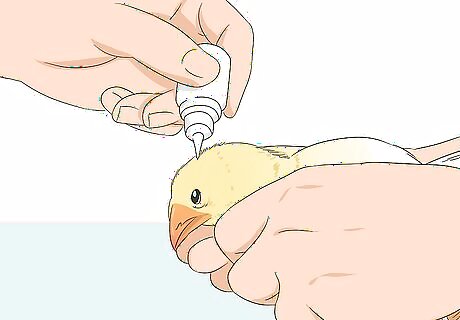
Drop at least 0.03ml of the vaccine into the chicken’s eye. Gently grab the bird’s head and twist it slightly so that its eye is facing you. Position the dropper carefully over the eye and slowly squeeze out a drop of the vaccine. Then, wait a moment to ensure that the vaccine is absorbed by the eye instead of pooling and leaking out. If the drop is fully absorbed, the vaccine was successful. If the drop was not fully absorbed, a new drop should be administered. It may be helpful to have an assistant hold the chicken in place while you administer the vaccine.
Mixing Vaccines in Drinking Water
Calculate the amount of water you will need to prepare. Your vaccinations should be mixed in with roughly the amount of water your chickens can drink in 2 hours. For 2-3 days prior to vaccination, check your water meter readings in 2 hour intervals. This will give you a rough idea of how much water you will need when it comes time to vaccinate. You can also check with your vet or the vaccine manufacturer for their recommended dosage and mixing instructions. Many will provide tables with the vaccine estimating the amount of water you need based on the age of your birds and the current air temperature.
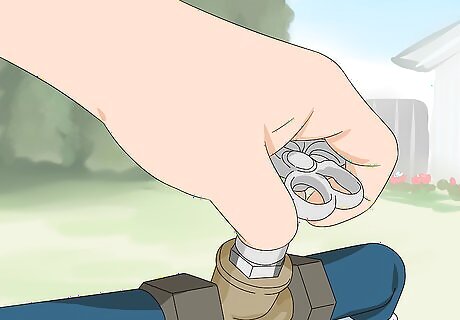
Clean your watering system. It is very important that your watering system be clean and free of chlorine. Stop running chlorine, disinfectants, and other medications through your watering system at least 48 hours before planning on vaccinating your chickens. You should also clean all buckets, jugs, whisks, and other tools you plan on using during the vaccination process. You can clean your watering system and tools with the same cleaners you typically use. Remember to rinse them thoroughly, though. It may be helpful to do 2-3 full rinses, since even trace amounts of detergent can impact the effectiveness of the vaccine. Check the pH of the water coming through the system after you clean. A reading greater than 7.5 is considered too high for the vaccines, while anything below 6.0 is too low.
Stop running the water prior to vaccinating your chickens. In order to make sure that your chickens actually drink the vaccinated water, you should stop running water to them for a short period prior to vaccine administration. Pause water flow for 30 to 60 minutes in warm climates, and for 60 to 90 minutes in cooler climates.
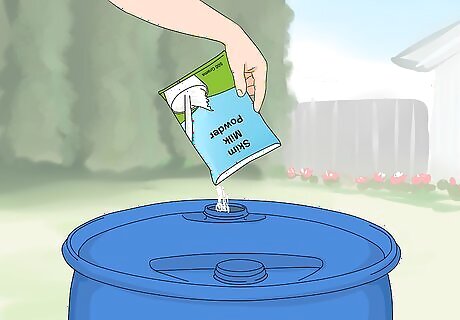
Stabilize the water using skim milk powder or a chlorine neutralizer. Stabilize the water by placing 500 grams of skim milk powder for every 200 liters (52.8 US gal) of water. You can also use a chlorine neutralizer like Cevamune® by adding one tablet for every 100 liters (26.4 US gal). The water should be stabilized 20-30 minutes prior to adding the vaccine.
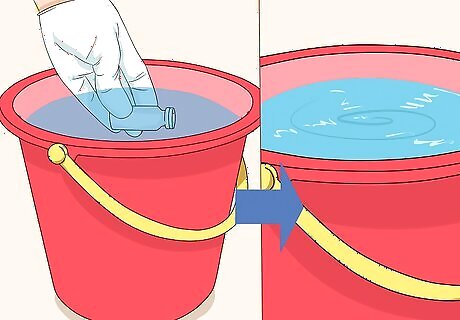
Prepare the vaccine in a clean bucket. Fill a clean bucket with 2 liters (0.5 US gal) of the neutralized water, and submerge your vaccine bottle in the bucket. Once the bottle is completely submerged, remove the rubber stopper and allow the vaccine to diffuse completely into the water. Remove the bottle, making sure it is completely empty, and thoroughly stir the mixture. Remember to wear rubber gloves throughout this process to keep the water clean. Once the solution is thoroughly mixed, add the water back into your water tanks and mix the vaccination mixture fully with the rest of your water.

Start running the water to your chickens. When you turn the water back on, the chickens should start to drink. This is how they will receive the vaccine. If you use automatic drinkers, let them fill with the vaccinated water completely before you lower them to the chickens. Try to get the chickens to drink all of the vaccine water within 2 hours. Do not put chlorine or other medications back into the water for at least 24 hours. For houses with manual or basin drinkers, equally divide the vaccine solution across the basins. For houses with bell drinkers, open the overhead tanks to let the birds drink.
Preparing a Wing Web Vaccination
Dilute the vaccine. The vaccine should come with a diluent. Only use the diluent that comes with your vaccine. The amount of diluent you need depends on the vaccine you will be giving your chickens. Follow the instructions that come with the vaccine to properly measure and mix the diluent.

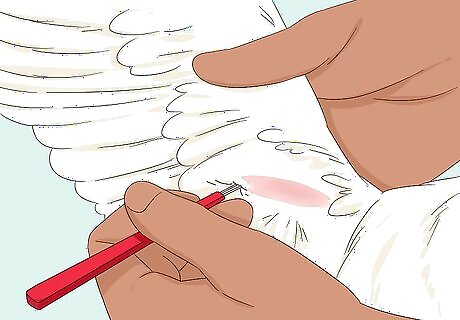
Spread the chicken’s wing to expose its web. Gently lift either wing, pulling it out to its full extent. Expose the underside of the wing so that it is facing up and the web is visible. Gently pluck a small patch of the feathers on the wing web so that you can properly administer the vaccine. Sterilize this area using a cotton ball dipped in rubbing alcohol. It may be helpful to have a second person stabilize the chicken and extend the wing while you administer the vaccine. The wing web is located near the bone where the wing connects to the body.
Dip the needle into the vaccine. Your vaccine should come with a 2-prong needle called a wing web applicator. Dip the applicator wells into the vaccine bottle. Take caution that the needle is not dipped too deep. It should be just enough to fully submerge the applicator wells. If you need additional wing web applicators in case of failed vaccine administration, you can get these from your vet or the vaccine manufacturer.
Pierce the underside of the wing web. Once the applicator has been loaded with the vaccine, pierce the needles into the wing web, taking care to avoid feathers, bones, and large blood vessels. You can ensure proper placement of the applicator by centering the needle puncture in the middle of the triangle formed by the spread apart wing web. If you accidentally hit a blood vessel, load a clean needle and repeat the vaccination process. Otherwise, replace the needle after every 500 birds. Check for scabbing or scarring in the wing web 7-10 days after vaccination. Scabs are an indicator that the vaccination was successful. If scabs are not present, consult with your vet to see if another dose of vaccines should be administered.
Cleaning Up After Vaccinations
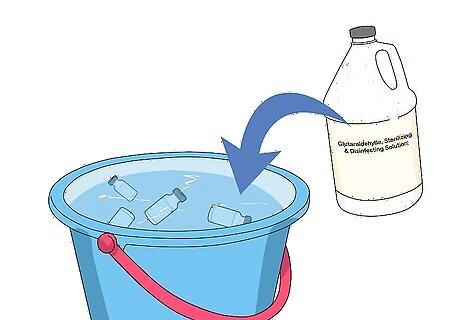
Disinfect and dispose of all empty vaccine vials and bottles. Vaccine bottle disposal can differ from region to region, so check your local and state or provincial laws regarding how to dispose of empty vials. If you are not required to dispose of them in biomedical waste containers, disinfect them in a bucket filled with 50 milliliters (1.7 fl oz) of glutaraldehyde per every 5 liters (1.3 US gal) water. Allow the bottles to remain in the disinfectant for at least 5 minutes before rinsing them in fresh, clean water. If you have leftover vaccines, call the manufacturer or your vet's office for proper storage and disposal instructions.
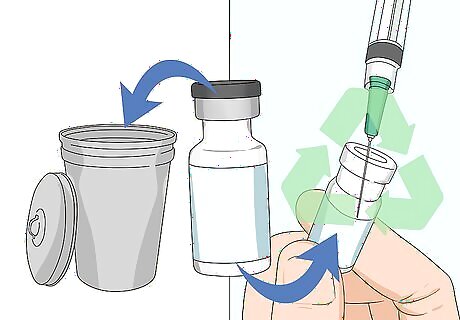
Throw away or recycle your vials and bottles. Some operations recycle vials and bottles and use them for sample collections. This can be done by first following the standard disinfection process for vaccine vials and bottles. After disinfecting, autoclave the containers to make sure that they are fully sterilized. If you do not have access to an autoclave or live in an area that does not permit vaccine bottle recycling, safely dispose of the vials in the trash after disinfecting them. If your region requires vaccine bottles to be treated as biomedical waste, contact your vet or local disease control office to schedule drop-off and pick-up for an appropriate waste receptacle.
Monitor your chickens’ health. It is always important to keep an eye on your chickens after you have vaccinated them. Look for any signs that something might be wrong. If you notice signs of illness including lethargy, discharge around the eyes or nose, large pimples with thick cores, cough, or a high temperature, call a vet right away. For respiratory vaccinations, it is normal for the chickens to develop respiratory issues like sneezing for 3 to 5 days after they get vaccinated. If the signs persist for longer than that, call a vet.


Comments
0 comment