
Dry Method for Applying Vinyl Stickers
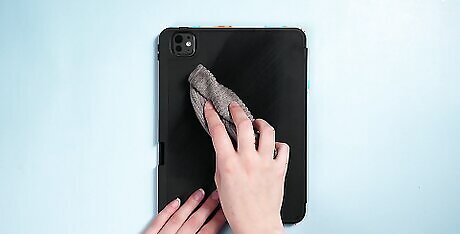
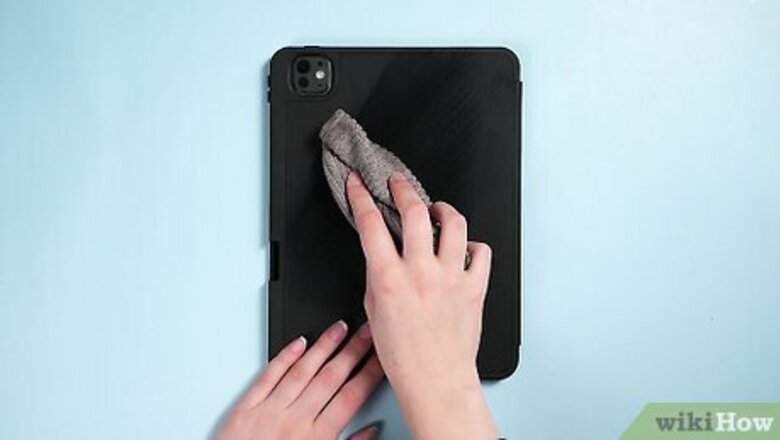
Clean the area where you want to place your sticker. Automotive expert Evan Ernst says, “Before you apply a vinyl decal, clean the area first with surface cleaner or rubbing alcohol. If the area doesn’t seem very dirty, you could also use a baby wipe or damp paper towel—just be sure to remove any dust, dirt, or grime that could prevent the decal from sticking. Allow the area to dry thoroughly.

Rub firmly across the transfer tape to prep your sticker. The transfer tape is the transparent layer on top of your vinyl sticker. Run your fingers or a squeegee or credit card firmly across the entire surface of the transfer tape. This will help the vinyl stay on the transfer tape instead of coming off when you remove the backing. Be sure to lay the sticker on a smooth, flat surface while you do this—if the surface is raised or bumpy, it could damage the vinyl.
Peel away the backing tape from the transfer tape. Crafts & DIY Specialist Nicole Bolin says, “Vinyl stickers have a backing that’s almost like wax paper.” To remove this backing, use your thumb and pointer finger to pry it from the sticker’s surface. Pinch the sticker’s edges with your free hand to hold the sticker steady as you peel off the backing. Go slowly as you remove the backing paper so you don’t tear the sticker. Once the back paper is completely removed, hold the sticker carefully by the edges. It’s okay to touch the clear transfer paper if it’s not covering the sticker, but avoid touching the back surface of the decal itself, or you could smudge the adhesive.
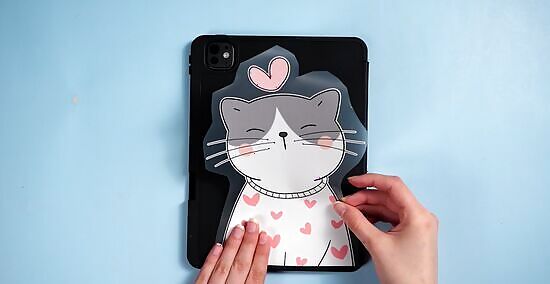
Lay the vinyl sticker on the surface, working from one corner to another. Hold the sticker securely and place one corner on the surface where you’re applying the sticker. Work your way across the sticker, laying it down in a smooth, rolling motion to prevent air bubbles from forming. You might prefer to apply the sticker from the center outward rather than working from one corner to another—go with what feels easier to you based on the size and shape of the sticker. Because you’re applying the sticker to a dry surface, make sure that it’s positioned and angled properly. Once the vinyl is in place, you won’t be able to adjust it easily.
Press out any air bubbles with a squeegee or credit card. Press your squeegee in an even line along the surface of the sticker. Apply an even amount of pressure as you go from edge to edge. Focus on areas that have air bubbles, smoothing them out so the sticker lays flat.
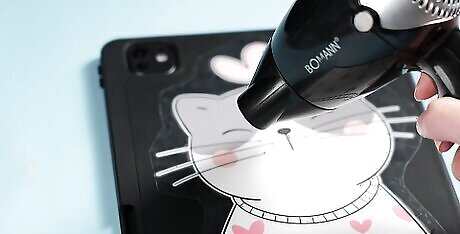
Heat curved vinyl stickers with a blow dryer to make them stick. Don’t be discouraged if your sticker isn’t adhering properly to a curved edge or surface, like a car bumper. Turn a hairdryer or heat gun to a low setting, and run the device several inches or centimeters above the surface of the sticker. Then, use your squeegee to help smooth the sticker until it lays against the curved edge. Don’t use a high heat setting for this—you’re only looking to stretch and expand the vinyl, not melt it.
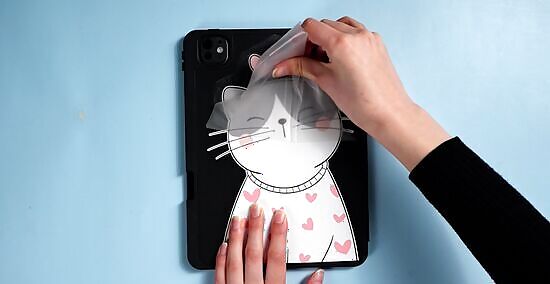
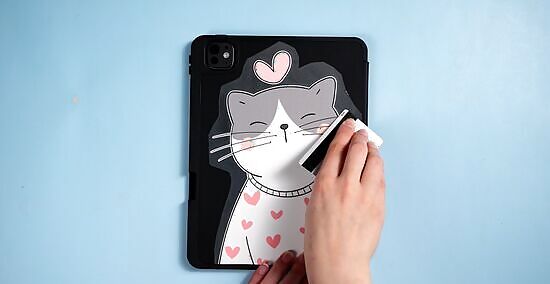
Peel away the final layer of transfer tape. Use your thumb and pointer finger to pinch and remove the outer layer of the sticker, which looks like a strip of opaque masking tape. Pull away at the transfer paper until you’ve completely removed it from the sticker. Sometimes the vinyl sticker will peel up with the transfer paper—don’t panic! Just lay the transfer paper back down and press down on the sticker with your squeegee, then keep peeling off the transfer sheet.
Wet Method for Vinyl Sticker Application
Spray the surface with soapy water for easier application. Clean the surface where you want to apply the sticker, then mix a pea-sized amount of dish soap into a spray bottle filled with warm water. Spritz the solution over the desired sticker surface. Spraying the area before you lay down the sticker will allow you to adjust the position of the sticker once you’re finished. You can’t adjust a vinyl decal that you apply to a dry surface. Do not use the wet method if you’re applying the decal to an electronic item, such as the back of a laptop.
Apply the sticker to the surface. The application method for the wet method is the same as it is for the dry method—rub firmly across the transfer tape, peel off the backing, and place the sticker where you want it. The main difference with the wet method is that once the sticker is in place, you’ll be able to adjust it by carefully sliding the edges of the sticker into place. Once the sticker is in place, use your squeegee to smooth out any air bubbles. If you’d like, you can spray the transfer tape with soapy water—this may make it easier to remove extra air bubbles from the sticker.
Allow the sticker to dry for 24 hours. To make sure the adhesive has time to fully dry, wait about a day before you touch the sticker or move whatever it’s attached to. For instance, if you can, you might wait a day before driving your car if you add a sticker to the window.
Hinge Method for Large Stickers

Use painter’s tape to secure your sticker where you want it. Press a few small pieces of painter’s tape around the perimeter of the sticker to hold it in place. Then, apply a long piece of tape vertically down the center of the sticker. This is called the “hinge.”

Peel the backing off the right side of the sticker. Pull the sticker to the left as you remove the backing. Keep going until the right side of the sticker is folded completely over the hinge. Then, use a utility knife to cut the backing away from the right side of the sticker.

Apply the right side of the decal, then repeat on the left side. Starting from the center, roll the sticker back into place, pressing it firmly into place with your hands. Then, use a squeegee to smooth out any air bubbles. Remove the tape hinge, then fold over the left side of the sticker and pull away any remaining backing. Carefully apply the left side of the sticker to the surface, pressing down firmly as you go, then finish smoothing out any air bubbles.
Getting the Perfect Application

Place the sticker on a smooth, non-porous surface. Vinyl stickers work best on smooth surfaces like glass, metal, plastic, or tile. If you put them on a rough or porous surface like brick or cement, they may appear bumpy and might not stick well.

Apply outdoor decals on a warm (but not hot) day. If your sticker is going outdoors, it’s best to wait until it’s at least 50 °F (10 °C) outside—in cold weather, vinyl stickers become stiff and the adhesive hardens. But avoid applying the sticker when it’s more than around 90 °F (32 °C) out, or the adhesive will soften and the vinyl could tear. If you’re indoors, normal room temperature should be fine.


Comments
0 comment