
Making a Candle in a Sand Mold
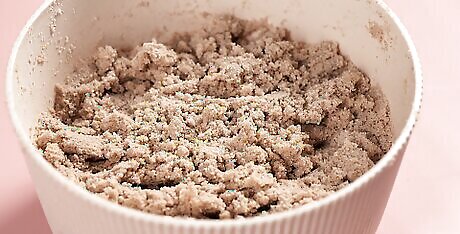
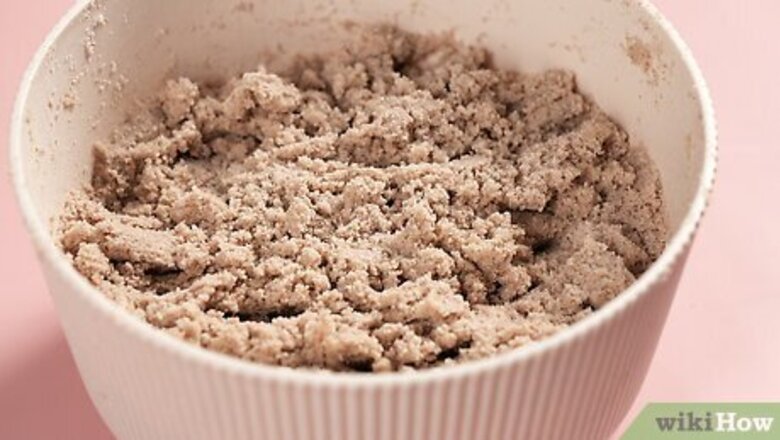
Fill a large container with damp sand. Use a bucket, large mixing bowl, or any other large container at least twice the desired height of your candle. Make sure the sand is packed tightly into the container, and that the surface is smooth. If needed, squirt the sand with a spray bottle until it holds its shape. The sand will stick to your candle, so make sure you’re happy with the grain, color, and texture. Ensure the sand is damp enough so that it holds its shape when you squeeze it in your hand, but not so wet that it’s soupy.
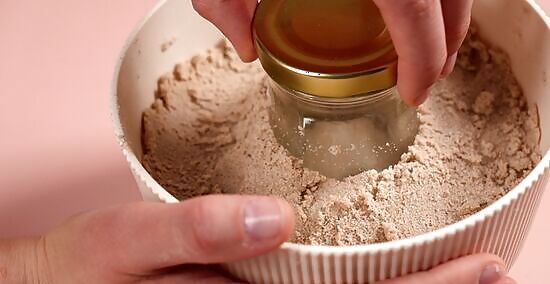
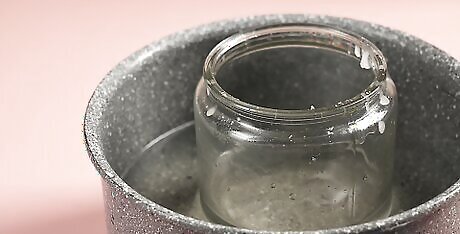
Press your mold into the sand, then pull it out. Use virtually anything you like to establish the shape of your candle–a flat bottomed drinking glass works best. Press the glass down into the sand and use your fingers to pack the sand around it. Then, lift the glass directly upwards to remove it. Work carefully and slowly so you don’t mess up the shape of the mold. If some sand does break off from the walls of the mold, use your fingers to smooth it out so that it doesn’t show. It may take a couple tries to get a perfectly clean impression, so don’t give up! Or, use a can, toy blocks, or even large seashells as a mold. For a shorter candle, press the object only part-way down into the sand
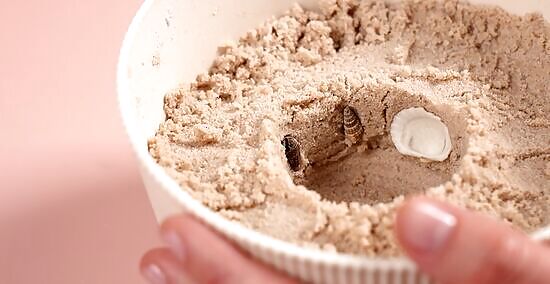
Press decorations into the sides of the mold, if you like. Choose some glass gems, sea glass, or small shells, and press them partway into the walls of your mold. Remember that the part of the object that’s in the sand will protrude from the side of the final candle. Avoid pressing them all the way into the sand, or they won't stick to the candle.

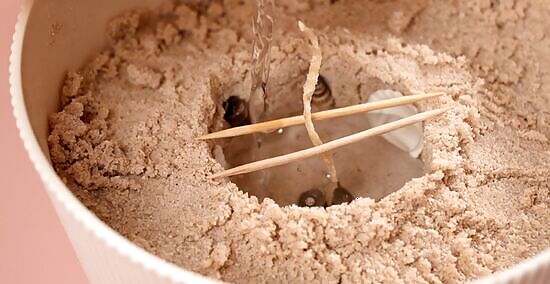
Press a wick into the bottom of your mold with toothpicks to hold it up. Gently press the tab of a candle-making wick into the center of the floor of your mold, so that it stands upright and the wick sticks up out of the mold by 1–2 in (2.5–5.1 cm). Then, lay 2 toothpicks across the opening of the mold, 1 on either side of the wick. If your wick doesn’t have a tab, use a toothpick to make a small hole in the bottom of the mold to stand the wick up in. And don't worry about the wick being too long—we’ll trim it down later. The toothpicks hold the wick upright as you pour the wax later.
Melt candle wax flakes or cubes in a double boiler. Set a can, jar, or another heat-proof container in a pot, and place your solid candle wax (soy or paraffin are most common) inside. Surround the container with water, filling the pot about halfway up the container, then heat the pot on medium heat to double boil the wax to melt it completely, stirring every minute or so to make sure it melts evenly. Use a candy thermometer to make sure the wax reaches the melting temperature indicated on the packaging. Most wax varieties need to reach between 175–190 °F (79–88 °C) Also, add a full, chopped-up crayon or candle dye, or your favorite candle scent oil to add color and scent to the candle. How much wax you use depends on the size of your sand mold. You can always melt more later!
Pour the melted wax slowly into the sand form. Use oven mitts to remove the container of wax from the pot, then slowly pour it into the mold you created out of sand. Work slowly and gradually, and fill it all the way to the top.. Don’t be alarmed if the wax seems to absorb into the sand. This is normal! You may need to pour more wax after a minute or 2 to refill the mold. For a striped candle, only fill the mold partway, then let the wax cool for 12 hours. Then, pour a different-colored wax over the first pour.

Remove and brush off the solidified candle after 12 hours. Let your candle solidify overnight in a safe spot, like on a counter. Then, use a spoon to carefully dig it out of the sand, and use a brush or a soft cloth to brush off any excess sand. Voila! Your sand candle is complete! If needed, use scissors to trim the wick to about 0.5 in (1.3 cm), and a sharp knife to cut a layer off the bottom of the candle, making it flat and stable. Also consider using a toothpick or knife to cut fun designs into the side of the candle.
Making a Candle with Granulated Wax

Place a tabbed wick in the center of a glass container. Use a drinking glass for a large candle, or a shot glass to make a tea candle. Or, use a shallow, decorative plate. Virtually any heat-proof dish will work. Place a tabbed wick in the center of the container, making sure it stands upright.

Select some granulated wax, or grate a wax block to make “sand” wax. Granulated candle wax comes in all colors and fragrances. But if you don’t have any, take a block of wax (or even an existing candle) and grate it into small bits with a cheese grater or a zester, until you have enough to fill your candle container. Many candle-making waxes come pre-shaved for easy melting. This method skips the melting altogether to make a more whimsical effect! To alter plain or white granulated wax, place it in a plastic bag with 2-3 drops of food coloring and candle scent drops or essential oil, then seal the bag and shake it for 1-2 minutes.

Pour the wax “sand” into the container around the wick. Carefully pour the granulated wax around the wick, making sure the wick continues to stand up straight. If you like, vary the colors of wax you use and pour them in layers, or in different shapes, to make a more varied candle. Fill the container to just below the rim, then enjoy your new sand candle! If you like, also add small decorations like seashells, ocean pebbles, or other heat-proof items around the sides of the container as you pour.
Making a Sand Candle Holder

Select a glass candle container and colored sand. Choose a glass, heat-proof container large enough to fit a small tea candle, plus some sand. A container that’s at least 4 in (10 cm) wide and 4 in (10 cm) tall is perfect. Then, select one or more colors of decorative craft sand to fill the container with.
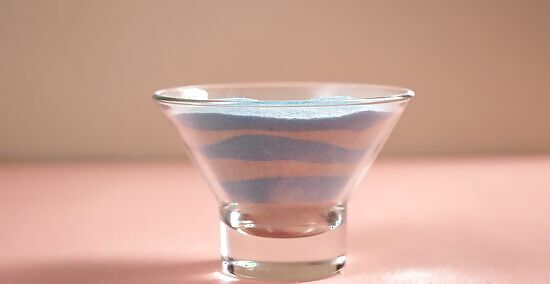
Fill the container with colored sand in layers or other patterns. Pour the craft sand into the container in whatever way you like. Make stripes by alternating colors of sand, or make blobs by pouring little mounds of sand. Continue to fill the container until the sand reach about 0.5 in (1.3 cm) below the rim. Or, take a toothpick or fork and trail it through the sand or poke it downward around the sides as you fill the container for a mesmerizing marbled effect. If you like, add little decorations like seashells, craft jewels, or beads to the sand as you pour it.

Nestle a tea candle in the sand. Lastly, take a tea candle and nestle it into the surface of the sand in the container, until the top of the candle is about level with the sand. Your unique, decorative candle is complete! Add multiple candles if your container is especially wide.


Comments
0 comment