views
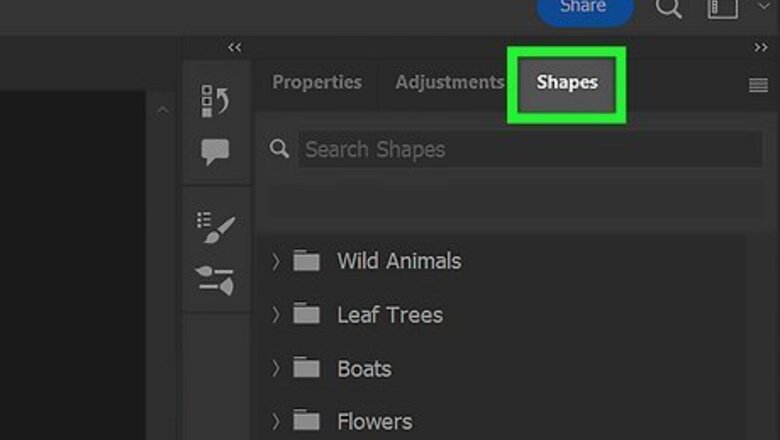
- Open the Windows menu and click on the Shapes panel. Click on the panel’s hamburger menu and pick “Legacy Shapes and More.”
- Select the Custom Shape tool from the toolbox. Pick the arrow shape and color from the dropdown menus in the top Options bar.
- Click and drag your mouse on your Photoshop project to add the arrow. Use the Transform tool to resize and rotate the arrow as needed.
- Alternatively, draw the arrow by hand with the Brush or Line tool to make a simple graphic.
Custom Shape Tool
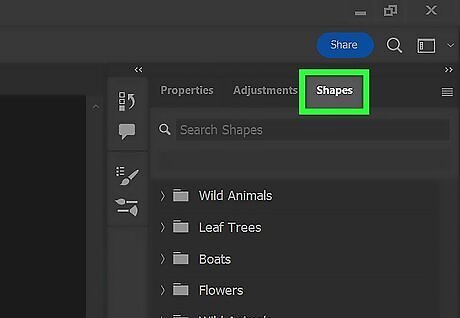
Open the Shapes panel from the Window menu. Look for the Window menu in the top toolbar when you open Photoshop. Look through the options in the dropdown menu and click on “Shapes.” A new panel will pop up on your screen with the new Shape options. Vector shapes in the Custom Shape tool work best if you want to use a professional-looking graphic that’s already preloaded into Photoshop.
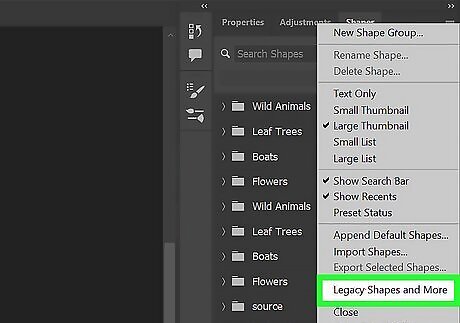
Select “Legacy Shapes and More” from the panel’s hamburger menu. Click on the hamburger menu, which is the icon that looks like 4 horizontal lines in the top-right corner. Click on the “Legacy Shapes and More” option. Once you click it, a new folder will appear in the panel with the arrows and other custom shapes from older Photoshop versions.
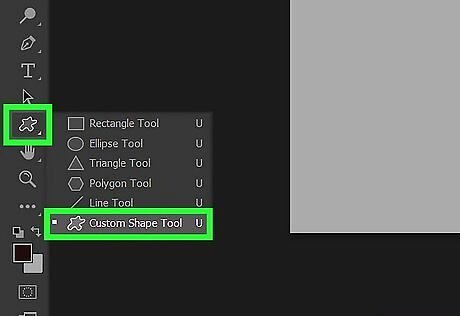
Choose the Custom Shape tool from the toolbox. Press U on your keyboard to take control of the Shape tool and look in the toolbox on the left side of your screen for the highlighted option. Click and hold on the icon until a dropdown menu appears, and click on the blob shape for the Custom Shape tool. Usually, the Shape tool has a rectangle icon, but it may have an oval or line depending on the last type of shape you drew.
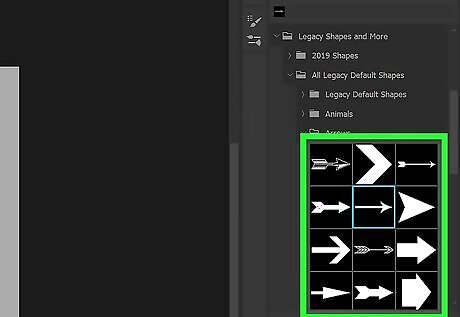
Select the arrow you want from the Shape dropdown in the options bar. Look for the square-shaped window with a preview of the shape in the Options bar on top of the screen. Click on the small arrow on the right side of the window to select the custom shape. Open the “Legacy Shapes and More” folder, and then select “All Legacy Default Shapes.” Choose the “Arrows” folder to open it and pick one of the options. Grab the panel's bottom right-hand corner of the panel that opens up to resize it and see more options.
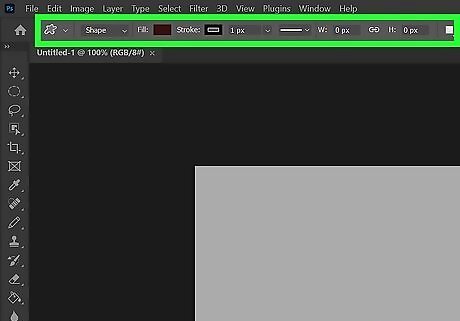
Change the fill and stroke colors from the options bar. Look for the Fill and Stroke options on the left side of the top Options bar. Click on the colored square labeled “Fill” and pick the main color for the inside of your arrow. Then, choose the color for the Stroke, which is the outline around the arrow. You may also change the thickness of the arrow’s outline by lowering or increasing the number next to the stroke color.
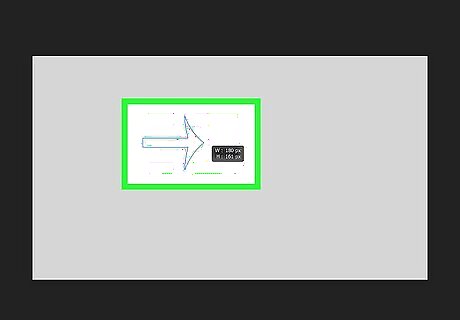
Draw the arrow onto your Photoshop project. Click on the screen in the general spot where you want the arrow to be. Click your mouse, hold it down, and move your cursor across the screen to see a live preview of what the arrow looks like. When you’re happy with the size, release the click to finish the shape. Hold down the shift key while you’re dragging your mouse if you want the arrow to maintain its size ratio and shape. Otherwise, the arrow may look a little stretched or distorted.

Use the Transform tool to resize and rotate your arrow. Go to the Edit menu and select Free Transform. Hover over one of the boxes in the corner of your arrow until you see a curved line with 2 arrows. Click and drag the arrow to spin it around until it’s pointing in the right direction. Then, click on the box and drag if you need to adjust the size again. Press “Enter” when you’re finished to save your changes. Press Ctrl + T on Windows or Command + T on a Mac to open the Free Transform tool from your keyboard.
Line Tool
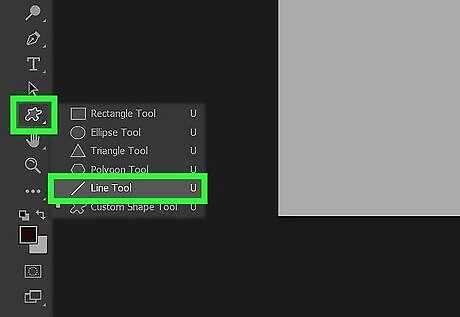
Use the Line tool from the toolbox. Press U on your keyboard to select the Shape tool in the toolbar. Click and hold your cursor on the highlighted icon in the toolbox until a new dropdown menu appears. Select Line Tool from the menu. Using the line tool is great if you want a simple straight arrow without any complicated designs.
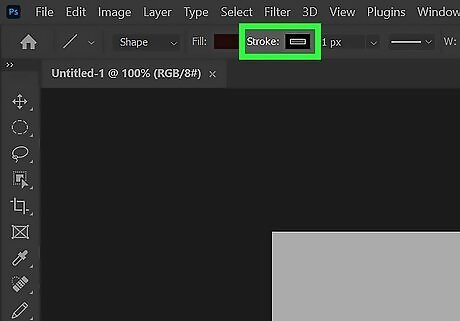
Set the line color and thickness in the options bar. Look for the Stroke option with a colored box in the top menu bar on your screen. Click on the box and choose the color you want your arrow to be. Then, change the stroke size. Choose a higher number if you want a thicker line, or a smaller number for a thin arrow.
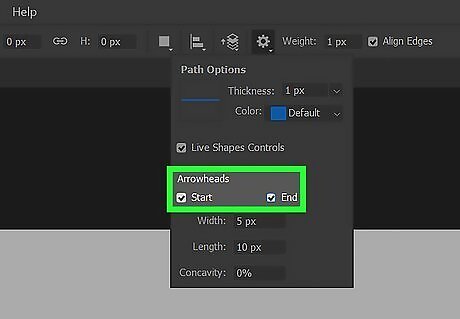
Select the Arrowhead option from the gear dropdown menu. Look for the gear icon in the Options bar at the top of your screen. Click on the gear and look for the options labeled “Arrowheads.” If you want arrows on both ends of the line, check both boxes. Otherwise, select if you want the arrow to point where you start drawing the line or where you end the line. You’re always able to rotate and reposition the arrow after you draw it, so it’s okay to select either option right now. If you want a more noticeable arrowhead, leave the boxes unchecked and draw additional lines to make the arrow shape.
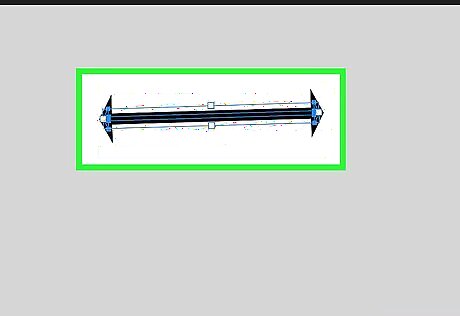
Click and drag on the screen to draw the shape of your arrow. Click on the workspace where you want the start of your arrow to be. Hold the mouse button down and drag your cursor to where you want the end of your arrow to point. When you’re happy with how it looks, let go of the mouse button to place the arrow.
Brush Tool
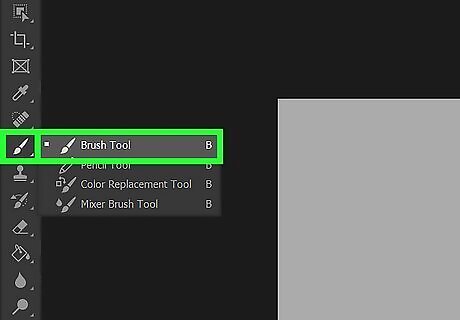
Click on the Brush tool in the toolbar. Look for the paintbrush icon in the main toolbox on the left side of the screen. Alternatively, press B on your keyboard to use the Brush tool. The Brush tool lets you draw your own custom arrow, so it’s best if you want to make it curved or wavy in a fun, casual design.

Create a new layer on your Photoshop project. Click on the “Create a New Layer” button, which looks like a blank sheet of paper, in the Layers panel at the bottom right of the screen. Alternatively, use the keyboard shortcut Shift+Ctrl+N on a Windows computer or Shift+Command+N on a Mac. Creating a new layer separates the arrow from the rest of your work so you can erase or edit it without affecting the rest of your project.
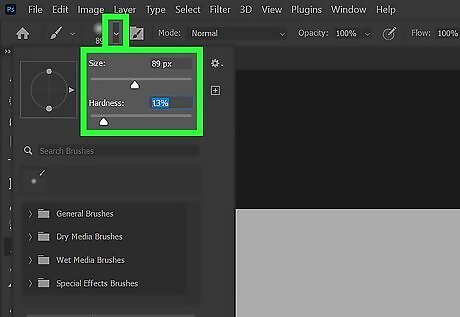
Choose the brush shape, size, and color from the options bar. Click on the square preview window on the left side of the options bar at the top of the screen. Choose one of the brush shapes to draw your arrow depending on how smooth or rough you want the line to be. Use the slider to adjust the size of the brush. Then, click on the colored box and pick the main color for your arrow. Photoshop has tons of brushes already preloaded, but you’re able to install custom brushes for a more unique style.
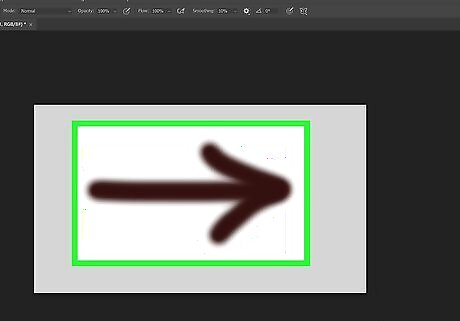
Draw your arrow onto your image. Move your cursor to where you want to start your arrow. Click your mouse and hold the button down to start drawing. Drag the cursor across the screen to draw the main line of your arrow. Then, draw a V-shaped line on one end of your arrow. Drawing your own arrow is the easiest way to make arrows that are curved or have odd shapes.


Comments
0 comment