
- You can use the Razor tool to split a video into two clips. It has an icon that resembles scissors.
- To slice, drag a clip to the timeline and move the playhead where you want to split it. Right-click the playhead and click "Slice." Select how you want to cut the clip.
- Click and drag the right or left edges of a video clip in the timeline to shorten the clip.
Trimming a Clip

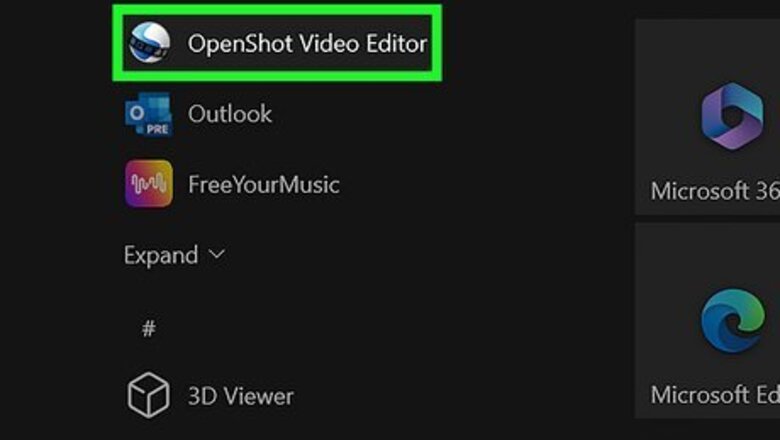
Open Openshot. It has an icon that resembles a blue and silver sphere with a film strip over the front. Click the Openshot icon on the Windows Start menu, the Applications folder on Mac, or the Apps menu on Linux. If you do not have Openshot, you can download it for free from https://www.openshot.org/download/
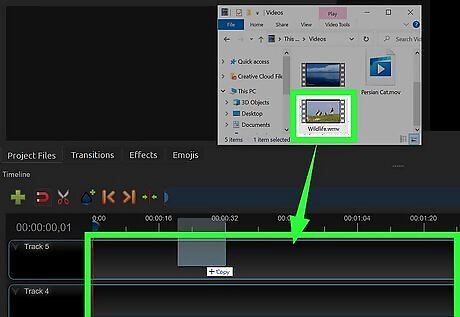
Drag the clip you want to cut into the timeline. The timeline is the long bar with all the tracks at the bottom of the screen. Drag and drop a video file from your computer or from the Project Files window into the timeline at the bottom of the screen.

Click and drag the left or right edges of the video clip. When you hover over the left or right edge of the video clip with the mouse cursor, the cursor will display a double-ended arrow. Click and drag the edge of the clip inward to shorten the clip. As you drag the edge inward, you will see a preview of the beginning or ending point of the video clip in the Preview window.
Using the Razor Tool

Open Openshot. It has an icon that resembles a blue and silver sphere with a film strip over the front. Click the Openshot icon on the Windows Start menu, the Applications folder on Mac, or the Apps menu on Linux. If you do not have Openshot, you can download it for free from https://www.openshot.org/download/

Drag the clip you want to cut into the timeline. The timeline is the long bar with all the tracks at the bottom of the screen. Drag and drop a video file from your computer or from the Project Files window into the timeline at the bottom of the screen.
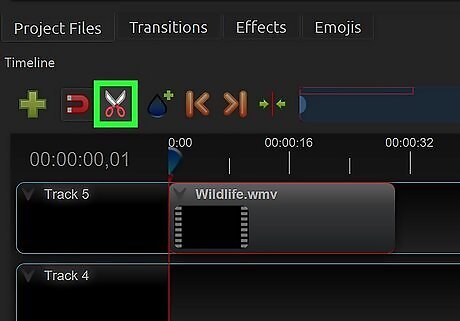
Click the Razor tool. It has an icon that resembles scissors. It's above the timeline on the right side.
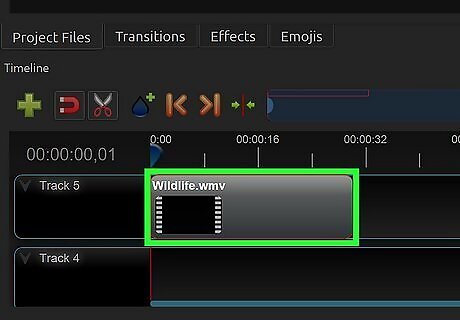
Click where you want to split the clip. Locate the spot where you want to cut the video clip. Click on that location with the Razor Tool. This will split the clip into two separate clips. You can move or delete either of the two clips. The Razor Tools is the quickest and crudest way to cut a video clip in Openshot. To locate different spots of the clip, click and drag the playhead over the clip. It's the red line with a blue bulb on the top. This displays different frames from the clip in the Preview window.
Slicing a Clip
Open Openshot. It has an icon that resembles a blue and silver sphere with a film strip over the front. Click the Openshot icon on the Windows Start menu, the Applications folder on Mac, or the Apps menu on Linux. If you do not have Openshot, you can download it for free from https://www.openshot.org/download/

Drag the clip you want to cut into the timeline. The timeline is the long bar with all the tracks at the bottom of the screen. Drag and drop a video file from your computer or from the Project Files window into the timeline at the bottom of the screen.
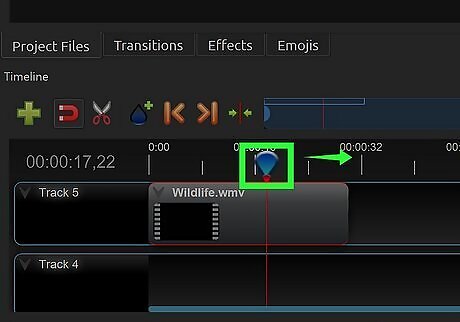
Drag the playhead to where you want to split the clip. The playhead is the red line that has a blue bulb on top. Clicking it and dragging the playhead displays frames from the clip in the Preview window. Drag the playhead to where you want to cut the clip.
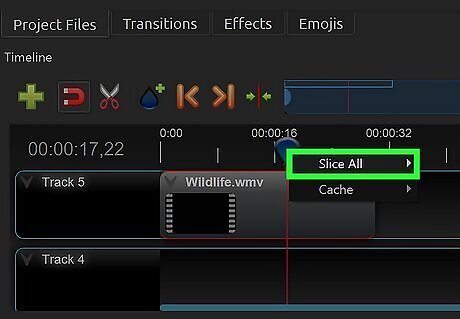
Right-click the playhead and click Slice. You can either click the red line or the blue bulb. This will display a fly-out menu with options for cutting the clip. If you're on a Mac with no right mouse button, Ctrl-click instead. Right-clicking the blue bulb will display the Slice all option. This will split all clips in the timeline at the location of the playhead.

Select how you want to cut the clip. The Slice option has three options for cutting the clip. They are as follows: Keep both sides: This option will split the clip into two separate clips at the playhead. Both clips will remain on the timeline. Keep left side: This option will split the clip into two clips at the playhead and keep the clip before the playhead on the timeline while deleting the clip after the playhead. Keep right side: This option will split the clip into two clips at the playhead and keep the clip after the playhead on the timeline while deleting the clip before the playhead.
Using the Split Clip Preview Tool

Open Openshot. It has an icon that resembles a blue and silver sphere with a film strip over the front. Click the Openshot icon on the Windows Start menu, the Applications folder on Mac, or the Apps menu on Linux. If you do not have Openshot, you can download it for free from https://www.openshot.org/download/

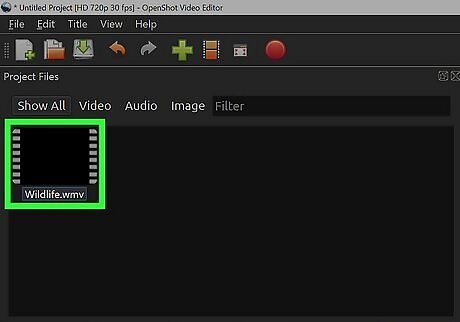
Import a video clip into your project files. You can import video clips, images, and audio files into your project files to be easily accessed as you edit your video project. Use the following steps to import a video clip into your project files: Click File in the menu bar at the top. Click Import Files. Click the video file(s) you want to import. Click Open.
Right-click the video file you want to cut. All imported video files should be in the Project Files window in the upper-left corner. Right-click a video (or ctrl-click on Mac) to display a fly-out menu. If the Project Files window is displaying transitions or effects, click Project Files below the window.
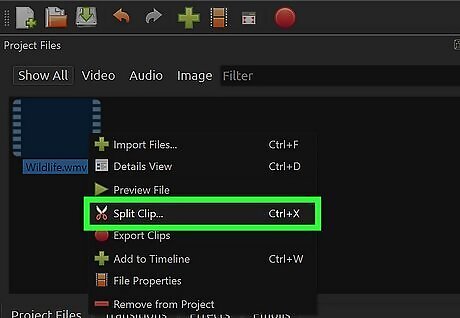
Click Split Clip. It's in the fly-out menu that appears when you right-click (or ctrl-click) a video in the Project Files window. It's next to an icon that resembles scissors.
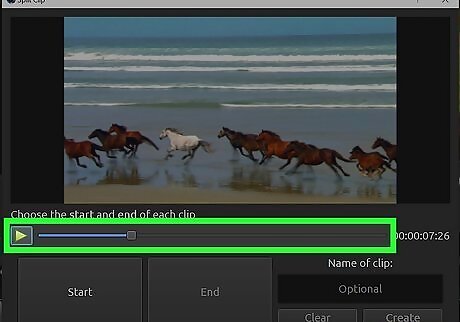
Play the video or drag the slider bar to where you want the video to start. Click the green play triangle to play the video clip. Alternatively, you can drag the slider bar next to the play button to fast-forward through the video clip. Drag the slider bar to where you want the video clip to start. You will see a preview of the video in the Preview window.
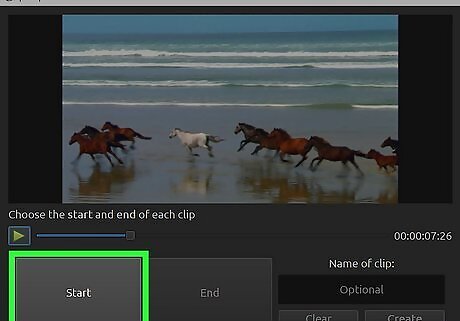
Click Start. It's the first large button below the play button. When you click start, the button will turn into an image thumbnail indicating the start of the clip. This is where the new clip will start.

Drag the slider bar where you want the clip to end. You can either keep playing the clip or drag the slider bar to where you want the video clip to end.
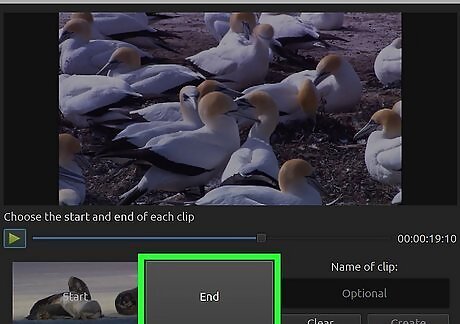
Click End. It's the second large button below the play button and the slider bar. This will display an image thumbnail of where the clip will end over the End button.
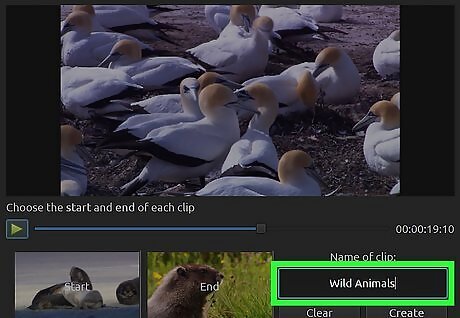
Enter a name for the clip (optional). If you want, you can enter a name for the clip in the lower-right corner below where it says "Name of clip."
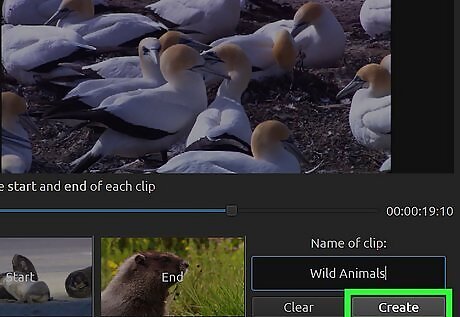
Click Create. It's the button in the lower-right corner below the field where you can enter a clip name. This creates a new clip starting and ending at the points you selected. You can find the new clip in the Project Files window. You can create multiple new clips from the same clip.


Comments
0 comment