
- Make plaster of Paris using 2 parts plaster of Paris powder and 1 part water, stirring until the mixture is smooth and thoroughly blended.
- Alternatively, use 3 cups (360 g) of all-purpose flour and 2 cups (470 mL) of water, or 2 parts white school glue and 1 part water to make plaster.
- Combine your ingredients and stir them together until the mixture is smooth and free of clumps. Add food coloring if your want colored plaster.
- Let the plaster dry for 1 to 2 hours if you used plaster of Paris powder, or wait 2 to 3 days if you used flour or glue.
Using Plaster of Paris Powder

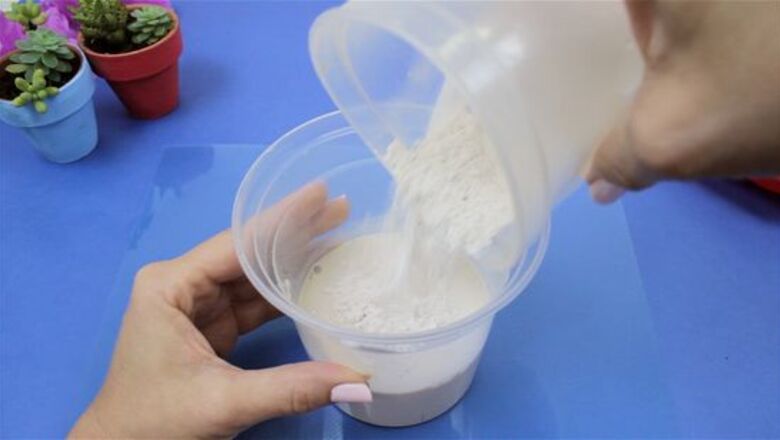
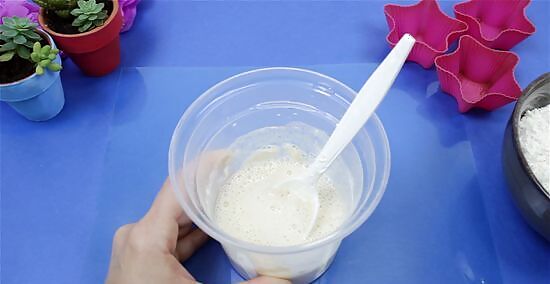
Sprinkle 2 parts plaster of Paris powder into a bowl with 1 part water. The exact amount you use will vary by how much plaster of Paris you need; so long as you stick to a 2:1 ratio with twice as much plaster of Paris powder as there is water, you can successfully make plaster. Start with water in a mixing bowl, and sprinkle the plaster powder in, stirring as you go. Consider using a disposable mixing bowl and disposable spoon (or spatula to mix your plaster, since it’s difficult to wash off of dishes. Tap the sides of your container periodically as you sprinkle in plaster powder. This helps disperse the powder and eliminate air bubbles. Some people prefer to use hot water because it speeds up the drying process. To do this, use a microwave or stove to heat the water to 100 °F (38 °C). However, use room-temperature water if you want to take your time.

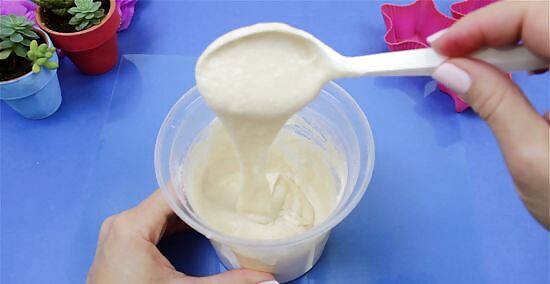
Stir the mixture until it reaches a smooth consistency. The key to making perfect plaster of Paris is ensuring there are no clumps in your wet mixture. Keep stirring the mixture until it is completely blended, with all the water and plaster powder evenly distributed. Try not to stir too vigorously, however; that may actually cause more air bubbles to form in your plaster mix. The exact amount of plaster powder you use can vary by brand, so try stirring and adding plaster until you can see that the powder is not easily absorbed by the water anymore. Wear gloves and an apron while you work to prevent any spills or splashes, and lay down newspaper or a disposable tablecloth where you plan to work. Plaster of Paris powder is made with dehydrated gypsum. Its technical name is calcium sulfate hemihydrate, and it’s designed to harden when exposed to moisture.

Add 1 teaspoon (4.9 mL) of food coloring if you want to color your plaster. You can easily make colored plaster of Paris for any of your colorful DIY crafts. Simply pick a color and add 1 teaspoon (4.9 mL) of the food coloring to your mixture; then, stir it again until the color is completely blended and looks uniformly dispersed across your plaster. Poster paint or acrylic paint can also be used as coloring agents if you have either of them on hand. You can add color to any of the 3 plaster of Paris recipes. Just remember that the best time to add coloring is when the mixture is all stirred but before it’s poured into the molds.
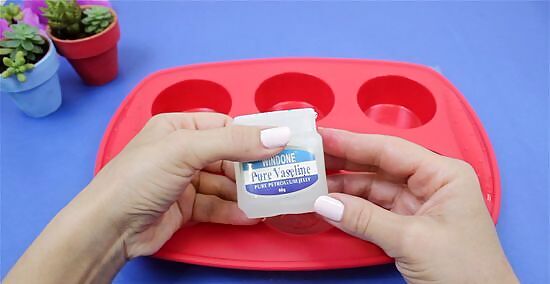
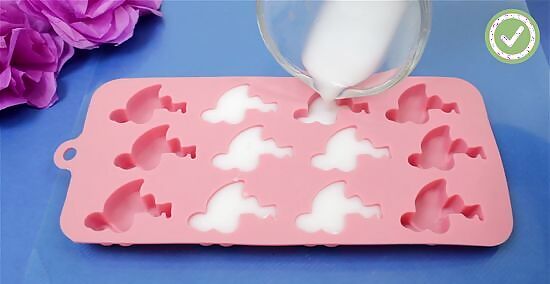
Prepare your plaster mold by coating it with petroleum jelly. Petroleum jelly will prevent any plaster from sticking to your mold, ensuring a clean removal from the mold when the plaster dries. Coat the mold in petroleum jelly before making your plaster of Paris to ensure it’s ready to go when the plaster is ready to pour. Use a non-stick agent even if you’re using a silicone mold. Talcum powder or cornstarch are both suitable for this. Wait 1 day before using a newly-made silicone caulk mold; if you use it sooner, the out-gassing of the silicone might create bubbles in your plaster.
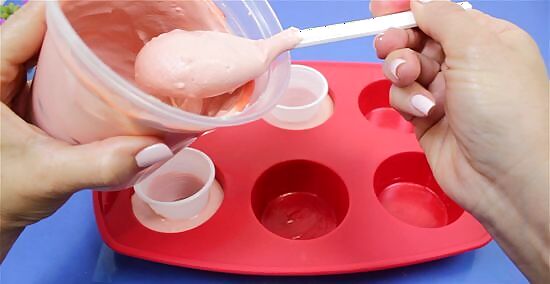
Spoon the plaster mixture into your molds within 10 minutes. Since plaster of Paris dries quickly, try to finish mixing it and pour it into a mold using your disposable spoon quickly. Even around the 10-minute mark, you might notice the mixture hardening slightly, which is why it’s important to work fast. Be sure to wash it off immediately if it comes into contact with your skin. Clean your bowl and mixing utensils immediately after you’re done with them (if you’re not using disposable dishes).
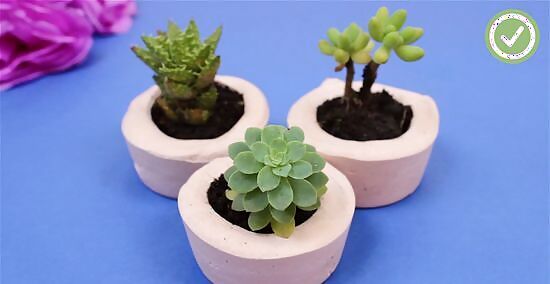
Let the plaster dry for 1 to 2 hours. It typically takes at least 20 to 30 minutes for plaster of Paris to set, but to be safe, wait at least an hour (if not 2) before attempting to remove the plaster from your molds. When it has completely dried, the plaster of Paris will be hard as a rock and feel cool on your hand. Don’t throw any leftover plaster away by washing it down the drain, as it can harden and clog your pipes. The easiest way to deal with leftover plaster of Paris is to let it harden in the mixing container, then throw the scraps away in the trash can.
Using Flour
Mix 3 cups (360 g) of all-purpose flour with 2 cups (470 mL) of water. Pour out all the water you’ll need into a mixing bowl. Then, gradually sprinkle in the all-purpose flour until you’ve added all of it, stirring the mix with a spoon or spatula. Use a disposable plastic spoon if you’re worried about dried plaster sticking to your utensils (which can happen if they aren’t cleaned quickly). You can also heat up your water before doing this, but keep in mind that the same rule applies as before: the warmer your water is, the faster it’ll harden.
Stir the mixture with a spatula until it’s a thick white paste. When you’re done, there should be no lumps in the paste. Your plaster should be dense but not difficult to stir—so if it seems too thick at any point, add more water until you can stir it without any trouble. Similarly, if it seems too runny, simply add more flour until it thickens. Work with the plaster within 10 minutes. You’ll notice the plaster mixture will start to solidify as you work with it, so move on to the next step as soon as you’ve finished stirring it for the best results.

Pour the plaster into your molds and let it sit for 2 days. The plaster may seem to dry within 24 hours, but it will not be completely set through. Allow it to sit at room temperature for at least 2 days to dry. Then, carefully remove the plaster from your mold.
Using Glue
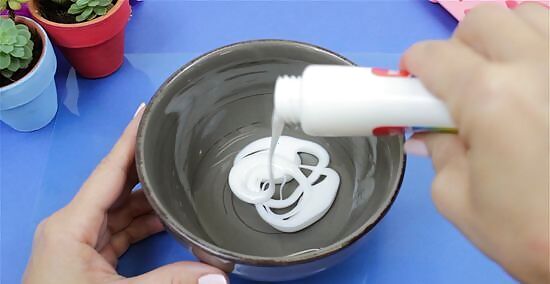
Combine 1 part water and 2 parts white glue in a bowl. Pour the water and white school glue into a mixing bowl and stir them together thoroughly with a spatula. This recipe will work as long as you use twice as much glue as you do water, but if you’re not sure where to start and want to follow a specific recipe, try making plaster 1 cup (240 ml) of water with 2 cups (470 ml) of school glue. Use lukewarm water if you want to speed up the drying process slightly. Otherwise, use regular room-temperature water.
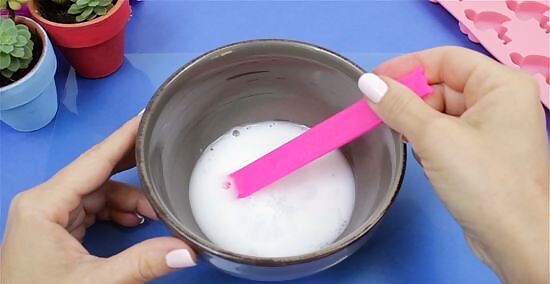
Add small amounts of water until the mixture is smooth and soupy. Stir the mixture and keep adding small splashes of water; the goal here is to create a mixture where the water is evenly distributed and the consistency of your plaster is smooth and medium thick. Try to finish making your plaster within 15 minutes to ensure it doesn’t start drying before you’re ready. Making plaster with wet glue will make it have a slightly longer drying time, but you should still work with it as soon as you finish mixing it!
Pour the mixture into a mold and let it dry for 2 to 3 days. Since plaster with glue takes longer to cure, it may take up to 3 days for the plaster of Paris to completely dry. Keep it at room temperature to ensure the final product dries evenly and thoroughly. When the plaster has finished setting, it should be cool to the touch. Don't use any part of your body as a mold; it’ll be very hard to get that body part out of hardened plaster.


Comments
0 comment