
- You can connect your printer via a USB cable or Wi-Fi.
- When adding printers to your network, you'll need to "Save" your printer in Settings.
- When your printer is connected, you'll be able to print wirelessly.
Connecting the Printer
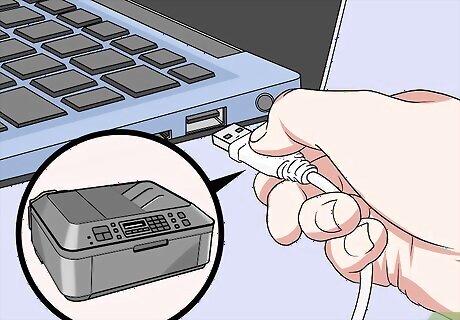
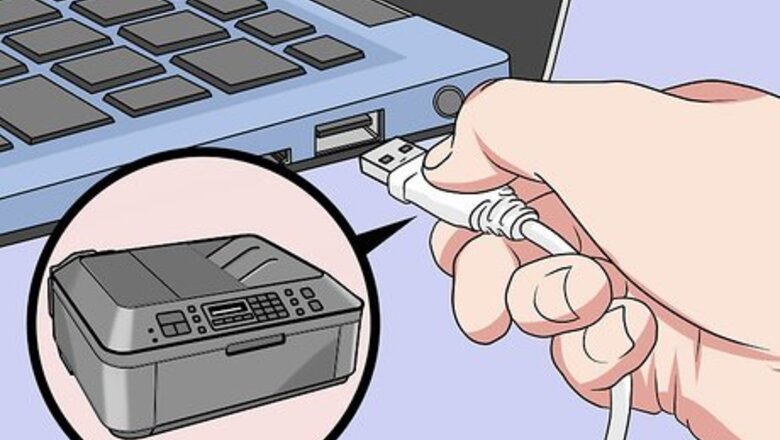
Connect your printer via a USB cable (optional). You can connect a printer to your Chromebook using a USB cable or a Wi-Fi connection. Use a USB connection if your printer can't connect to the internet. Plug one end of the USB cable into your Chromebook, then plug the other end of the cable into the appropriate port on your printer. Some Chromebooks will use a regular USB cable. Newer Chromebook models may require a USB-C cable. If your printer doesn't have a USB-C cable, you may need to use an adapter. Some printers will use a USB-to-USB cable to connect, while others will use a USB-to-printer cable.
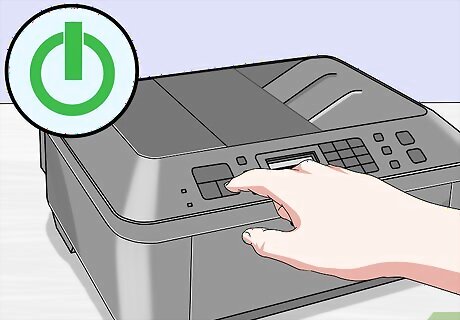
Make sure your printer is plugged in and turned on. In order for you to connect your printer to your Chromebook, it must be plugged into a power source and turned on.

Connect your printer to a wireless network. If your printer isn't already connected to a wireless network, open the printer's menu, select the Wi-Fi network to which you want to connect, and enter the network's password when prompted. Connecting to Wi-Fi will vary from one printer model to the next. Check your printer's manual or online documentation for specific directions on setting up a connection.

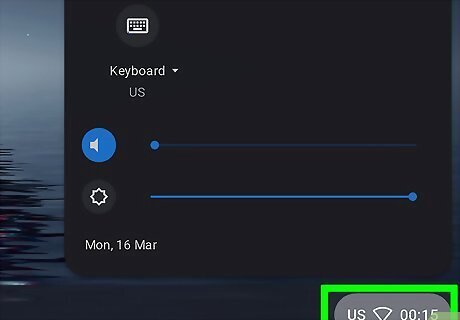
Tap the time section. It's the section with the time in the lower-right corner. This displays a pop-up menu.

Tap the Wi-Fi icon. It's the icon that resembles a dot with arches over it. Tap this icon to open the Wi-Fi menu.
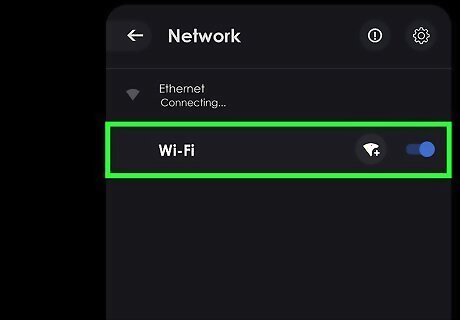
Ensure Wi-Fi is turned on. If you don't see a list of available Wi-Fi networks, tap the toggle switch at the top of the menu to turn on Wi-Fi. Your Chromebook should start scanning for Wi-Fi networks.

Tap the same network your printer is connected to. This displays a password screen for you to enter your Wi-Fi password. Your Chromebook and printer must be connected to the same network in order for you to be able to connect.

Enter the network password. Type in the password you use to log into the Wi-Fi network.

Click Connect. It's below the password text field. Doing so will log you into the network. Now you are ready to connect the printer to your Chromebook.
Adding the Printer
Tap the time area. It's the area with the time in the bottom-right corner of the screen. A pop-up menu will appear.
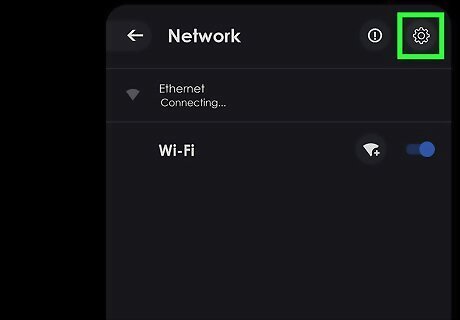
Tap the "Settings" icon Android 7 Settings. It's the icon that resembles a gear. This opens the Settings menu.
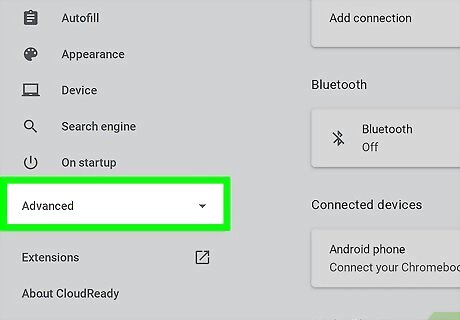
Scroll down and tap Advanced. It's at the bottom of the Settings menu. You may have to scroll down to see this option.

Click Printing. Doing so opens a list of the currently available printers.
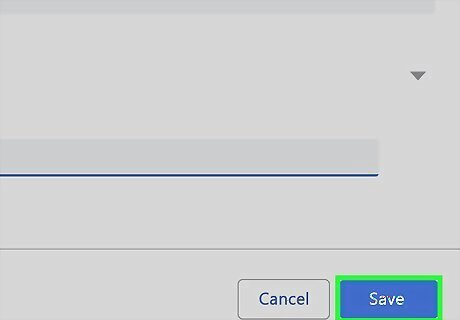
Tap Save next to your printer. You should see your printer listed under "Available printers to save". This adds the printer to your Chromebook. You should see the printer listed under "Saved printers." If your printer isn't available below "Available printers to save", tap the icon with a plus (+) sign next to "Add Printer". Enter a name and the IP address for the printer and tap Add.
Printing Wirelessly
Go to the page or document you want to print. Once your printer is connected, you can print any on-screen item.
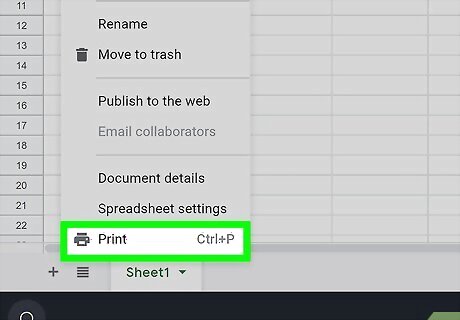
Press Ctrl+P to bring up the "Print" menu. This is the quickest way to open the print menu. Alternatively, you may be able to click an icon that resembles a printer or select Print from the "File" menu.
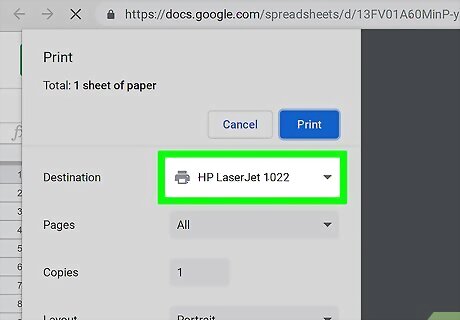
Select a printer. In the "Printer" section of the menu that appears, click the default printer's name and then select your printer from the resulting menu. This is only necessary if the default printer is different than the one you want to use.

Change print settings if necessary. Depending on the page or item you're printing, you may have the option of doing things like printing in color, changing the orientation of the page, and so on. These options will also vary depending on your printer and the app you are printing from.
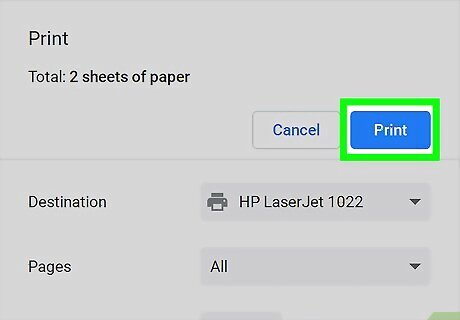
Click Print. It's the blue button at the bottom of the window. Your item should begin printing. On some pages or menus, you may instead click OK.


Comments
0 comment