
X
Expert Source
Guy GabaySolar Energy Contractor
Expert Interview. 4 August 2020.
What’s even better is that you’ll save money on you electric bill. To build your own solar panel, you’ll need to assemble the pieces, connect the cells, build a panel box, wire the panels, seal the box, and then finally mount your completed solar panel.
Assembling the Pieces
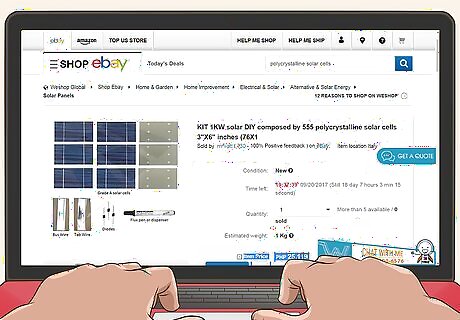
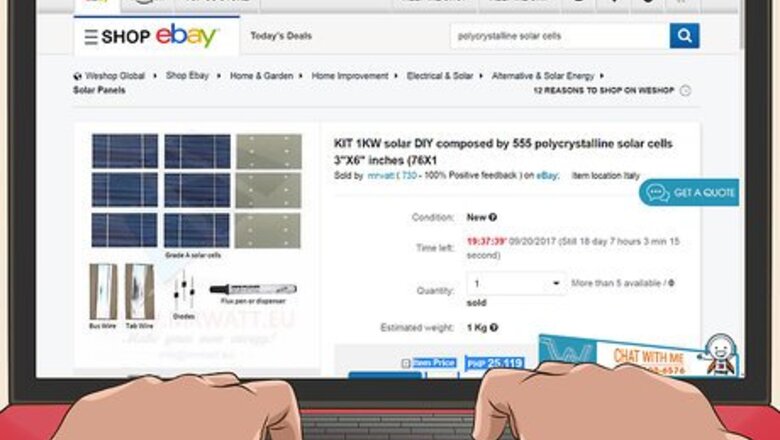
Purchase the cells. There are a few different types of solar cells to buy, and most good options are either made in the United States, China, or Japan. However, the best cost-to-efficiency option is most likely polycrystalline cells. The number of cells you should buy depends on the amount of energy you’re looking to produce. The specs should be listed when you purchase the cells. Make sure to buy extras. These cells are extremely fragile. Cells can most easily be bought online through websites like Ebay, but you may be able to purchase some from your local hardware store. It may be necessary to clean wax off of the cells, if the manufacturer ships them in wax. To do this, dip them in hot, but not boiling, water. Each cell shouldn’t cost more than $1.30 per watt.
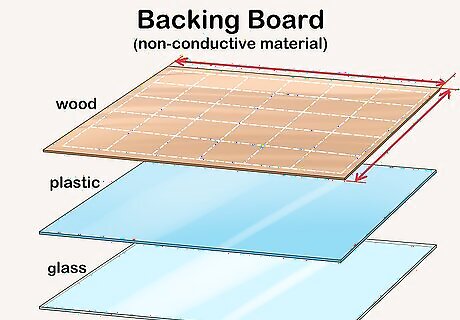
Measure and cut a backing board. You will need a thin board made out of a non-conductive material, such as glass, plastic, or wood, to attach the cells to. Lay out the cells in the arrangement you will use, then measure the dimensions and cut a board to that size. Leave an extra inch or two at both ends of the board. This space will be used for the wires that connect the rows together. Wood is a more common backing material to choose because it’s easier to drill through. You’ll need to drill holes in it for the cell wires to pass through.
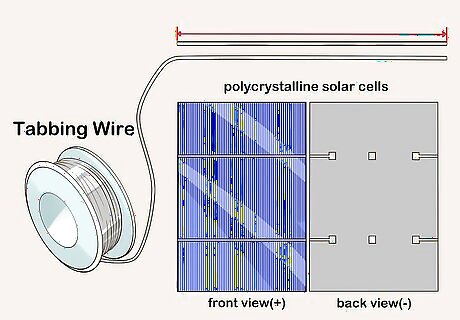
Measure and cut all of your tabbing wire. When you look at your polycrystalline cells, you’ll see a large number of small lines going in one direction (the long distance) and two larger lines going in the other direction (the short distance). You will need to connect tabbing wire to run down the two larger lines and connect to the back of the next cell in the array. Measure the length of that larger line, double the length, and then cut two pieces for each cell.
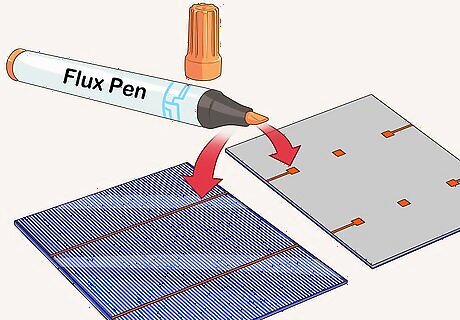
Flux the work area. Using a flux pen, run 2-3 lines of flux down the length of each cell strip, or group of three squares. Make sure to do this on the back of the cells. This will keep the heat of the soldering from causing oxidation.
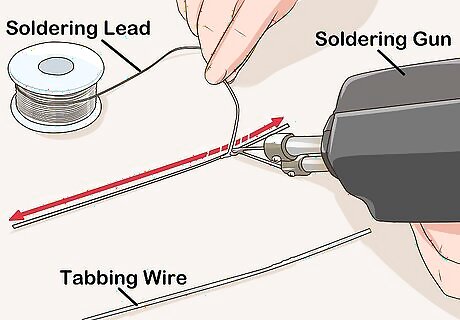
Solder the tabbing. Use a soldering iron to melt a thin coat of solder onto the back of the cell strips. This step is not necessary if you purchase pre-soldered tabbing, which is often a better option because it cuts time in half, heats up the cells only once, and wastes less solder. However, it’s more expensive.
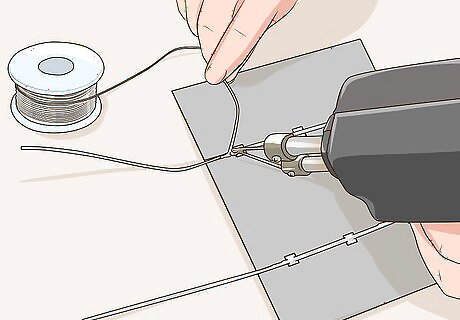
Bond the wire to the cells. Heat the first half of a piece of tabbing wire with a soldering iron. Then bond the wire’s end to a cell. Repeat this bonding process for each cell.
Connecting the Cells
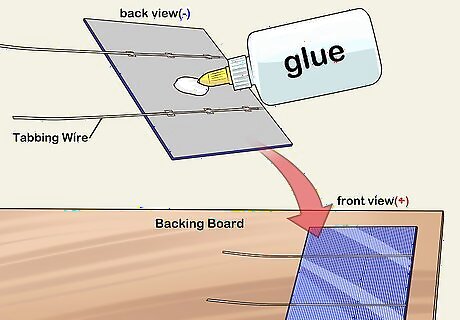
Glue the cells to the board. Put a small amount of glue at the back-center of the cells and then press them into place on the board. The tabbing wire should run in a single, straight line through each row. Make sure the ends of the tabbing wire are coming up between the cells and are free to move, with just the two pieces sticking up between each cell. Keep in mind that one row will have to run in the direction opposite to the one next to it, so that the tabbing wire sticks out at the end of one row and on the opposite side of the next. You should plan to put the cells in long rows, with a fewer number of rows. For example, three rows each consisting of 12 cells placed long side to long side. Remember to leave an extra inch (2.5 cm) at both ends of the board.
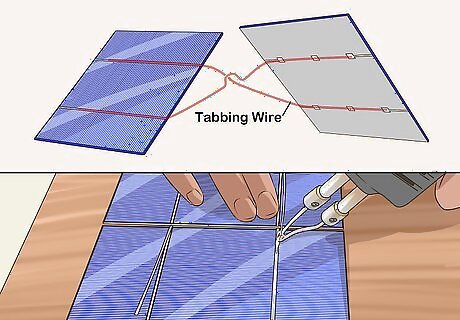
Solder the cells together. Apply flux to the length of the two thick lines (contact pads) on each cell. Then, take the free sections of tabbing wire and solder them to the entire length of the pads. The tabbing wire connected to the back of one cell should connect to the front of the next cell in every case.
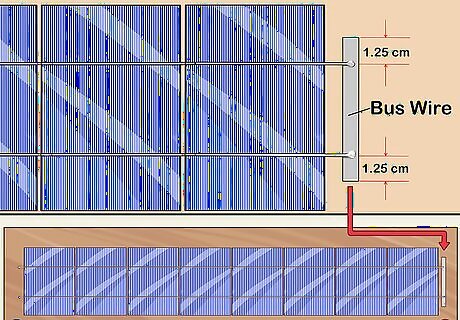
Connect the first row using bus wire. At the beginning of the first row, solder tabbing wire to the front of the first cell. The tabbing wire should be about an inch (2.5 cm) longer than needed to cover the lines, and should extend towards the extra gap on the board. Solder those two wires together with a piece of bus wire that’s the same size as the distance between the thick lines of the cell.
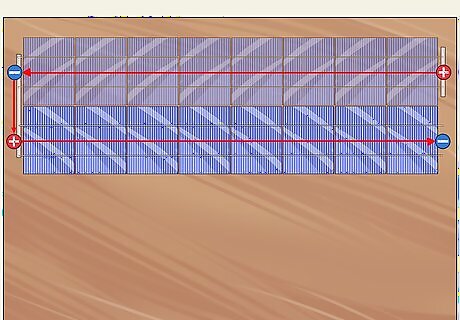
Connect the second row. Connect the end of the first row to the beginning of the second with a long piece of bus wire that extends between the wire at the edge of the panel and the wire that’s the furthest away in the next row. You will need to prepare the first cell of the second row with extra tabbing wire, as you did with the first. Connect all four wires to this bus wire.
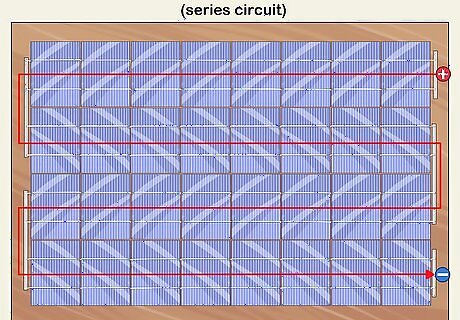
Continue connecting the rest of the rows. Continue connecting the rows with the long bus wires until you reach the end, where you will connect it with a short bus wire again.
Building Your Panel Box
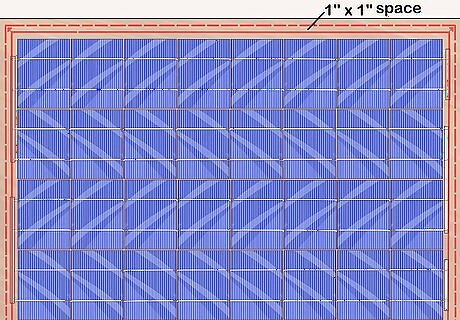
Measure your cell panel. Measure the space taken up by the panel on which you have placed your cells. You will need the box to be at least this big. Add 1 inch (2.5 cm) to every side, to allow space for the sides of the box. If there will not be a free 1 inch by 1 inch (2.5 cm x 2.5 cm) square spot at each corner after adding the panel, also leave room for this. Make sure that there is enough space for the bus wires at the end as well.
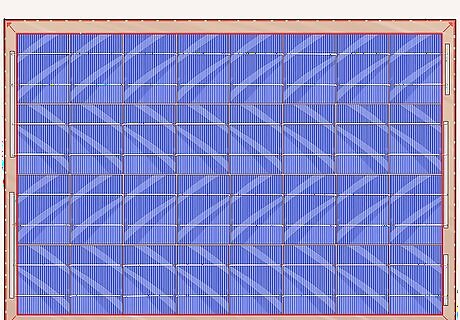
Cut the flat back. Cut a piece of plywood to the size you measured in the previous step, plus the space for the box sides. You can use a table saw or jigsaw, depending on what you have available.
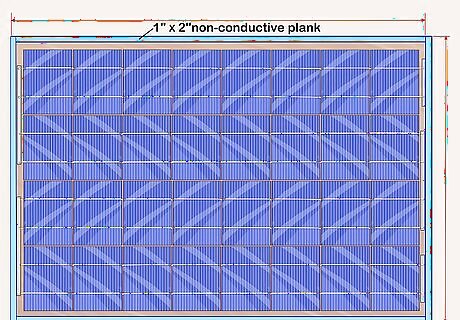
Form the sides. Measure two 1 inch by 2 inch (2.5 cm x 5 cm) pieces of non-conductive plank to the length of the long sides of the base of the box. Then, measure two more 1 inch by 2 inch (2.5 cm x 5 cm) planks to fit between these long pieces, completing the box. Cut these pieces you have measured and secure them together using deck screws and butt joints. It’s important that the sides aren’t too tall because then they may shade the cells when the sun is coming from a sharp angle.

Attach the sides. Using deck screws, screw through the top of the sides and into the base to secure the sides to the bottom of the box. The number of screws you use per side will depend on the length of the sides, but no matter the length, you shouldn’t use less than three.
Paint the box. You can paint the box whatever color you prefer. Consider using white or reflective colors since this will keep the box cooler, and cells perform better when they are cool. Your panel will last longer if you use paint designed for outdoor use. This type of paint will help protect the wood from the elements.
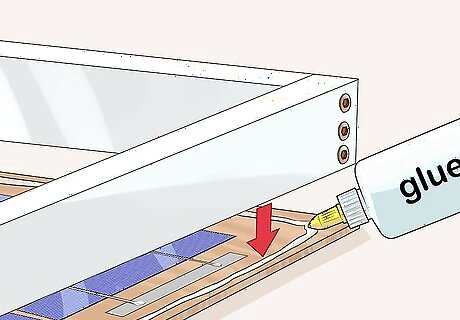
Attach the solar unit to the box. Glue the solar unit to the completed box. Make sure that it is secure and that the cells are facing up and can get sunlight. There should also be two holes in the panel for the ends of the bus wire to go through.
Wiring Your Panel
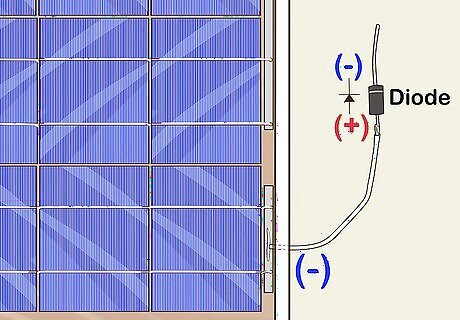
Connect the final bus wire to a diode. Get a diode a little bigger than the amperage of your panel and connect it to the bus wire, securing it with some silicone. The light colored end of the diode should be pointing towards where the negative end of the battery goes. The other end should be wired to the negative end of your panel. This prevents energy from travelling back through the solar panel from the battery when it isn’t charging.
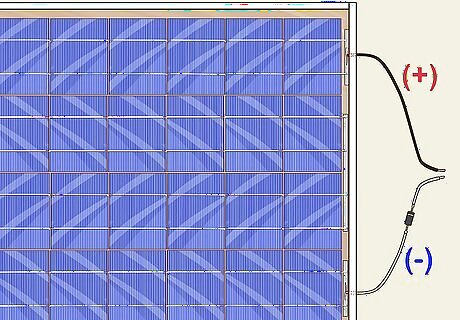
Connect the other wires. Connect a black wire to the diode and run it to a terminal block which you will need to mount on the side of the box. Then connect a white wire from the short bus wire on the opposite side to the terminal block.
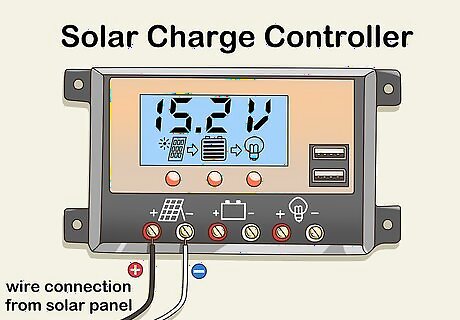
Connect your panel to a charge controller. Purchase a charge controller and connect the panel to the controller, making sure to connect the positive and negative correctly. Run the wires from the terminal block to the charge controller, using color coded wire to keep track of the charges. If using more than one panel, you might want to connect all of the positive and negative wires together using rings, to make sure you end up with two wires.
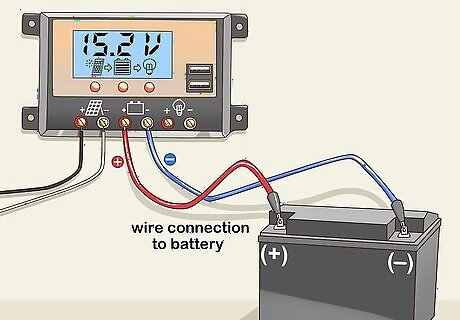
Connect the charge controller to your batteries. Buy batteries which will work with the size of the panels you built. Connect the charge controller to the batteries according to the manufacturer’s instructions.
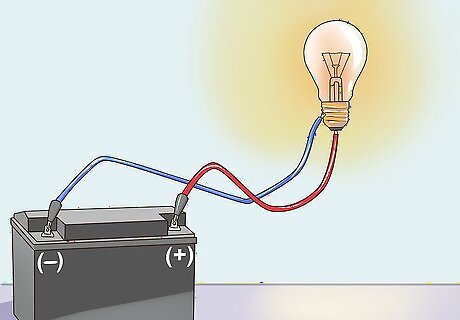
Use the batteries. Once you have the batteries connected and charged from the panel or panels, you can run your electronics off of the batteries, depending on the amount of power you need for them.
Sealing the Box
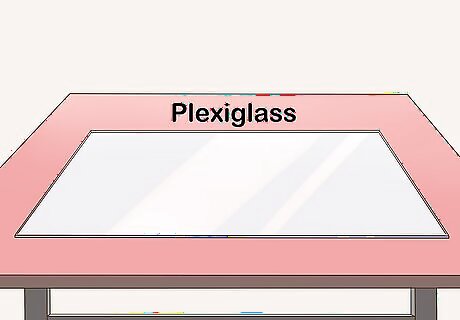
Get a piece of plexiglass. Purchase a piece of plexiglass that is cut to fit inside the box that you made for your panel. You can get this from a specialty shop or from your local hardware store. Make sure you get plexiglass and not glass, as glass is prone to breaking or chipping.
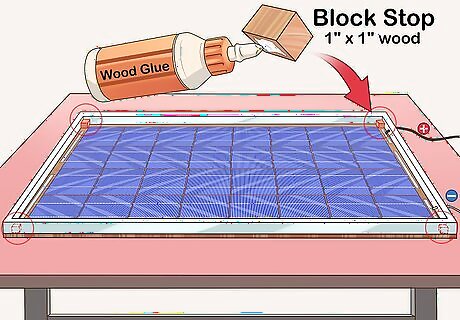
Attach block stops for the glass. Cut 1 inch by 1 inch (2.5 cm x 2.5 cm) blocks of wood to fit into the corners. These should be high enough to fit above the terminal block but low enough to fit below the lip of the box. Glue these stops into place using wood glue.
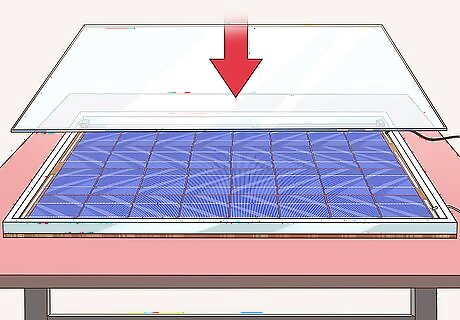
Insert your plexiglass. Fit the plexiglass onto the box so that the glass rests on top of the blocks. Using the appropriate screws and a drill, carefully screw the plexiglass into the blocks.
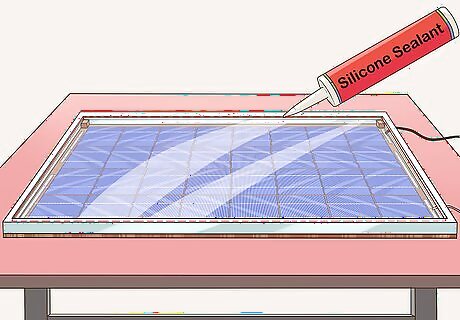
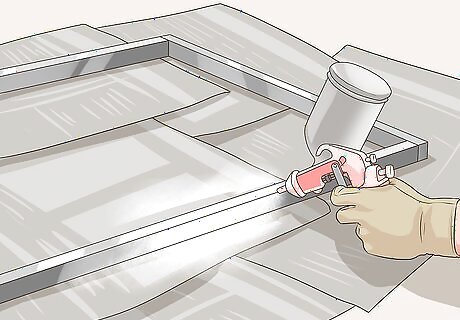
Seal the box. Use a silicone sealant to seal the edges of the box. Also seal any gaps you can find so that box is as watertight as possible. Use the manufacturer’s instructions to properly apply the sealant.
Mounting Your Panels
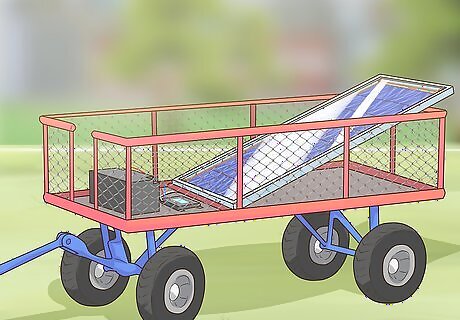
Mount your panels on a cart. One option would be to build and mount your panels on a cart. This would place the panel at an angle but allow you to change which direction the panel faces in order to increase the amount of sun it gets in a day. This will, however, require you to adjust the panel 2-3 times a day.
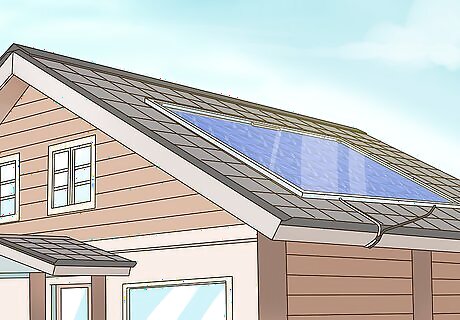
Mount your panels on your roof. This is a popular way to mount the panels because they tend to receive the most sunlight and are out of the way. However, the angle will need to be consistent with the sun’s path and your peak load time. This will limit you to only getting full exposure at certain times of day. This option is best if you have a large number of panels and very little ground space to place them on.
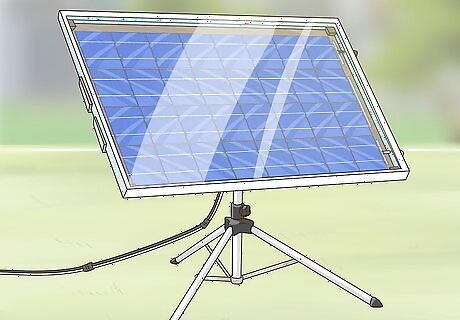
Mount your panels on a satellite stand. The stands usually used to mount satellite dishes can also be used to mount solar panels. They can even be programmed to move with the sun. However, this option will only work if you have a very small number of solar panels.


Comments
0 comment