
- Use an HDMI cable with an adapter or use a Thunderbolt cord to connect your Mac to your TV with a cable.
- Thunderbolt 4 and 3 both refer to USB-C, whereas Thunderbolt 1 and 2 are an older port-type.
- Connect your Mac and Apple TV to the same network and use your Mac's Control Center to connect the two displays via AirPlay.
- Use the Displays section of your System Settings to adjust the resolution, size, and audio of your projected screen.
Using a Cable

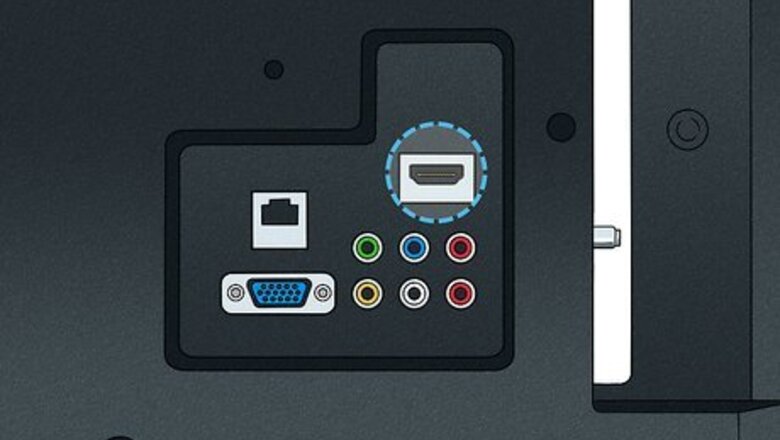
Find your TV's HDMI input. While TVs can use a variety of video inputs, HDMI is the most commonly used one for high-definition televisions. You'll have the best results using the HDMI input on your TV when connecting to your Mac. The HDMI port is usually on the back or the side of the TV. Most modern HDTVs have at least two HDMI ports. If your TV doesn't support HDMI, you'll need to figure out which input your TV uses for video and then buy an adapter once you know which output your Mac uses.

Determine your Mac's video output. Macs manufactured in the last 8 years will output both video and audio through one of the following ports: Thunderbolt 4 — Oval port (also known as USB-C) found on the backs of recent iMac computers and on all recent models of MacBook. If your Mac has a Thunderbolt 4 port, you'll need a USB-C to HDMI cable. Thunderbolt 4 is just a faster version of Thunderbolt 3, so Macs with either port can use the same USB-C to HDMI cable. Thunderbolt 2 — Squared-off port found on most older Mac computers. If your Mac has a Thunderbolt 2 port, you'll need a Thunderbolt 2 to HDMI cable (or a Thunderbolt 2 to HDMI adapter and an HDMI cable). If your Mac is old enough to have a Thunderbolt 1 port, Thunderbolt 2 cables should still be compatible with it. Mini DisplayPort — Before Thunderbolt came to replace it, Mini DisplayPort was Apple's most common form of video projection. The port is identical in shape to Thunderbolt 1 or 2. To use Mini DisplayPort with your TV, you'll need a Mini DisplayPort to HDMI connector (or a Mini DisplayPort to HDMI adapter and an HDMI cable). Mini DisplayPort replaced DVI on most Macs, so any computer older than 2008 will likely feature a DVI port. HDMI — Found on older MacBook computers, or on the newest Mac Studio desktop. If your Mac has an HDMI port, you can use a standard HDMI cable to connect your Mac to your TV.

Buy the correct cable for your Mac. You can buy standard HDMI cables in most retail stores that have tech departments, but you may want to visit a tech store (or shop online) for a USB-C to HDMI cable or a Thunderbolt 2 to HDMI cable. Best Buy and Amazon are two of the most commonly used options for buying non-standard cables. If you have to buy an adapter because your TV doesn't support HDMI, look for a [Mac output] to [TV input] adapter (e.g., "USB-C to VGA" or "Thunderbolt 2 to VGA") along with an audio to RCA cable to connect audio to your TV. You most likely won't be able to find an RCA (component cable) adapter. HDMI, Thunderbolt 2, Thunderbolt 3, and Thunderbolt 4 cables (and their adapters) all support audio.
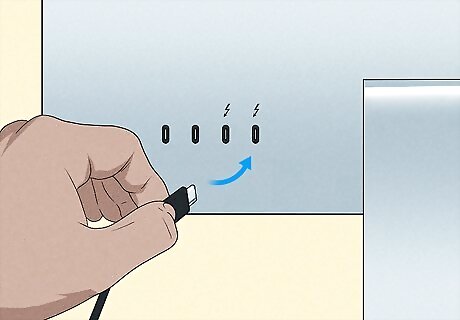
Plug one end of your cable into your Mac. If you're not using a traditional HDMI cable, this will be the non-HDMI end of the cable. If you are using an HDMI cable, you can plug either end of it into the Mac. If you're using a non-HDMI adapter on the TV side of your Mac, you'll also need to plug the single end of the auxiliary cable into your Mac's headphone jack.
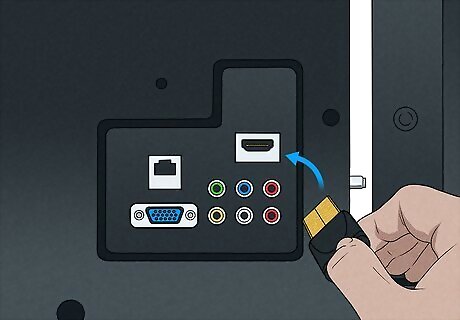
Plug the HDMI end of the cable into your TV. The HDMI portion of the cable should plug into the HDMI port on the side or back of your TV. The cable only plugs in one way, so don't force it. If you're using a non-HDMI cable to connect to your TV, plug the end of the cable into your preferred input instead, then attach the audio cable's red and white inputs to the red and white ports on your TV, respectively.

Turn on your TV. Press your TV's "Power" Windows Power button to turn it on.
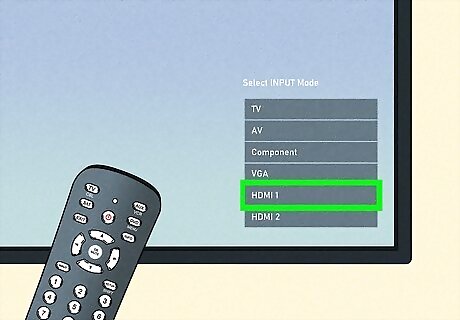
Change your TV's input to the HDMI input. Press the Input button on your TV, or use the remote to select the HDMI input. This step will vary depending on the appearance of your TV and its remote. For example, if the slot you plugged the HDMI cable into was labeled "HDMI 3", you would change your TV's input to HDMI 3.

Wait for your Mac's screen to appear on the TV. As long as your Mac is on, you should see its screen appear on the TV within a few seconds of changing the input. If not, you may need to change your Mac's display and sound settings.
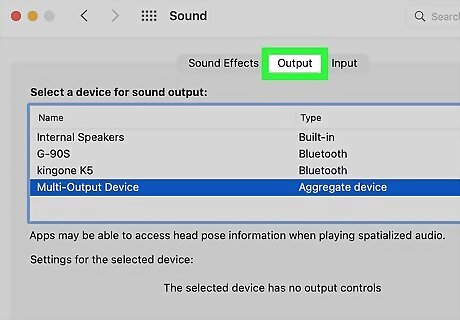
Double-check your Audio settings. If you require your computer's audio to come through your TV, this may work automatically. If not, navigate to System Settings > Sound > Output. Make sure your TV is selected as the audio output.
Using AirPlay

Set up your Apple TV. In order to use AirPlay Mirroring, you'll need either an Apple TV device or an Airplay-enabled streaming device. This could include a wide variety of smart TVs, as well as several Roku devices. Click here for a full list of Airplay-enabled devices.
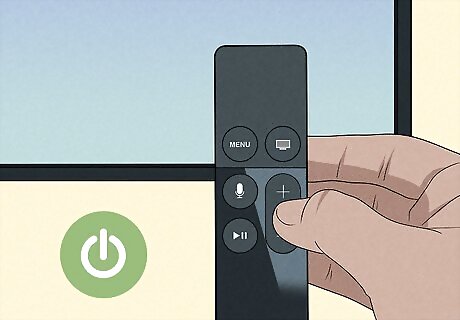
Turn on your Apple TV. Press your TV's Power button Windows Power, then press any button on the Apple TV remote. If your TV isn't using the Apple TV's input (e.g., HDMI 1), you'll first need to switch to that input before you can view the Apple TV's display. If you're using an AirPlay-compatible smart TV, simply turn on the TV.
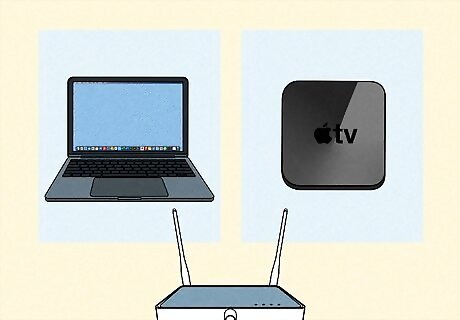
Connect your Mac to the same network as the Apple TV. Both your Mac and your streaming device/smart TV must be connected to the same Wi-Fi network before you can mirror your Mac's screen to your TV. You can find the name of your Apple TV's current network by opening Settings on the Apple TV, selecting Network, and looking at the current Wi-Fi name. Consult with your smart TV's manufacturer's guide if you have trouble finding the network settings, or check out this wikiHow article for updating your Roku's Wi-Fi settings.
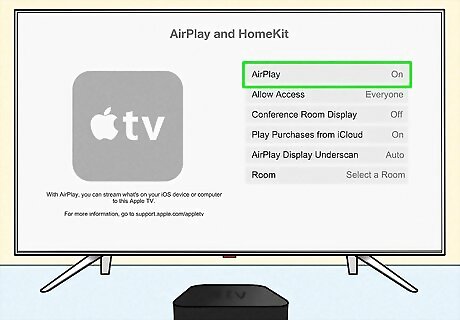
Enable AirPlay on your Apple TV or smart TV. There is usually no need to enable AirPlay on a compatible third-party device, but your Apple TV may not have the setting enabled by default. Ensure that it's set up by doing the following: Open your Apple TV's Settings Select AirPlay Select AirPlay at the top of the screen. Select Everyone in the menu. EXPERT TIP Chiara Corsaro Chiara Corsaro Computer Specialist Chiara Corsaro is the General Manager and Apple Certified Mac & iOS Technician for macVolks, Inc., an Apple Authorized Service Provider located in the San Francisco Bay Area. macVolks, Inc. was founded in 1990, is accredited by the Better Business Bureau (BBB) with an A+ rating, and is part of the Apple Consultants Network (ACN). Chiara Corsaro Chiara Corsaro Computer Specialist Our Expert Agrees: With AirPlay, you can stream and share content from your Apple computer or any compatible iOS device to your AppleTV or an AirPlay2-compatible smart TV.
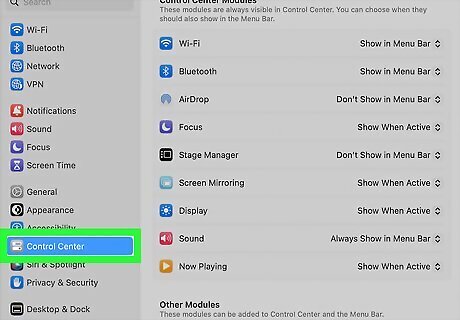
Navigate to the Control Center on your Mac. Click the Apple menu Mac Apple logo in the top-left corner. Tap System Settings, then click Control Center.
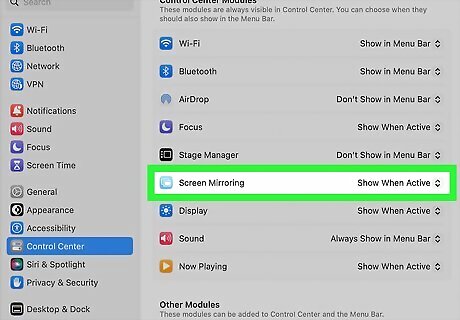
Click the Screen Mirroring icon. It is represented by two overlapping rectangles.

Click on your device's name. If your Mac and your smart TV/streaming device are on the same network, you should see the device listed here. Click on its name to connect to it. You may be prompted to enter a matching code to what appears on your TV. You should now see your Mac's display on your TV. If you want to extend your screen as opposed to mirroring it, click the Screen Mirroring icon again and choose "Use As Separate Display".
Changing Display and Sound Settings

Open your Mac's Apple menu Mac Apple. Click the Apple logo in the top-left corner of the screen.

Click System Settings. It's near the top of the Apple drop-down menu.
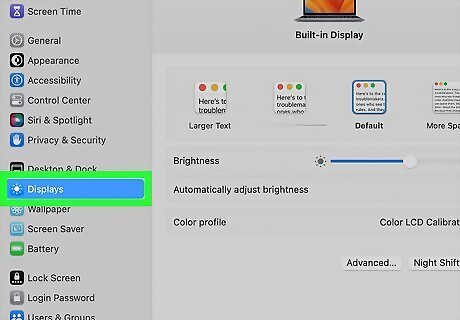
Click Displays. This monitor-shaped icon is in the System Settings window. Clicking it opens the Displays window.
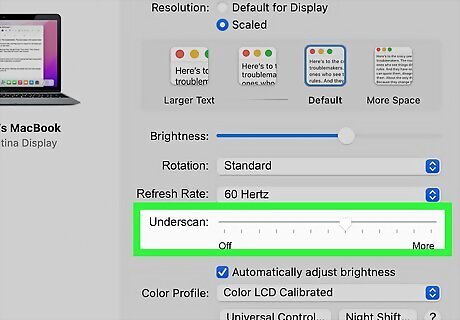
Change the "Underscan" value. Click and drag the "Underscan" slider at the bottom of the page right to zoom your TV's display in, or left to zoom out. This will help resize the image on your TV.
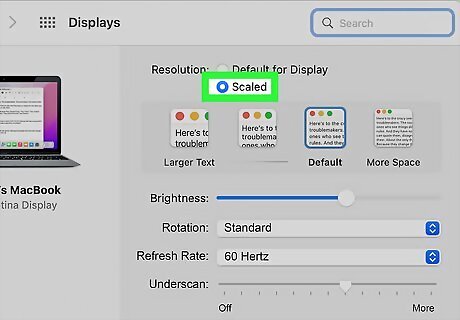
Change your TV's resolution. Click the "Scaled" checkbox, then select a resolution (e.g., 1080p). You cannot set a resolution that's higher than your TV's maximum resolution.
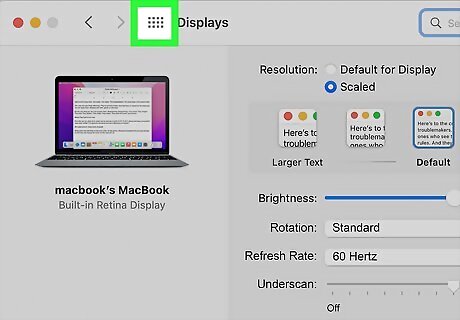
Click ⋮⋮⋮⋮. It's in the top-left corner of the window. This will take you back to the System Settings page.
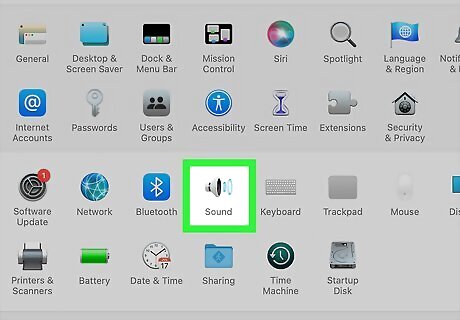
Click Sound. This icon resembles a silver speaker. To get a better sense of the audio quality, you can even connect your AirPods to your Apple TV!
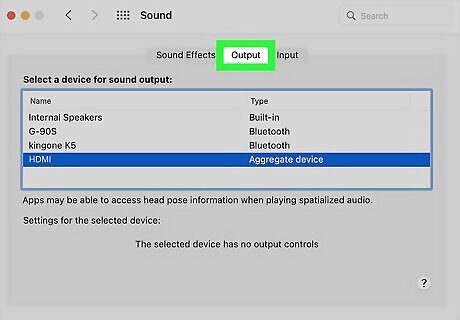
Click the Output tab. It's at the top of the Sound window.

Select the HDMI option. Click your TV's name or the word HDMI in the menu at the top of the page. This will ensure that your Mac outputs audio through your TV's speakers, not its own. Your TV should now be all set up to display your Mac's audio and video.


Comments
0 comment