
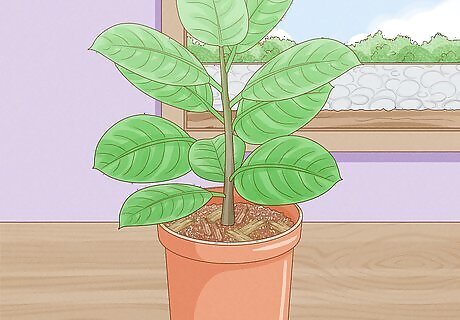
Preparing an Indoor Pot or Outdoor Plot
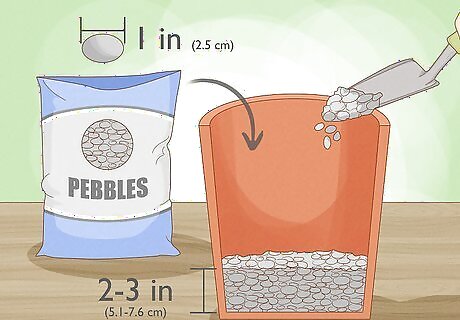
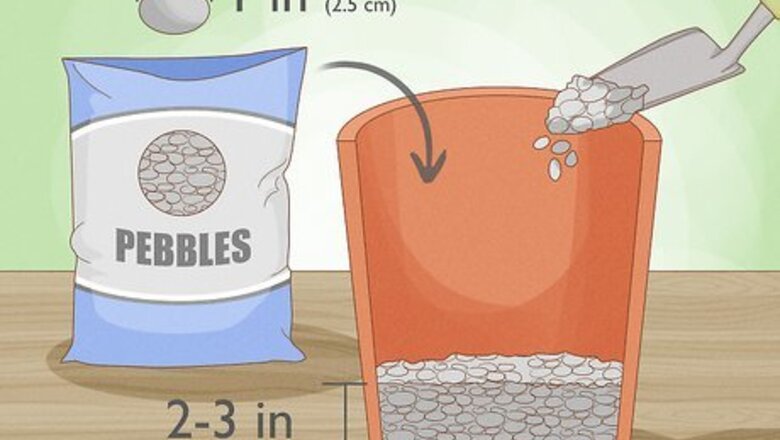
Place small pebbles in the bottom of a pot for drainage. The pebbles should be about 1 inch (2.5 cm) big in diameter. The layer of pebbles should cover 2 to 3 inches (5.1 to 7.6 cm) in the bottom of your pot. You can find these at most gardening centers. This plant likes well-drained soil, and the pebbles will help with that.
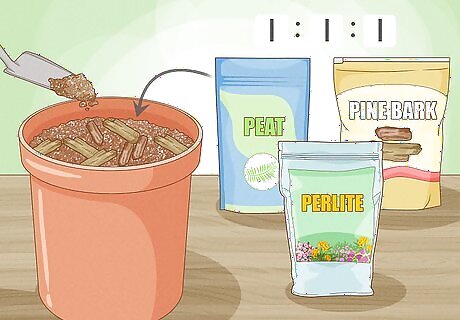
Give the rubber tree a well-draining soil. This plant also prefers a soil that is aerated. The soil should be 1 part peat, 1 part pine bark, and 1 part sand or perlite. You should be able to buy all of these ingredients at your local gardening store. If you don't want to make your own mix, look for a potting soil that has the same ratio, or one meant for foliage plants. Outside, the plant will do well in most soils, though a slightly acidic soil may be best.
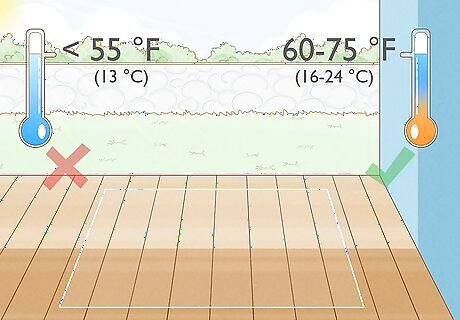
Pick a warm spot in your home for the plant. This plant thrives in temperatures of 60 to 75 °F (16 to 24 °C), so pick a temperate corner for your plant. It doesn't do well with the cold, so try to pick an area that isn't susceptible to drafts. Don't go below 55 °F (13 °C) for this plant.
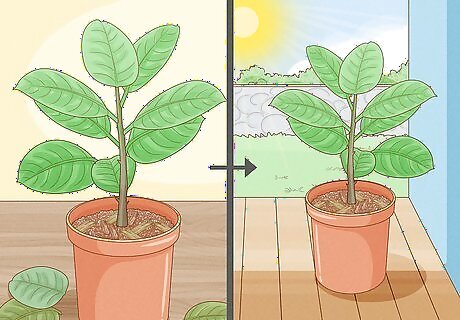
Place the rubber tree in an area with indirect sunlight. Direct sunlight is usually too much for this plant. Instead, stick it near a window that has a sheer curtain. That way, it still gets sunlight but not too much sunlight. Outside, try it in a shady area, where it will still get indirect light. You could also place it in a room that gets a lot of ambient sunlight without it directly hitting the plant. EXPERT TIP Maggie Moran Maggie Moran Home & Garden Specialist Maggie Moran is a Professional Gardener in Pennsylvania. Maggie Moran Maggie Moran Home & Garden Specialist Strike a balance between sunlight and shade for a healthy rubber tree. Horticulturalist Maggie Moran explains, “A rubber tree requires an equal amount of both sunlight and shade. Plant your tree in a location that has these conditions for best results.”
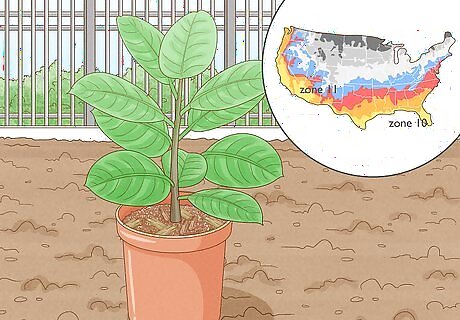
Grow in temperate climates when placing the tree outdoors. In the United States, this plant grows best in hardiness zones 10 and 11. It can grow in zone 9 if you provide it with some wind protection with a wall. It will not tolerate temperatures below freezing or above 115 °F (46 °C). You can find a map of US hardiness zones at http://planthardiness.ars.usda.gov/PHZMWeb/.
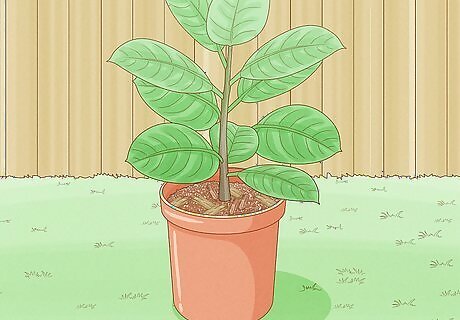
Pick a protected location for outdoor trees. Rubber trees need to be protected from the wind. Place it near a wall to protect it. For the most protection, determine the direction the wind in your area commonly blows, and place it so it is blocked from that wind. For instance, in the southern areas of the US, the wind typically blows from the south or west, so place the tree on the north or east side of the building.
Starting from Stem Cuts or Seeds
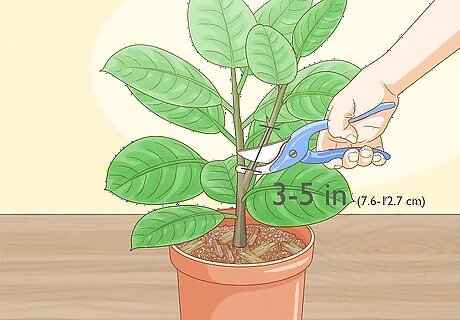
Take a stem cutting from another plant. While you can simply buy a rubber plant from a gardening store, you can also start a plant from a stem cutting. Make a slanted cut below a node on the stem with a sterile knife. You'll need at least 3 to 5 inches (7.6 to 12.7 cm) of stem with 2 to 3 nodes on it. The node is where the leaves attach to the stem. Wear gloves to work with this plant, as the sap can affect your skin. To sterilize a sharp knife, place it in a mixture of 1 part bleach and 3 parts water. Let it sit for 5 minutes.
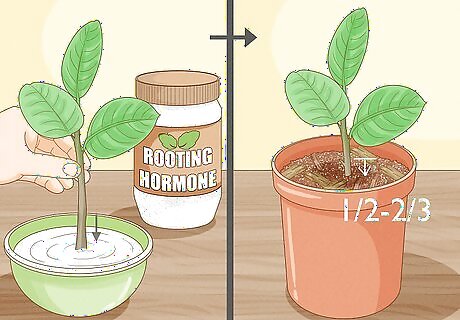
Plant the stem cutting in rooting medium. Add rooting medium like perlite to a small pot. Plant the stem 1/2-2/3 of the way into a hole with all the leaves above the soil. Water it until it's moist and cover it with clear plastic. Once the roots have reached 1 to 2 inches (2.5 to 5.1 cm), you can move it to regular potting soil and a bigger pot.
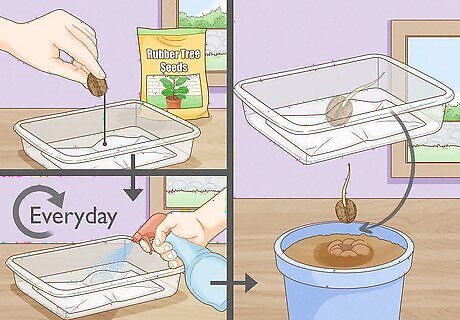
Sprout a plant from seed instead of from a stem cutting. Place a seed in a small tray. Set a piece of thin cloth or paper towel over it and mist it to several times a day to keep the seed wet. Place it in an area with indirect light. The seed should sprout in about a week, after which you can move it to a small pot to grow. Wait until the seed has roots before you move it. Be very gentle with it, as seedlings are fragile.
Watering and Fertilizing a Rubber Tree
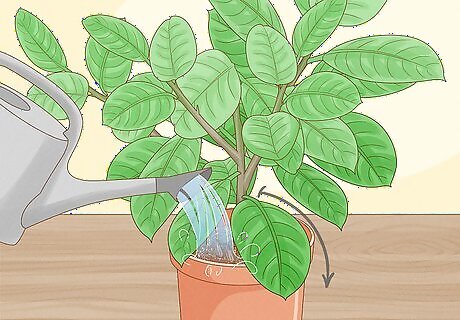
Watch for droopy leaves to tell you when to water the plant. In the summer, which is the plant's growing season, water once or twice a week. During the winter, you might only need to give it water a couple of times a month. You can also check the soil by sticking your finger in it to see if it's moist. If it's dry, add water. Give it lukewarm water. Let water come to room temperature if it's cold from the tap. That also lets the chlorine evaporate. Cold water can be shocking to the plant.
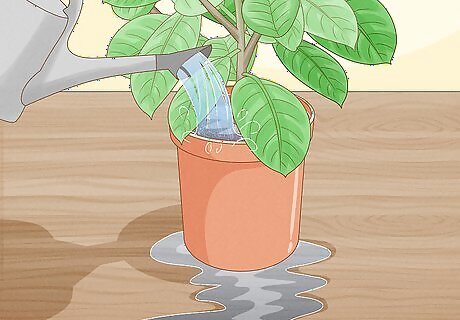
Provide enough water that it runs out of the bottom. If you're soil drains well enough, you don't have to worry about over watering the plant in one watering session. To make sure your plant gets enough water for its roots, add enough that it seeps out of the bottom into the drip tray or base. Outside, give the plant a good 5-minute soaking if conditions have been dry and the leaves are drooping.
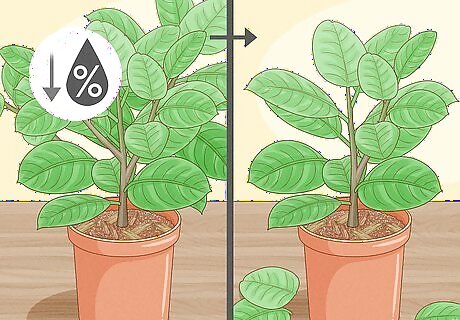
Mist the leaves when humidity is low indoors or outside. If the air feels dry to you, it likely feels dry to your rubber plant. Typically, anything below 50% humidity is low for a plant. Mist the plant gently with water once a day to help keep it happy. Use lukewarm water on your plant.
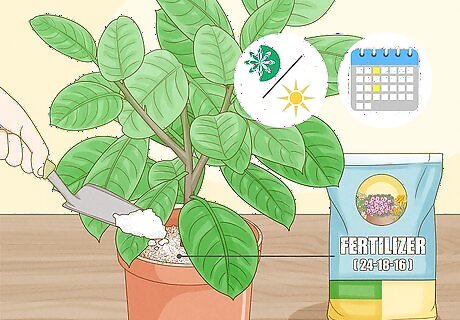
Give your plant fertilizer every 2 weeks in the spring or early summer. Only give the plant fertilizer during the growing season. You can use houseplant fertilizer; just dilute it with water until it's half strength. Try a typical 24-8-16 fertilizer, which refers to the mixture of nitrogen, phosphate, and potash, respectively. Mix ⁄4 teaspoon (1.2 ml) with 1 gallon (3.8 L) of water. Water the plant as you normally would with this fertilizer.
Providing Additional Plant Care
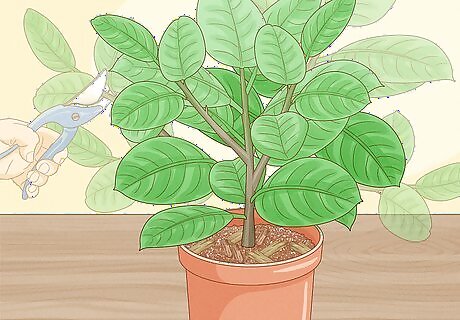
Prune to create the shape you want indoors. If your rubber plant is at the height you like, use hedge shears to cut off the top of the plant. It will then branch out instead of growing up. You can also trim off branches to create a shape you like. When these plants are pruned, they'll drip sap, so put something down to protect your floors. The sap can also irritate your skin, so avoid it or wear gloves. These plants can grow to 10 to 12 feet (3.0 to 3.7 m) indoors, so make sure you trim it when you want it to stop growing. You can also prune outdoor trees this way to help keep them an acceptable height. It's best prune during the spring and summer, but you can do it anytime of year. You can prune off dead or dying leaves as they appear on the plant.
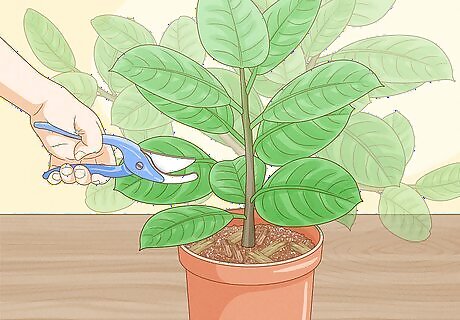
Prune to a single stem outside. If you leave 2 or more stems growing outside, it may split down the middle from the wind, killing the tree. Therefore, in the first couple years of its life, prune the tree by leaving only the hardiest stem with the most leaves. Use pruning shears or a hand saw to cut the other stems down to the ground.
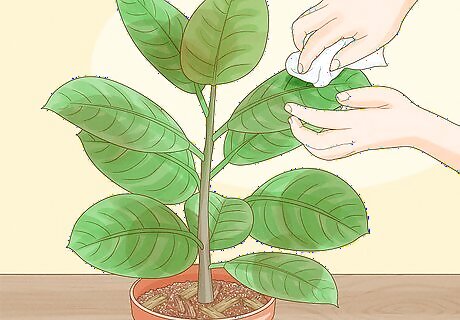
Wipe down dusty leaves on indoor plants with a soft cloth. Like anything indoors, your plant will get dusty from time to time. Use lukewarm water and a very soft cloth to gently wipe down each leaf. The water is actually good for your plant, but don't use any cleaning product on it, as your plant will not enjoy that.
Look for dull leaves and the bottom leaves falling off on indoor plants. These signs indicate the tree isn't getting enough sunlight. Re-situate the plant somewhere so it can get more light, where it should return to its former glory. You may also notice the plant becomes leggy. Leggy just means the plant is stretching its stem out too to reach the light, making it look long and straggly.
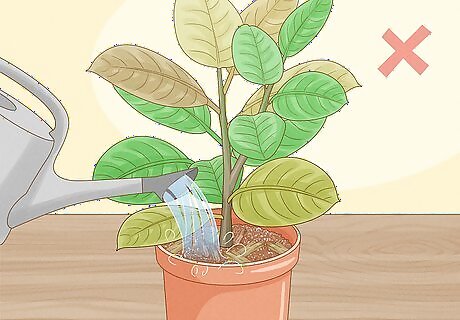
Watch for yellow and brown leaves that drop off. If your leaves are yellowing, that usually means they need less water. Try easing off on the water, as too much water can kill it as easily as too little. Only water the rubber tree when the leaves look a little droopy.
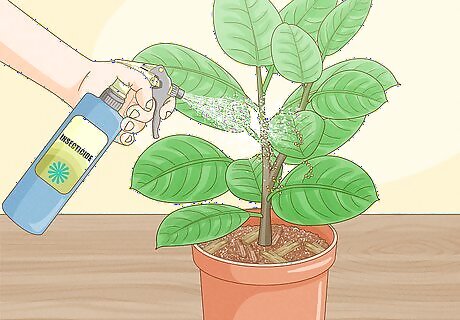
Use a gentle insecticide if you notice an insect infestation. While the occasional bug is bound to happen, an insect infestation could compromise the health of your plant. If notice damage to the leaves or body of your plant due to insects, or if you see them populating on your plant, use a mild, gentle insecticide to control the infestation.
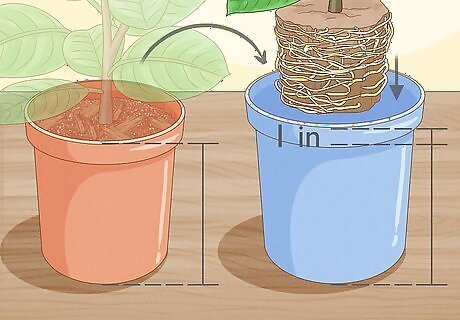
Re-pot indoor plants once a year when they are young. Summer is the best time to re-pot this plant. Pick a pot that's about 1 inch (2.5 cm) bigger in diameter than the current pot. For the first couple of years, re-pot the plant once a year. After that, you can replant every 3 years or when it becomes root bound. To re-pot the plant, add soil to the bottom of the new pot. Grasp the plant by the stem, and pull it out of the old pot, roots, soil, and all. Set it in the new pot. Surround it with soil until you reach the top edge of the soil from the old pot. Give the plant some water.
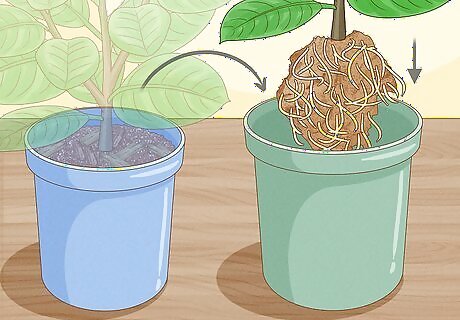
Re-pot indoor plants when they become root bound. Root bound just means the roots have outgrown the soil. You can tell if the pot is root-bound by grasping the trunk and pulling upward. If it comes out in one big ball with swirls of roots on the outside, the plant is root bound.


Comments
0 comment