views
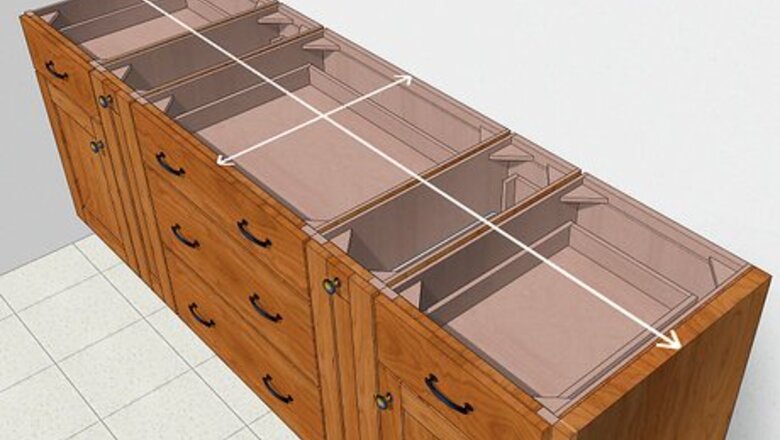
- Measure the space on top of your cabinets from corner to corner before ordering a prefabricated or unfinished countertop.
- Attach a prefabricated countertop to the cabinets using wood screws and L-brackets beneath the countertop.
- To attach a laminate sheet to an unfinished countertop, cut the sheet to size with a circular saw or snips. Then apply contact cement to the sheet backing and the countertop.
- Lay wood dowels on the countertop as spacers and rest the laminate on top. Starting in the center, remove dowels and press down on the laminate to adhere it to the countertop.
Installing Prefabricated Countertops
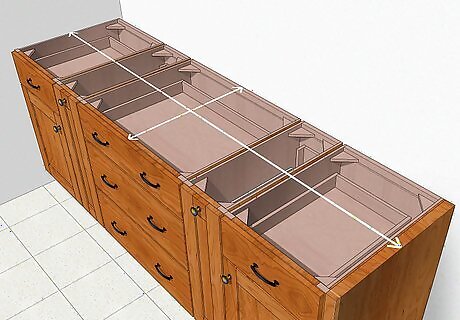
Measure the space on top of your cabinets carefully. Use a measuring tape to calculate the size of the countertops that you want for your kitchen or bathroom. Measure each length from corner to corner and draw a corresponding line with the measurement on a piece of grid paper. Once you’ve sketched out each side with the corresponding measurements labeled, re-measure your cabinets 2-3 times to make sure that your measurements are accurate. Measure the opening of your sink by flipping it over and measuring the base from edge to edge on each side. If your sink is still in the box, it will list the required space for the opening. If you’ve installed the cabinets yourself, make sure that you have a level line running along the top by placing a level over each individual cabinet and measuring the distance from the floor to the top. Use shingles to raise a cabinet if you need to adjust its height to make them level. Add 1 in (2.5 cm) to each side that will lead to a rounded corner if you aren’t ordering countertops with 90-degree corners.
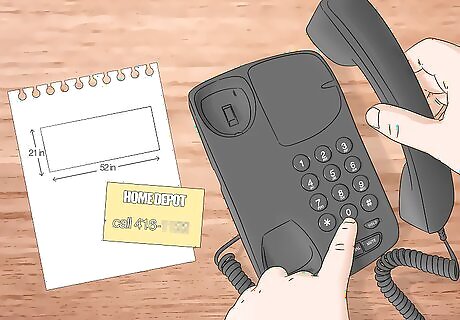
Order countertops to fit your cabinets. Order your countertop from a manufacturer that produces laminate countertops. Choose a style and color of laminate that you think will look good in your kitchen or bathroom. Keep in mind that lighter colors will be easier to clean. Give the countertop manufacturer your measurements and wait for them to deliver your countertop. If you really want to make sure that the countertop fits perfectly, have the distributor take measurements for you. It may cost you a little more, but it’ll ensure that you get a perfect fit. The distributor will determine how many pieces your countertop will come in. Most of the time, it will arrive as a single piece.Tip: Choose a counter that includes a backsplash if your home is less than 20 years old and your walls are perfectly flat. Get a separate piece for you backsplash if your home is older and your walls have warped a little as the house settled over the years.
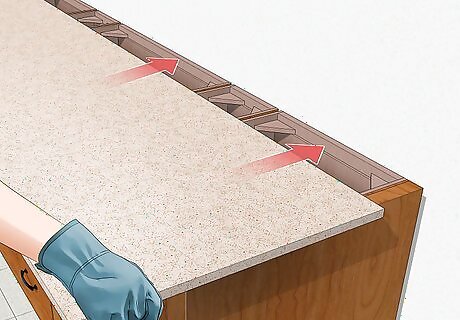
Set each section of countertop on top of your cabinets to make sure they fit. Once your countertop arrives, set it up on a set of saw horses or sturdy table. Unwrap the packaging and carefully lift it over your cabinets. Set it down slowly and evenly so that you don’t damage your cabinets. Slide it by lifting it a little and repositioning it until it’s in place to ensure that it fits. If it doesn’t fit, measure it and double-check your original measurements to ensure that the manufacturer didn’t make a mistake. If they did, contact them directly to get them to replace it.
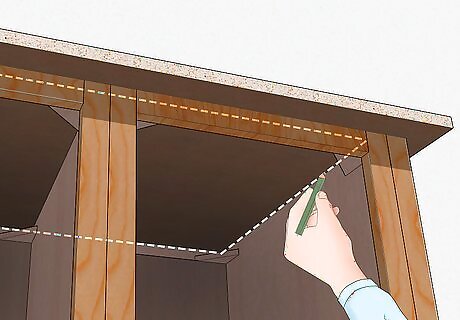
Outline the cabinet edges underneath with a carpentry pencil or grease marker. Open your cabinets and lay down under the countertop. Use the cabinets as a straight edge to outline where they meet the countertop with a grease marker or carpentry pencil. This will make it easy to figure out where you need to drill pilot holes or place glue when you attach your countertops.
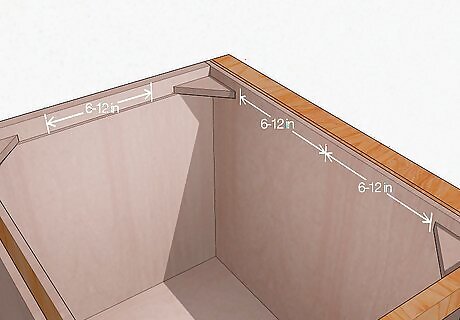
Use a carpentry pencil to make marks on the counter for the screws. Place at least 1 screw for every 6–12 inches (15–30 cm) of counter. Measure the distance from the screw opening of a corner bracket to the edge of the cabinet. This will tell you the distance that you need to install your pilot holes from the cabinets. Once you have the measurement from the screw opening to the side of the bracket, measure and mark the locations of your screws under the cabinet. Custom-sized counters often come with the pilot holes, brackets, and screws to install it. You can skip the corresponding steps if this is the case. Corner brackets are sometimes called L brackets. They’re L-shaped or triangle-shaped brackets with flat sides and they’re used to attach flat surfaces that are perpendicular.
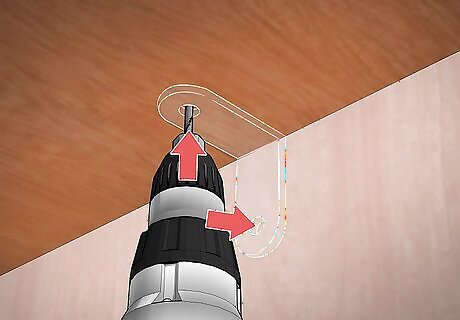
Drill 2 pilot holes into your countertop on each side of a cabinet. Use the measurement from your corner bracket to determine how far you need to place each pilot hole from the cabinet. Drill pilot holes where you marked your screws with a carpentry pencil. Use a soft drill bit in the countertop to make the screws fit perfectly.Tip: The size of your pilot holes depends on the size of your screws, which is dependent upon the thickness of your countertop. For a standard countertop with a 1.75 in (4.4 cm) thickness, drill a ⁄64 inch (0.20 cm) pilot hole. Place your brackets so that they rest squarely in the corner where your counter meets the cabinets. If your cabinet comes with pre-fitted slots for your screws, you do not need to drill pilot holes. If the brackets weren’t provided, you can purchase them from a local hardware store.
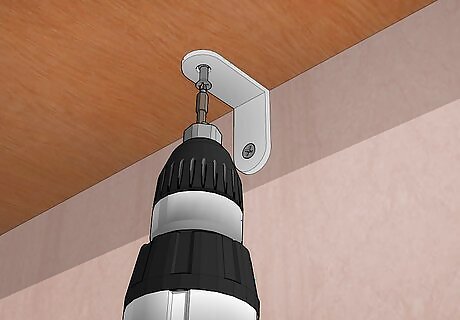
Screw wood screws into your brackets using the pilot holes. Use a drill and wood screw to install each bracket. Drill the screw into the countertop first to determine if the bracket will be flush against the cabinet. Repeat this process for each bracket. Before you drill, hold the bottom of a screw flush against the side of your countertop to make sure that you aren’t going to drill through the countertop completely. For a countertop without screw slots and screws, drill #4 wood screws into your ⁄64 inch (0.20 cm) pilot holes.
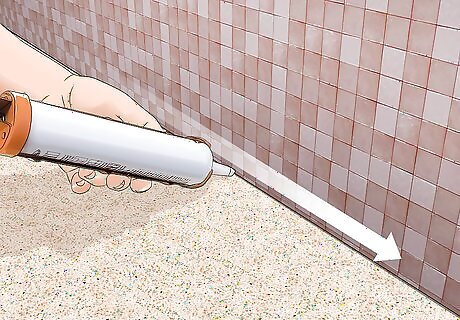
Use silicone caulk to attach your backsplash and fill any edges. Apply silicone caulk to the back of your backsplash by spreading it across the entire backside with a caulk gun. Place the bottom edge carefully in the corner where the counter meets the wall. Slide it up against the wall and press down towards the corner. When you’re done, use a caulk gun and silicone caulk to fill in the gaps around the edges of your countertops and backsplash. Wait 24 hours before using your countertop to give it time to settle. Let your backsplash air dry for 30-60 minutes before adding the caulk around the edges.
Laminating Wood Countertops
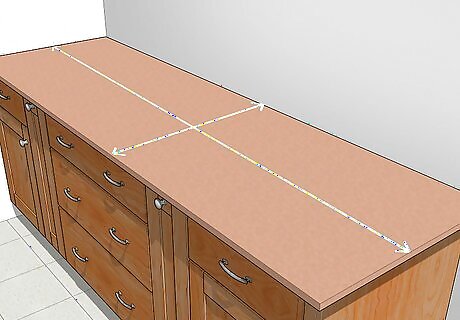
Measure and order your unfinished countertops. Use a tape measure to find the distance from edge to edge across every section of your cabinets. Add 1 inch (2.5 cm) to sides that will contain rounded edges. Order your countertops with the laminate unglued. Once you’ve received your particleboard or wood counters, set them up on sawhorses or a stable work surface.Tip: If you get your counters and laminate sheets from the same shop, they can cut them to size for you. If you’re using this method, you are going to be laminating the countertop before you install it later on.
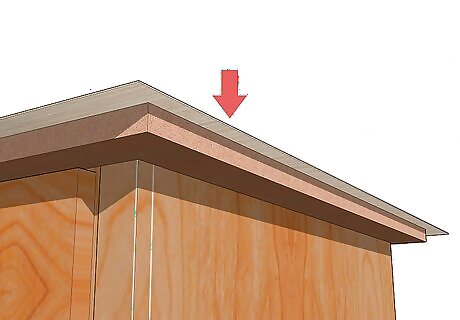
Line up your laminate sheet so that it’s sticking past your countertop. Lay a laminate sheet on top of a section of your counter. Line it up so that it’s parallel with the sides of your countertop, with 2–3 inches (5.1–7.6 cm) sticking out over the side. Use a level as a straight edge to mark line cuts with a carpentry pencil or grease marker. You’re going to trim the excess portion of laminate later, so don’t try to fit it perfectly.
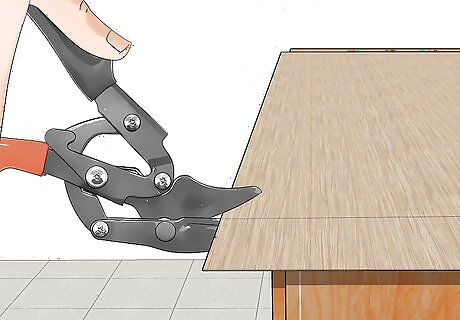
Cut your laminate sheet with snips or a circular saw.To cut laminate using a circular saw, attach a saw blade designed for laminate to your motor by unscrewing the bolt and sliding the blade on. Set the base plate against the edge and line up your cut with the guiding line on the front of the circular saw. Pull the trigger and let the blade pull the saw through the cut. To use snips, hold the sheet in your non-dominant hand and cut straight through your line. You don’t need to worry about getting a perfect line since you’re going to trim the edges down anyway.
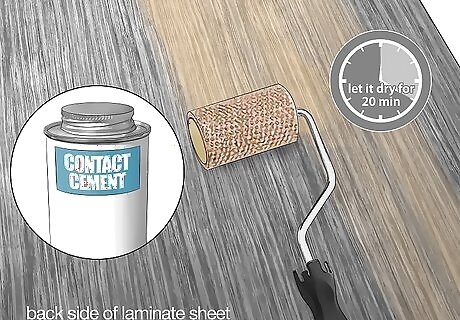
Apply contact cement on the back of your laminate and let it dry for 20 minutes. Put on some gloves and flip your laminate over. Drop a big dollop of contact cement in the center of your laminate with a mixing stick or spoon. Use a roller with a thin nap to spread it out across every surface of your laminate. Roll over each section 2-3 times to ensure that you’ve fully applied the contact cement to every section of the sheet. Do this in a well-ventilated area. While it isn’t toxic, contact cement can smell kind of bad. Don’t worry if the cement starts to dry—it’s supposed to do that before you attach it.
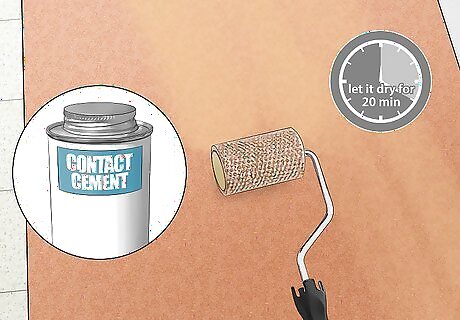
Cover the countertop surface with contact cement and let it dry for 20 minutes. Use the same brand of contact cement that you used with your laminate sheet. Spread your contact cement across every section of the top of your countertop with the same roller. Wait another 15-20 minutes to let your countertop dry.
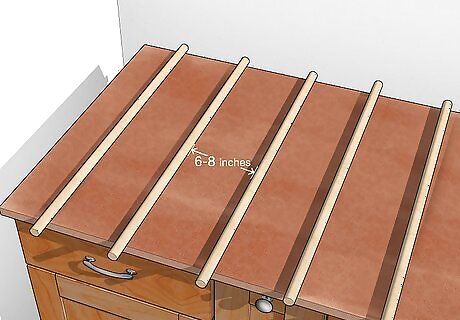
Place wooden dowels perpendicular to the length of your countertop. Contact cement bonds instantly to itself, so you need to use dowels to complete this process carefully. Set wooden dowels on top of your countertop so that there are 6–8 inches (15–20 cm) between them. They should lay on top of your counter to form a 90-degree angle with the long sides. Arrange each dowel so that is parallel with the dowel on either side of it. You have to use dowels that are a few inches longer than your countertop on either side.
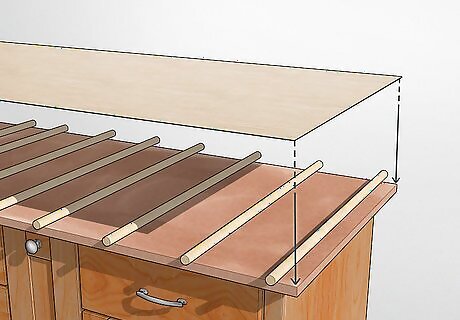
Line up your laminate so that it’s sticking out past every side of the countertop. Flip your laminate over so that the side covered in contact cement is facing the top of the countertop that is also covered in contact cement. Line your sheet up so that it’s sticking out past each side of your laminate if it’s not cut to size. Slowly lower it on top of the dowels so that it’s floating above your countertop. You can adjust the sheet slightly once you’ve placed it down, but you have to be careful to not let your laminate come in contact with your countertop. Contact cement will bind them instantly together if you do.
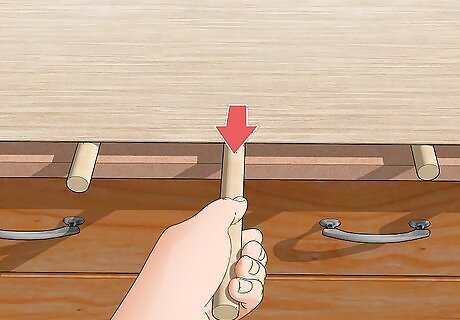
Slide the middle dowel out once your laminate is lined up. Once you’ve inspected each side to make sure that it’s covering each section of the countertop, slowly slide out the middle dowel. Pull the edge out toward you, keeping it parallel to the countertop and laminate as you pull. Slide it all the way out and then set it aside.
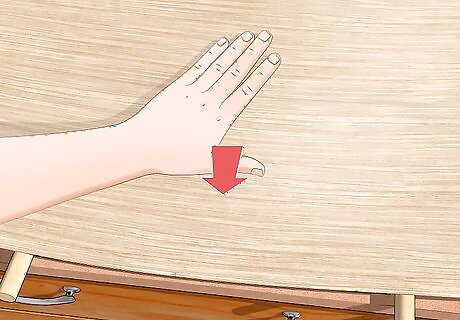
Press down firmly with your palms to set the laminate in place. Place your palms in the center of your laminate and slowly press down until you’ve touched the laminate to the countertop. Press straight down and then slide your palms across the middle section of the laminate to join it. Be careful to not slide any other dowels around as you do this. The laminate and countertop will be instantly and permanently joined, so avoid air bubbles by not lifting your hand off of the laminate as you press down. Depending on how long the dry time is, you might want to use some type of clamps or some type of heavy weight objects to hold it down in its proper position.
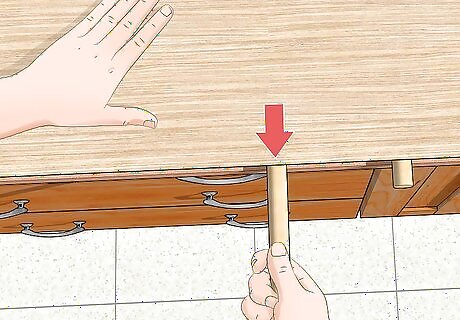
Remove an adjacent dowel, pushing down as you move along the surface. With your dominant hand still pressed against the middle section of laminate, slide out an adjacent dowel with your nondominant hand. As you’re sliding it out, press the laminate down in the direction of the dowel that you’re removing. Run your palm up and down the section to affix it to the countertop. You can enlist the help of a friend to remove the dowel for you if you’re nervous about accidentally creating an air bubble.
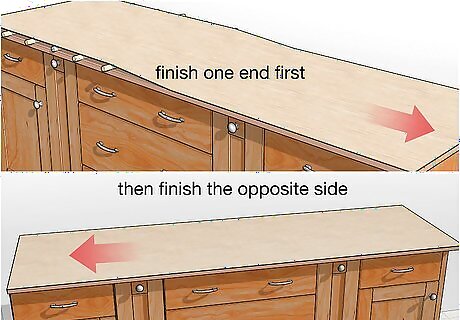
Finish one end of the laminate before removing dowels from the other end. Repeat this process by removing the dowel next to the one you just removed. Continue until you’ve finished half of your countertop and then repeat the process on the opposite side.
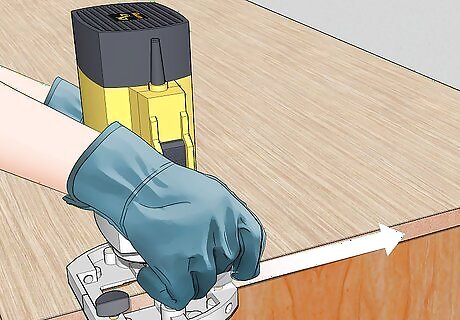
Trim the excess edges with a plunge router. Put a bolt on your router that is designed for cutting laminate by unscrewing the opening in the center and sliding it in before locking it. Set the plunge router so that the bolt sits 0.25–0.5 inches (0.64–1.27 cm) past the edge of your countertop. Place a flat edge parallel to the countertop to guide your cut. Turn on the plunge router and slide it along your straight edge to remove excess portions of laminate. Press downward while moving your router to guide it along the line. You don’t need to cut it so that it’s flush with the counter.
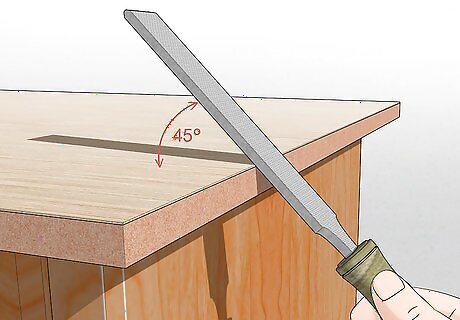
Run a file along the edges at a 45-degree angle to smooth them out. Once you have trimmed each side, use a file to remove the remaining smaller sections of laminate. Hold your file against the laminate at a 45-degree angle and brace the laminate by pressing down with your non-dominant hand. Run the file back and forth over a section until the laminate is flush with your wood. Place your counter on top of the cabinets and use the cabinet walls as a straight edge to outline where they meet the countertop with a grease marker or carpentry pencil.
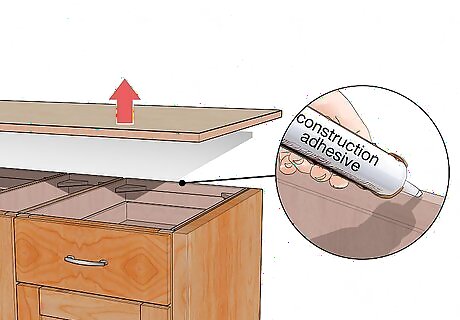
Add construction adhesive to areas where the countertop touches the cabinets. Take your countertop and flip it over so that the underside is exposed. Use a construction adhesive and a brush to cover the sections that you’ve marked with your grease marker or pencil in glue. Cover each section completely. Some construction adhesives come in a squeezable bottle. You don’t need to use a brush in this case. Work in a well-ventilated area; construction adhesive can be quite pungent. Liquid Nails is a popular, inexpensive brand of construction adhesive.
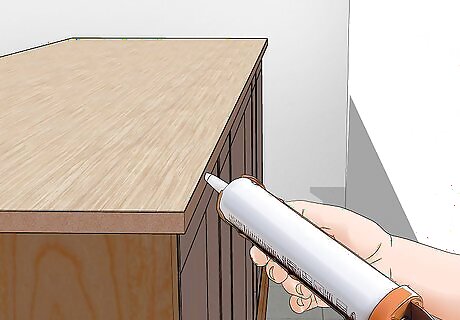
Squeeze silicone caulk where the countertop meets the wall. Use a caulk gun and clear silicone caulk to cover the edges that will rest against the wall. Run a line of caulk against each section, squeezing the gun slowly as you go to release the caulk. Cover the backside of your backsplash as well if it’s preinstalled on your counter.
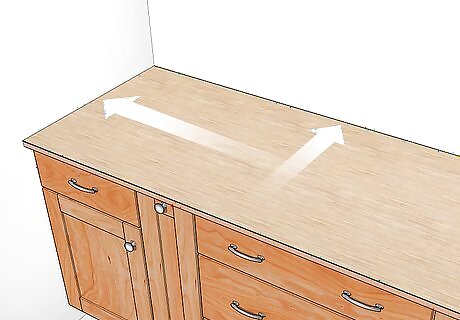
Slide the countertops as needed to fit them perfectly on your cabinets. Look underneath your counter to see if you successfully lined it up with the tops of your cabinets. If you didn’t, slide it while it’s still on top of the cabinet so that the glue lines up with the wood. Once it’s lined up, push it against the wall so that the backsplash or edge is flush.Warning: Don’t take your time while lining it up. The construction adhesive and silicone will dry if you leave it alone for more than a few minutes.
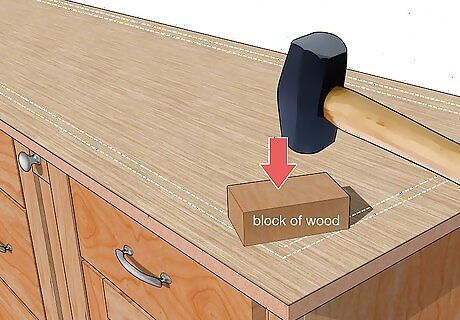
Hammer a block of wood along sections where the cabinets meet the countertop. Take a thick block of wood and place it on top of a section where your cabinet meets the countertop. Hold it along the side with your non-dominant hand and hammer it down. This will press out any air pockets and affix your countertop tightly along the cabinet edge. Repeat this process for each area where your cabinet meets the counter. You can use a rubber mallet instead of a hammer if you’re really worried about damaging your countertops. Let your countertop air dry for 24 hours before using it.


Comments
0 comment