
Cutting the Fabric
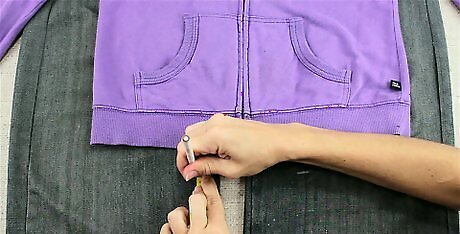
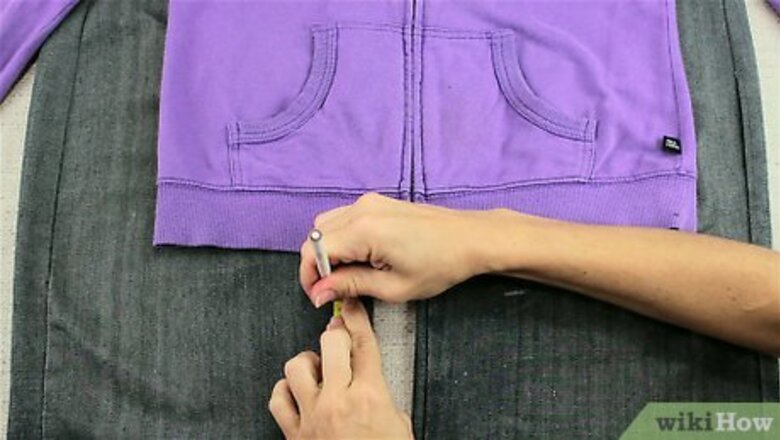
Use a jacket or long sleeve shirt as a guide. You will need something to help you get the right shapes for your jacket. The best thing to use is a jacket or a long sleeved shirt. Lay out your jeans and then place the jacket or shirt over your jeans so that the shoulders are lined up with your waistband. Draw a line in chalk across the legs of the jeans about 1” (2.5 cm) past the bottom of jacket or shirt. This will be the end point of your jacket.
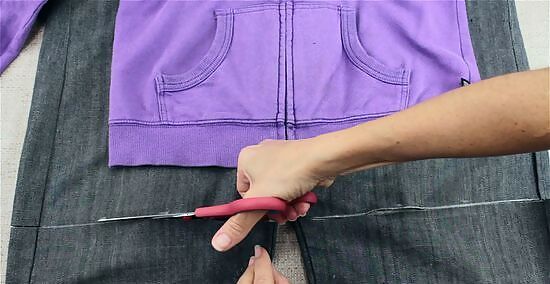
Cut the jeans. Next, cut across the marks you made in the jeans to remove the excess leg material. You will use the upper half of the material (waistband and upper leg material) to make the body of the jacket and the lower half (bottom of legs) to make the arms. Use sharp scissors to cut your jeans. They can be difficult to cut through.
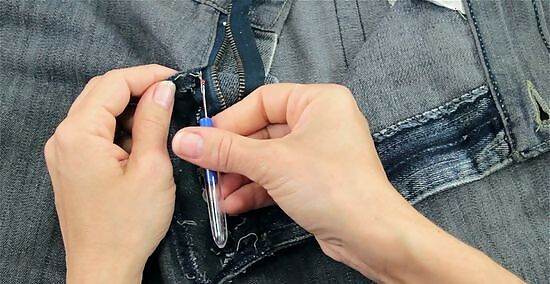
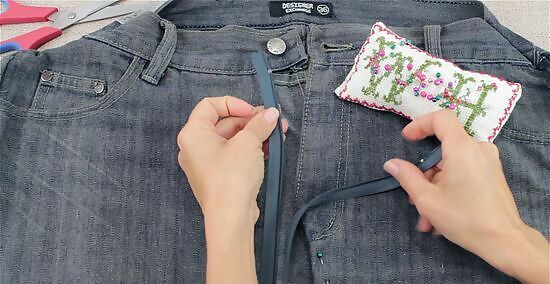
Use a seam ripper to open the inner seam and remove the zipper. To open up your jeans to form the body portion of the jacket, use your seam ripper. Run the blade along the inseam of the jeans to cut open all of the stitches. Then, run the blade of the seam ripper along the stitches holding the zipper in place to remove the zipper. If you do not have a seam ripper, then you can also use a knife or a pair of scissors. Just be careful not to cut the fabric.

Open up part of the seams for armholes in the waist piece. Starting about 2” (5 cm) from the top of the jeans, begin ripping open the seam on the side of the waist piece. Open the side of the jeans enough so that you can fit your arm through easily up to your shoulder. This will probably be about 4” (10 cm) to 6” (15 cm) depending on your measurements.
Creating the Sleeves
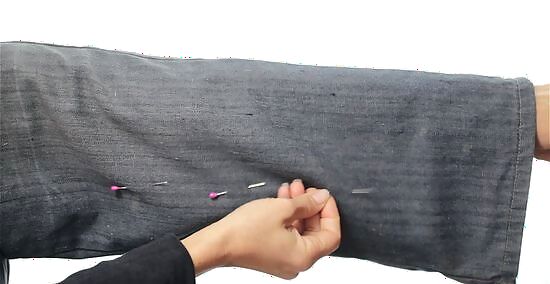
Size and pin the sleeves. Next you will need to size your sleeves. To do this, slide one arm into one of the leg pieces so that it goes all the way up and over your shoulder. Then, begin placing pins in the denim fabric on the underside of your arm to mark your ideal size. Pin all the way down to the wrist in this way.

Cut off excess fabric. Next, remove the sleeve from your arm and make a chalk mark along the edge of the pinned area. Cut off this excess fabric, including any fabric that went past your wrist on the sleeves. Just make sure to leave about 2” (5 cm) as a seam allowance. After you have one sleeve piece cut out, use it as a guide to cut out your other piece. Cut open the other jean leg and lay the sleeve piece you just made over top of it. Then, trace the fabric and cut along the lines to get your second sleeve piece.
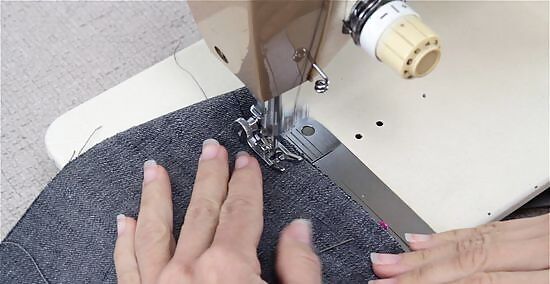
Sew the sleeves. Next, you will sew the sleeve pieces together to form them into sleeves. To do this, line up the long edges of the sleeves so that the right sides are facing each other. Then, pin along the edges to hold them in place. Sew along the pinned areas and remove the pins as you go. Do not sew across the arm or wrist openings. Leave these areas open. Snip the excess thread when you finish sewing the sleeves.
Sewing Everything Together
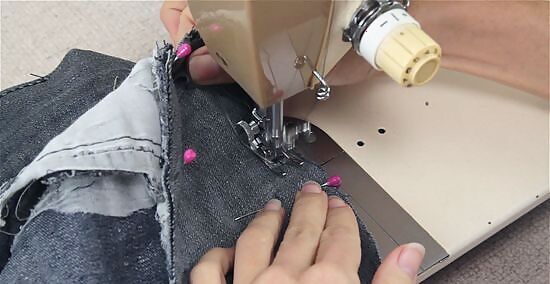
Attach the sleeves to the armholes. After you have finished sewing the sleeves, you will need to attach the sleeves to the armholes. Pin the upper arm openings of the sleeves to the armhole openings on your jacket body piece. Pin the sleeves and armholes so that the right sides of the fabric are facing each other and the raw edges are lined up. Sew along the pinned edges to attach the sleeves to the body piece. Remove the pins as you sew. Snip the excess threads after you finish sewing the sleeves in place.

Sew part of the waistband closed on both sides. To shape the shoulders of your jacket, you will need to sew up a part of the waistband at the top of your body piece. To determine where to sew, turn the jacket inside out and then put the jacket on. Insert pins through the fabric where you would like the shoulders to be. Do this on both sides and then remove the jacket. Leave it turned inside out so that your seams will be hidden. Sew across the pinned areas to secure the shoulders. Remove the pins as you go and cut off excess threads when you are finished. Do not sew across the neck opening. Make sure to leave this area open and only sew across the shoulders.

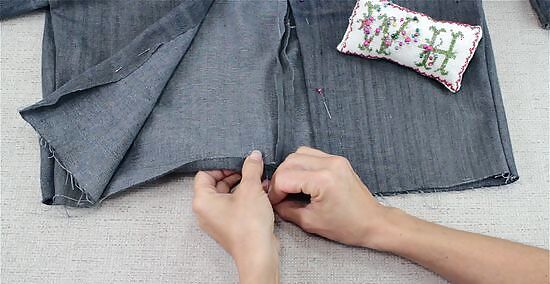
Sew the back seam closed. You should still have an open seam on the back of your body piece from where you ripped the seam open. To close this seam, pin both sides of the fabric together so that the right sides are facing each other. Then, sew along the pinned edge about ½” (1.3 cm) from the edge. Remove the pins as you sew. Cut off the excess threads when you are finished.
Customizing Your Jacket
Hem the edges of the jacket if desired. Hemming the edges will result in a neat finish, while leaving the edges raw will result in fraying. You can go with either option depending on how you want your jean jacket to look. To hem the edges, fold the fabric under by about ½” (1.3 cm) around the sleeves, bottom edge of the jacket, neckline, and front of the jacket. Pin the fabric in place. Then, sew along the edges to secure the hem. Remove the pins as you go and then cut away any excess threads.
Add a zipper to the front. Adding a zipper is an easy way to add a closure to your jacket. You will need to purchase a new zipper that is long enough to cover the length of the front of your jacket. Then, open the zipper and pin the zipper fabric to the edges of the jacket opening. Make sure that the right sides of the fabric and zipper are facing each other. Then, sew along the pinned edges—about ¼” (0.6 cm) from the raw edges—to secure the zipper in place. Repeat this for both sides of your jacket. Snip off the excess thread when you are finished sewing.

Adjust the length of your sleeves. Making your sleeves shorter is another easy way to customize your jacket. If you want your jacket to have ¾ length sleeves, then try on the jacket and mark the sleeves at the midpoint between your wrist and elbow. Then, remove the jacket and cut the sleeve where you marked them. Hem the sleeve if desired, or leave the edges raw for a frayed look.


Comments
0 comment