
- Quotes, song lyrics, illustrations, and puns are all popular options for graduation hat decorations.
- You can construct your own graduation cap out of poster board, construction paper, and hot glue.
- To make the cap, fold the construction paper in half lengthwise and roll it into a cylinder; add a square-shaped piece of poster board on top.
- You can make a tassel using gold yarn and embroidery floss.
Decorating a Graduation Hat
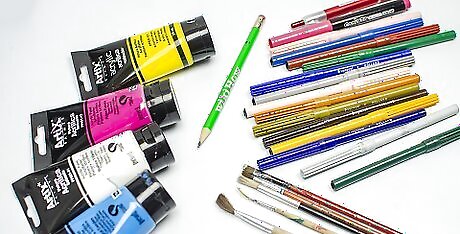
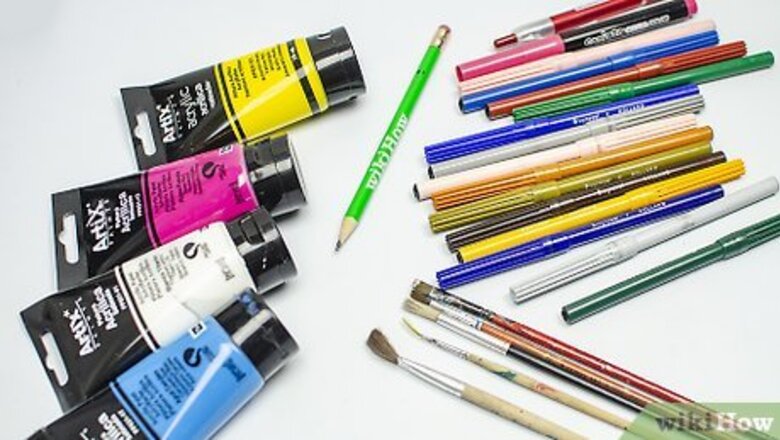
Gather supplies and decide on a quote. Try adding a favorite quote or song lyric to your hat, particularly one that is relevant to your education. Puns are also a favorite of many grads. You can also design one based on your favorite book, animal, or even around how many cups of coffee you drank to get your diploma. If you need inspiration, look at what others have done on social media! For instance, you could write "earned it!" if you're becoming an registered nurse or add an apple or ABC's if you're going to be a teacher. You could also just paint on one of your favorite characters, flowers, or animals and the year you graduate. Many hats focus on the adventure that awaits ahead.
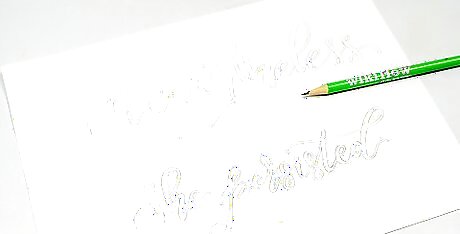
Sketch out your design on a scrap piece of paper. Cut out a piece of paper the same size as the top of your hat. Decide what you want to go where on the hat, including any characters, images, or lettering. Keep in mind, you want your design to be large enough to be seen from a distance.

Color the background with paper or paint. For a simple color change, simply glue on a piece of scrapbook paper with hot glue. A single sheet may be enough to cover it. Otherwise, try acrylic paint. Choose a sponge or bristle brush that's 2 to 3 inches (5.1 to 7.6 cm) wide, and apply paint going in one direction across the top of the cap. Try blending 2 colors on the brush for a fun mottled effect on the hat. You can find a wide range of scrapbook paper in single sheets at your local craft store.
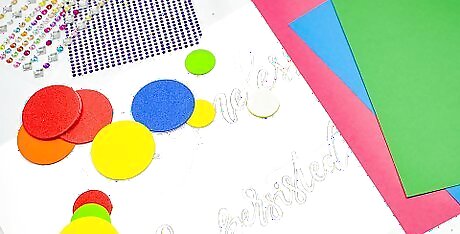
Create your design with paint, stickers, or printed images. If you have the skill, consider painting the images you want on your hat in acrylic paint. Alternatively, use a variety of stickers, which you can find at your local craft store. Another option is to simply print off images from the internet and glue them on your hat. For more oomph, make your hat 3D. Glue on silk flowers, pompoms, feather, or rhinestones, for instance.
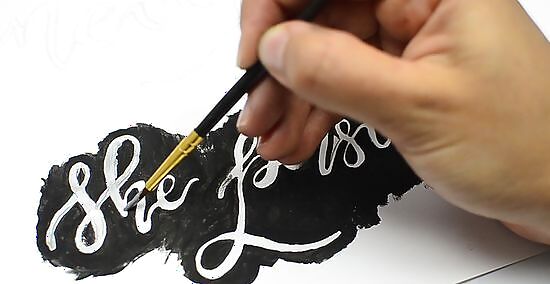
Add your lettering freehand or with stencils. If you want to do the lettering freehand, sketch it lightly in first with a pencil. Then, go over it with paint, a paint marker, or a permanent marker. You can also use stencils or stamp letters to make the lettering more uniform. Alternatively, use stick-on letters. If you have a vinyl cutting machine, you can cut out professional-looking letters to stick on your hat.
Creating a Graduation Hat
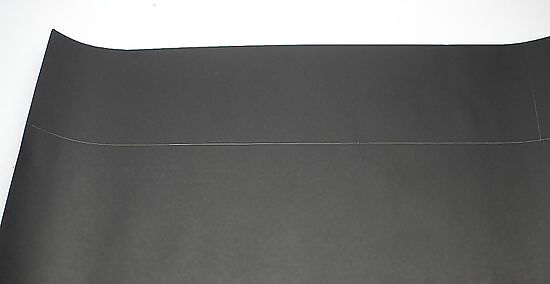
Mark a 24 to 26 in (61 to 66 cm) by 6 in (15 cm) rectangle on poster board. Lay out a piece of poster board on a table and use a ruler to measure along one side from the corner. Mark the length with a pencil and draw a light line with a ruler and pencil at that mark down the paper. From the same corner, measure 6 inches (15 cm) down the other side. Make a mark and draw a line with the ruler across the paper so it meets the first line you made, forming a rectangle. If you want to make sure the hat will be form-fitting, wrap a piece of string around your head and measure the length with a ruler. Then, add 2 inches (5.1 cm) for overlap. That will be the long side you measure on the poster board. Children's hat sizes range from 20 inches (51 cm) for preschool kids to 22 inches (56 cm) for teens. Don't forget to add 2 inches (5.1 cm) or so for overlap. You can also use construction paper.

Cut out the rectangle you've just drawn. Set the excess aside. You should now have a rectangle that's 6 inches (15 cm) wide and 24 to 26 inches (61 to 66 cm) long. Wrap the long side around your head (or the person you're making it for) to see if it fits with a little overlap. If it's too long, you can trim a bit off.
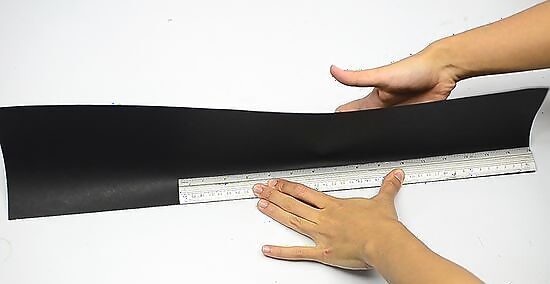
Fold the long edge up over the ruler by 1 inch (2.5 cm) or so. Lay your ruler along the long edge of the paper, lined up with the side. Flip that edge of the paper up with the ruler so that the paper is overlapping it just enough to cover the ruler. Fold along that edge and then pull the ruler out. Basically, you need to fold the edge of the paper up 1 inch (2.5 cm) or so along the long side of the paper. You can measure this out and fold it that way if you prefer.
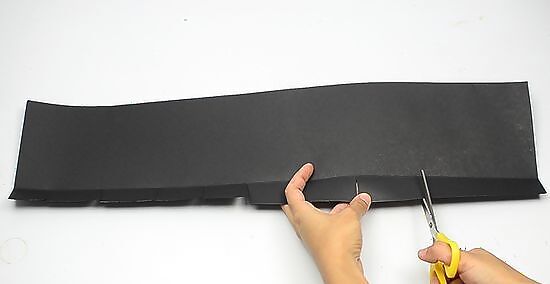
Open the fold you made back up to cut slits in the paper every 2 inches (5.1 cm) or so. Hold your scissors so they're perpendicular to the fold you just made. About 2 inches (5.1 cm) from the end, cut from the edge of the paper toward the fold, stopping at the fold. Move another 2 inches (5.1 cm) down and make another slit. Keep going along the this edge until you reach the end. You should end up with flaps sticking up from the fold every 2 inches (5.1 cm) or so.
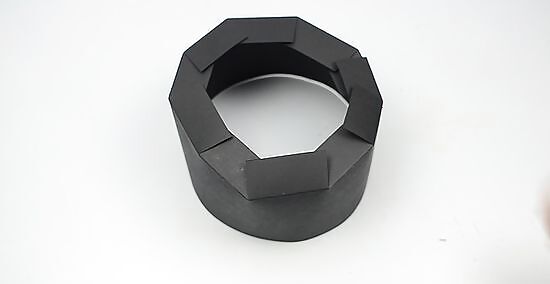
Make a circle with the long side of the rectangle and glue the short ends together. Take both ends of the strip and bring them together. The flaps you cut in the previous step should be facing the inside of the circle, making a 90-degree angle along the fold; they will overlap a bit. Overlap the strip by 2 inches (5.1 cm) or so. Apply glue to the paper that goes underneath the edge of the other side and hold the pages together for a few seconds so the glue has a chance to take hold. You can run a glue stick along the edge or use basic white school glue. A hot glue gun would also work, but always be careful when applying hot glue! It can burn your fingers.
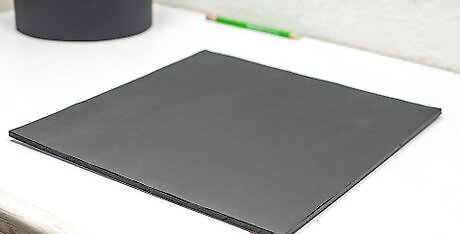
Cut out a 12 by 12 in (30 by 30 cm) square of black foam core board. Measure out a square that's 12 inches (30 cm) on each side with your ruler and draw light lines with a pencil. Cut down the lines to make a square piece of foam core board. You can find foam core board at most craft stores and big box stores. Alternatively, cover a piece of cardboard with black paper. If you're having trouble cutting the foam core with scissors, use a craft knife to cut along the lines. Always cut away form you and make sure there's something underneath the board so you don't scratch the surface you're cutting on.

Glue the flaps to the center of the square. Run the ruler diagonally across the square each way to mark the center point. Flip the circular piece you made earlier so that the tops of the flaps are facing the bottom of the square. Center to get an idea of where it will go, then pull it off. Apply glue to the tops of the flaps and lay the circle down so the flaps glue it to the center of the square. You can use glue sticks or regular school glue.

Locate the center of the square and add a round circle of foam board. Cut out a circle of foam board that's about 0.5 inches (1.3 cm) in diameter. Glue it to the top of the hat in the very center to make the hat's button. If you want to add a tassel, wait to glue this piece on. You can also use a small brad instead, inserting it through the top of the hat.
Making a Tassel

Wrap yarn or embroidery floss around your fingers repeatedly. Spread your fingers apart until the length from the side of your pointer finger to the outer edge of your pinky finger is how long you want your tassel to be, such as 2 to 3 inches (5.1 to 7.6 cm). Wrap the yarn or string around once and hold the end in place. Wrap it again, going over the first strand to hold it in place. Keep going around and around your fingers until you get the thickness you want for your tassel. You may need to do this 20-40 times. You can add other colors by cutting off one color and wrapping a different color on the next go round. You can also use a form instead, such as a piece of cardboard you cut to size.
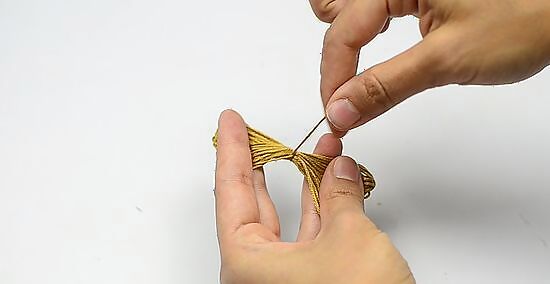
Tie a square knot in the middle. Pull the loops off your fingers, drawing them tight as you do. Pull out the other tail of the string, exposing about 2 to 3 inches (5.1 to 7.6 cm). Find the middle and wrap the outside tail around it 3-4 times. Tie it to the other tail using a square knot. To tie a square knot, wrap one end over and under the other end, then do the same with the other end, pulling them both tight.

Snip through the loops on either end. You should now have loops of string tied together in the middle. Cut the ends loose by gathering the loops in your scissors and pulling them tight. Slice through the loops. Do the same on the other ends. This creates the fringe for your tassel.
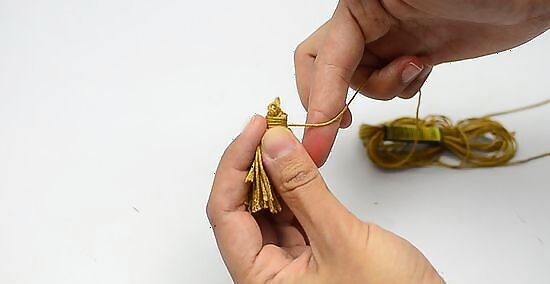
Cut off about 2 feet (0.61 m) of string to tie around the tassel. Tie this piece of string over the center of your tassel. Find the center of the long string and then make a square knot. Leave the long ends of the string loose for now, as you'll stick them into your hat in a moment.
Gather your tassel together with a 12 inches (30 cm) piece of string. Pull the ends of the loops together so it forms your tassel. Leaving about 2 inches (5.1 cm) of the tail out, wrap the string around the tassel about 0.5 inches (1.3 cm) from the top. Keep wrapping until you have 2 inches (5.1 cm) left. Tie it to the other tail with a square knot. Tuck the ends of the knot under the wrap.
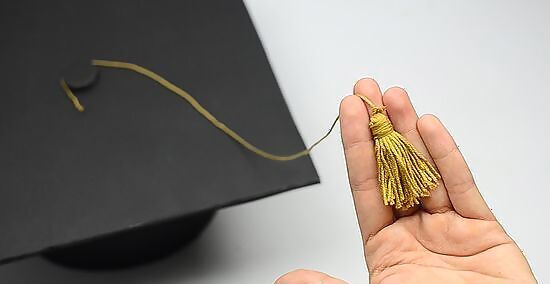
Trim the edges of the tassel to make them even. Smooth out the tassel with your fingers. The ends will be all different lengths. Use your fingers to hold the ends together and then cut across them to smooth out the edge. Run your fingers through the tassel to make sure you got all the longer pieces.
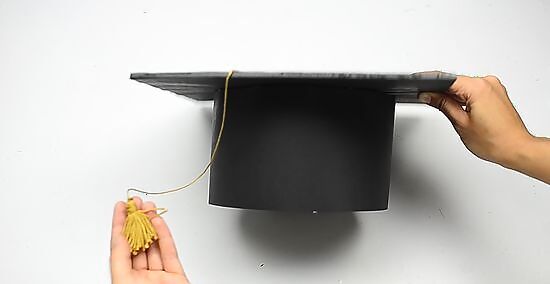
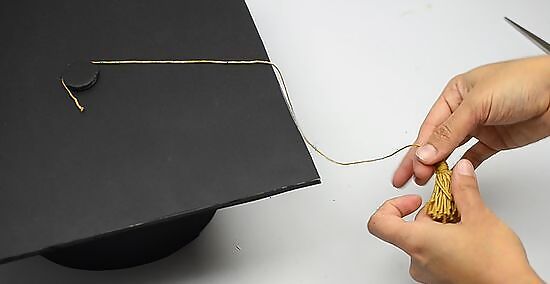
Attach the tassel to the hat by making a hole through the top. Find the center of the hat on top and poke a hole through it with a needle or toothpick. Push the string through the hole, using a needle if you have trouble threading it through the hole. Adjust the tassel to the length you want by pulling on the string inside the hat. Then, make an overhand knot on the inside at that point. At this point, you can glue your foam core board button on top of the string and the hole to hold it in place. Hot glue will work best, but you can also use school glue. To create an overhand knot, make a loop with both strings together as one string, then pull the end through the loop on the other side.


Comments
0 comment