
Acquiring Inspiration
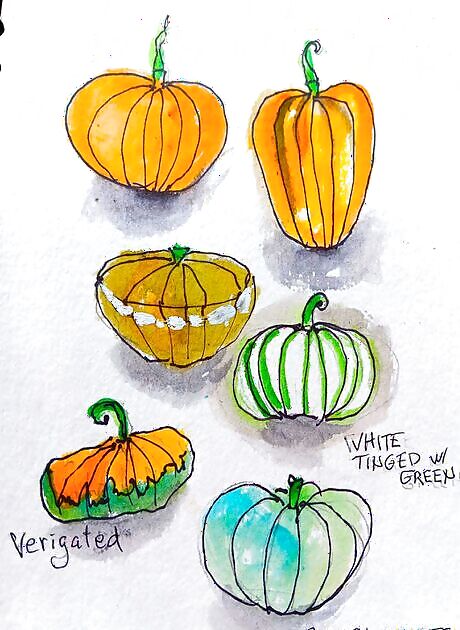
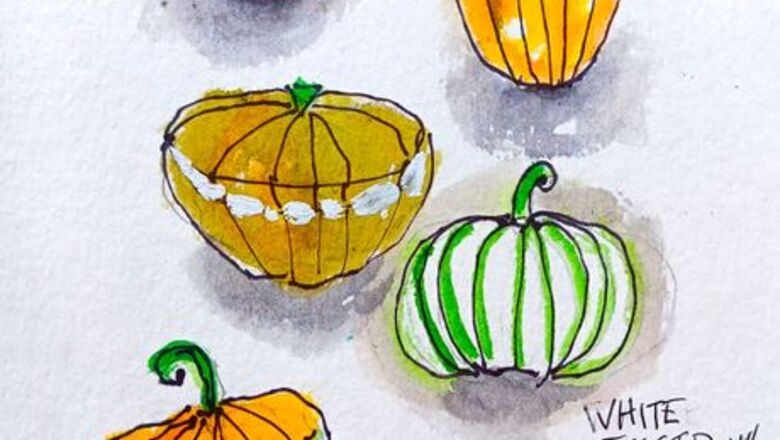
Study various shapes and colors of pumpkins. It doesn't cost a dime to look. When you look with a discerning eye as an artist would, you begin to see things you never noticed before. Check out the varied shapes of pumpkins. Some are large, others tiny. Most are classic orange. Hybrids can be unique or of mixed patterns and colors. Stems are attached to make handles for the lid when a pumpkin is carved into a jack-o'-lantern. They vary, so look closely at them.

Gain an understanding of how pumpkins look before harvesting. Nestled together in the field against a bed or brown and green, they are eye-catching.
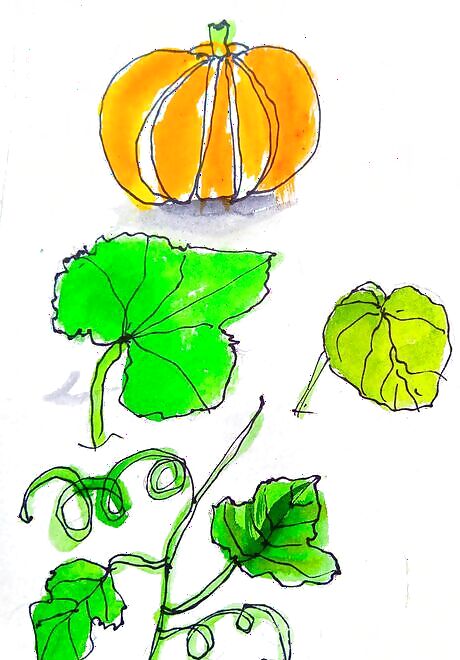
Study leaf shapes. Leaves vary in size. They come in different shapes. Study the vein pattern. Do they come off the main vein directly across from one another, or are those secondary veins staggered?
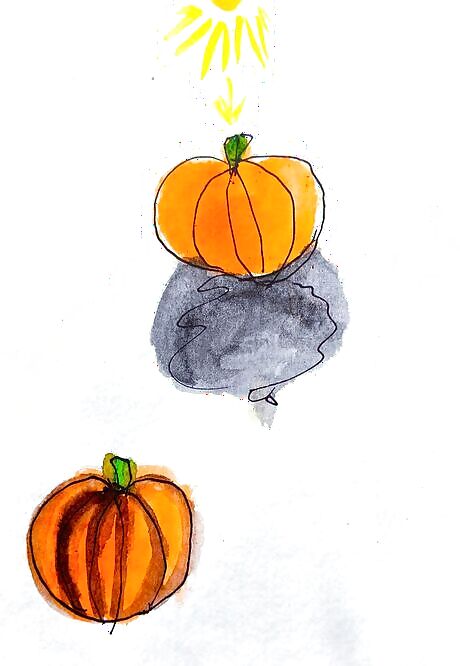
Study the light. Watercolor and knowledge of light are two sides of a coin. You no doubt already know the two types of shadows, but now you can call them by name. Form shadows define the shape of an object. On a pumpkin, a darker tone around the edges will show its roundness. A slightly darker shade of orange (or brown) within the curved growth lines on the pumpkin can show texture or how it would feel to the hand. Sometimes the lines are deep, and other times barely visible. Even the stem will have a shadow showing its roundness.
Understand how cast shadows are formed. Cast shadows are a second type that are familiar to us all. This type is dependent upon how the light strikes the object, time of day, and which direction the light is coming from. Morning light comes from the east (left side of your paper) and is cool. Shadows might not be very pronounced at dawn. The noontime sun is directly overhead and is strong. Shadows will fall directly beneath the object. Afternoon light appears from the right side and is warm. Shadows can contain a hint of the color of the object casting them. Sunset often brings unexpected color to the sky.
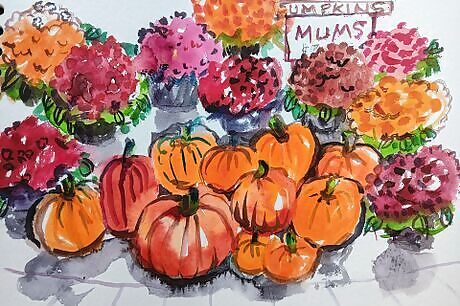
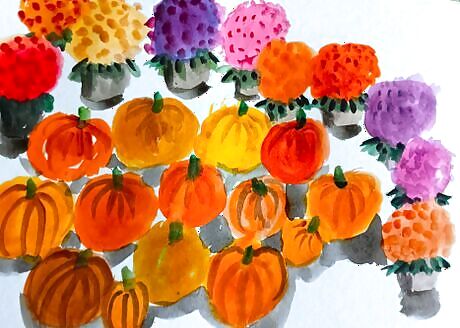
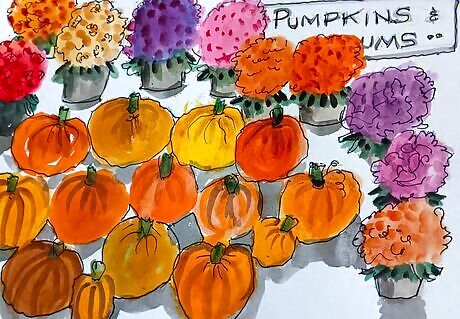
Study this example of a fall display at the entry of a food mart. The scene caught the artist's eye as inspiration for a possible painting. The focus of the scene is the pumpkins, with the flowers acting as a background. Certain elements, such as the brick wall and wooden structure behind the display, were left out. There were many more pumpkins than appear in this picture. The actual mum plants were much larger and many more of them surrounded the pumpkin. The artist included in the painting only what was needed to tell the story of the pumpkins. In this painting, the pumpkins are mostly the classic oval shape. They are varied slightly to create interest. Some pumpkins are behind others. They are not in rigid rows, but they are also not stacked, just put there in a casual way to welcome shoppers. Green stems point in all directions. There were no signs, but here, "artistic license" is employed, and a sign fills the top corner. The cast shadows make the pumpkins seem to be sitting on solid ground. The faint hint of a sidewalk shows that this is a city.
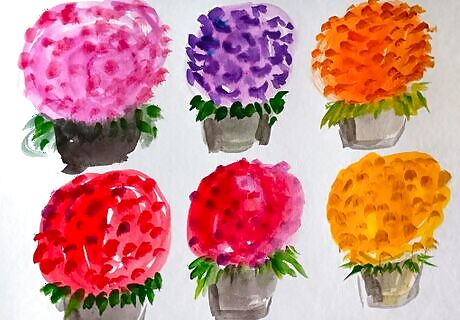
Study this example of mums for inspiration. The potted mums are reduced to ovals and hardly any attempt is made to differentiate individual blossoms. The colors of the pots of blossoms are chosen to accent and play up the beauty of the pumpkins.
Painting the Pumpkins
Get your bearings by sketching one pumpkin to start. Think of this oval shape as having sections like an orange. Notice that the lines of the sections follow the rounded shape of the pumpkin.
Choose your paper carefully. Paper is all important. A pad of #140 watercolor paper is ideal because the cardboard backing provides a built-in support for your paper. Open your paper pad to a sheet of paper and turn it back. Sketch the oval shape of the pumpkin lightly in pencil and add a stem.
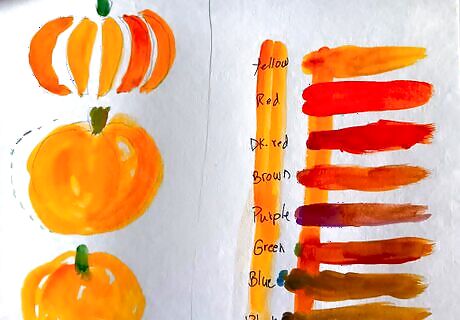
Define each section with curved lines going from center top to center bottom. Have the sections conform to the oval shape. You can barely suggest the rear side of the pumpkin behind the stem.
Paint the pumpkin. Standard paintbox orange is good for a few, but when you do a group, try to vary the shade of orange. Do this by mixing yellow, red, and minute bits of blue to create new shades. Let your brush skip over the paper occasionally to leave white paper showing. This adds vitality and sparkle and is a hallmark of watercolor. Paint the stem and let it dry.
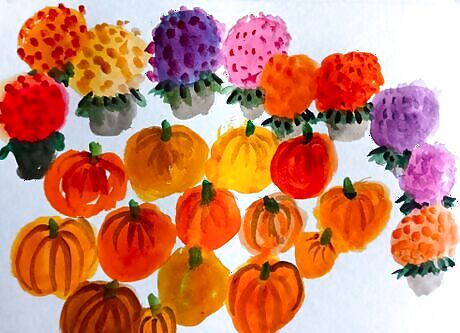
Add many more pumpkins sitting next to the first one. Draw them lightly in pencil. Have some of them tilted as indicated by the placement of the stems. Vary the sizes and shapes of the pumpkins.
Adding Detail
Move on to the mums. They are circles with a few leaves sticking out at the bottom. There is no need to draw in individual blossoms. Make up a display sign if desired.
Paint the scene. Watercolor is a transparent medium, so add water to dilute your pigments. When you have the first coat, let it dry, step back and study the piece.
Paint details as you go if you wish. As with the mum bushes, there is no rule or correct way to proceed. Do what you wish, and have fun painting it.
Stop when you think you are done. When it dries you can go back and add whole layers or smaller bits of color. Doing a few painted outlines will bring out sections where needed.
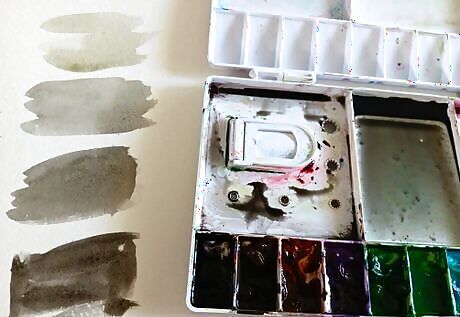
Mix a color for your cast shadows. Keep them transparent and work from a puddle of gray you have mixed. Test on a piece of scrap paper. Avoid getting cast shadows too dark — they need to be transparent.
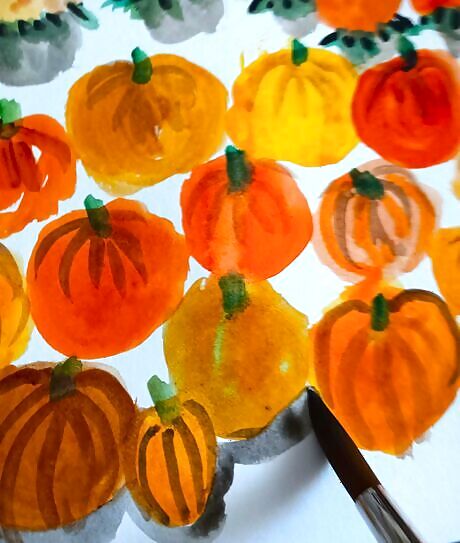
Put in your cast shadows. Use a fully loaded brush and quickly dash the shadows on.
Avoid trying to alter cast shadows. Dash them on and leave them alone.
Outline your piece if desired. Sketch around the pumpkins and flowers using a fine-line Sharpie or other black marker.
Understand that your art piece might turn out to be different from the example shown. Perhaps you will do another based on this lesson but using different elements. Instead of mums, perhaps use green plants, and instead of pumpkins make it oddly-shaped gourds. Perhaps you will put them in wicker baskets. Experiment with colors.


Comments
0 comment