

Preparing for Pan Searing
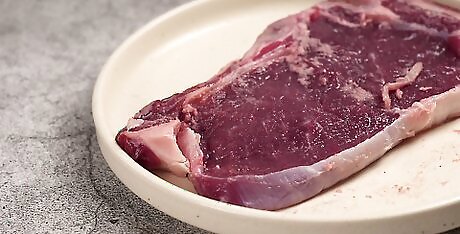
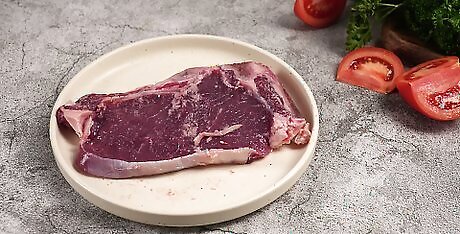
Choose a suitable cut of steak. Beef may be the first kind of "steak" to come to mind, but a crisp, intensely flavorful browned surface over a moist interior can be great on a burger, pork chop, chicken, fish, or even a thick, firm slice of a vegetable such as an eggplant or portobello mushroom. Pan-searing works best on boneless cuts. A pan is much cooler than a fire or electric element and so must heat the meat mostly by conduction. As it begins to cook, the meat will shrink thinner than a bone running through it, be propped away from a hot pan, and not sear well in that area. If you really want a cut with a bone, be sure to use a steak weight to hold it relatively flat, and an ample coating of oil in the pan to conduct heat to the still not quite flat surface. For the best-tasting results, it's wise to start with a high-quality steak (tender, well-marbled and typically more expensive). Pick a steak with a reasonable fat content, like a ribeye or strip steak, that's about 1" - 1.5" thick. Pick thicker steaks at your own risk - they may be suitable if you like rare steaks, but if you don't, they can prove difficult to cook through before overcooking the outside. If you can, pick a steak with a strip of fat on one side - the fat will render as the steak cooks, creating a great natural taste and crisp outer crust. Cheaper steaks are equally nutritious, leaner, and can be tenderized (mechanically or enzymatically; slow, through cooking is not consistent with the typical seared style). Mechanical tenderization such as perforation can drive in surface pathogens, so it needs to be cooked through well enough to kill them.

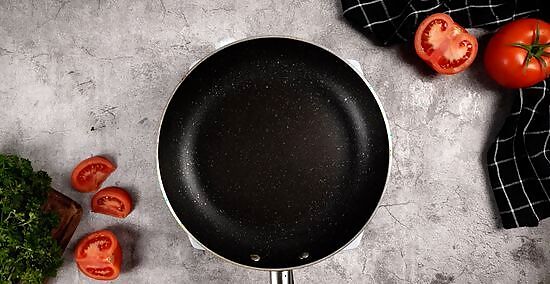
Choose a skillet that retains heat well. For the best sear on your steak, it's important to choose a skillet that's up to the task. A cast-iron pan is best. It accumulates heat to brown and crisp the exterior faster than the interior can cool it to cook only slowly. It will not melt, scorch, or warp (but it's relatively brittle for metal: don't thermally shock it with water right after you finish, but wait for it to cool to clean it.) Its rough metal surface turns the problem of burnt-on grease into the feature of a non-flaking, rust-resistant, semi-nonstick, antique-looking coating. And, it's cheap! Other kinds of dense, all-metal pans work well too. Do not use a Teflon or similar nonstick-coated pan! High heat will damage the coating and make it flake off into food. (This coating works best on electric skillet appliances, not regular pans, because the built-in elements distribute their heat very evenly and the thermostats prevent overall overheating. Those can do light browning, but accumulating a stove's greater power into a heavy pan sears better.) Metal utensils, necessary to not melt in a very hot pan, can also damage the nonstick coating. You'll also want to consider the size of your pan - pick a pan that's just big enough for your steak. If your pan is much bigger than your steak, the steak's juices will spill into the unused space and burn up.

Get a steak weight. This is a heavy, flat object to press the steak evenly against the pan as it cooks, preventing it from curling away to sear only in spots. A "bacon press" is essentially the same thing; purpose-made ones often have a waffle face to allow excess fat to ooze out. The bottom of a smaller pot or pan that can nest over the steak in the skillet, preferably without a long handle to unbalance it, can substitute. After using it against a raw side of the steak it might best be heated against the skillet briefly to sterilize the surface before proceeding with the now-cooked side.
Bring the steak to room temperature. Before cooking, allow the steak to sit, gradually coming to room temperature. If the steak is frozen, allow it to thaw overnight in the refrigerator, then let it sit to come to room temperature. As you wait for the steak to warm up, you can proceed to the other preparatory steps. It's important to let the meat warm up not only because a room-temperature steak sears faster, before the accumulated temperature in a thinner pan runs low, but because more heat needs to be conducted. This may potentially overcook the outside of the steak.
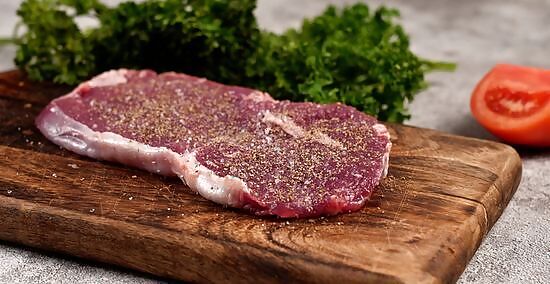
Season and coat the steak. You don't have to season it before cooking, but pre-applied seasonings can diffuse and permeate the steak before and during cooking. Some salt is very important to flavoring meat. Oil can help conduct heat to the surface for efficient searing (olive oil has a popular flavor; clearer oils have higher smoke points for cleaner, less noxious use at desirable high temperatures). Applying a generous coat to the steak (after salt, herbs and spices, so it doesn't seal them out) reduces the amount sitting unneeded on the pan to waste, smoke, or even catch fire. Peppering a steak beforehand is also popular but herbs and spices can scorch (black pepper is fairly resistant); apply them before serving or if a little wilting, tenderizing, or cooking-in is desired, toward the end of cooking at lower temperature. Before coating your steaks, use a paper towel to absorb any moisture on the surface of the steaks. A watery steak is anathema to pan searing - the water cools the surface to make it cook slowly, and may even "steam" the steak, giving a tough, leathery texture. You shouldn't go completely overboard with your salt and pepper, but you should try to give each side a generous coat. Keep in mind that, with pan-seared steaks, the flavor of the steak's crust is extra-important. Since the steak isn't marinated in any way, the inside of the steak will have only the natural flavor of the beef.

Optionally, heat the skillet in the oven to 500 degrees. When cooking a steak on the stove, it's important to have an extra-hot pan for a powerful initial sear. If you have time, you may want to heat your pan in the oven to get it suitably hot for this purpose. If you do, be extremely careful when you take the pan out of the oven - use thick oven mitts and/or a towel to protect yourself from burns. Don't heat your skillet in the oven if it's not oven-safe - that is, if it contains components that will melt at high heat, like a rubber handle. Instead, with a pan like this, it's best to simply heat the pan on the stove. Many home stoves have enough power so that preheating the skillet in the oven or using the oven to help heat the skillet on the stove (presumably on a burner over the exhaust vent) is simply unnecessary, wasteful, and risky in handling hot metal and leaving appliances on.
Put the skillet on the stove on high heat. If you heated your pan in the oven, leave the oven on. If you didn't, set the oven to about 400 °F (204 °C) to 450 °F (232 °C) and allow the pan to heat on the burner. You'll know your pan is hot enough when drops of water sprinkled on the surface of the pan evaporate almost instantly or "dance" across the surface of the pan. A cast-iron skillet's black "seasoning" may begin to smoke just a little. Higher temperatures give a more distinct, crunchy, even blackened crust, but increase smoke that will need ventilation such as a range hood to remove, and can risk fire with much oil.
Pan Searing a Steak to Perfection
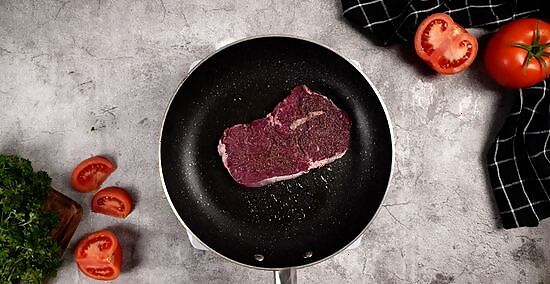
Lay the steak(s) in the pan with tongs. When your pan is nice and hot, lay your steaks down in the pan with a pair of tongs. You should immediately hear a furious sizzling sound - this is crucial to get that delicious initial sear. If one side of your steak has more fat than the other, lay the fatty side down first. The fat will quickly render as it comes into contact with the hot pan, helping to form a delicious, mouth-watering crust. Do not use plastic-ended utensils and do not allow plastic handles to lean on extra hot, water-less pans. They can melt.
Sear each side, flipping minimally. It should not take long for a crisp brown crust to form. Depending on the heat of your pan, it should take about 2-4 minutes (or less) for each side to finish cooking. When the first side is done, flip your steak and cook the second side for about as long. Ideally, you'll only need to flip your steak once. Resist the urge to meddle with your steak as it cooks. Don't flip the steak more than you need to - again, if possible, you should only flip it once. Each time you flip the steak, you "reset" the process of heat from the pan penetrating to the interior of the meat and may drain off juices, ensuring that you're left with a steak with a tough exterior and, by the time that takes to cook, a potentially over-cooked interior.
Resting and Serving

Remove skillet and steaks from heat and allow to "rest". If you cut into a steak immediately after you finish cooking it, its flavorful internal juices will run onto your plate. To help preserve this internal source of flavor, give the steak a chance to reabsorb these juices by allowing the steak to rest for about ten minutes before eating. You can do this by removing the pan from heat and covering with aluminum foil or by letting the steak sit on a wire rack. A steak that's been allowed to rest is generally moister, more flavorful, and has better texture than a steak that hasn't been allowed to sit. Keep in mind, however, that as the steak rests, it will actually continue to cook, especially if you keep it in the pan and cover it with tin foil. This means that the final product may be more well done than you initially intended, so if you're aiming for a rare steak, be conservative and remove the steak from heat slightly early.

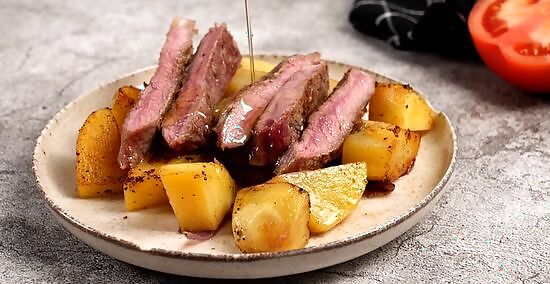
Enjoy. Congratulations! You've (hopefully) just pan seared a delicious steak. Serve alone or with potatoes and/or garlic butter for a delicious, hearty meal.
Byproducts and Cleanup
Optionally, cook with the steak drippings. If the steak drippings aren't overly burnt, they can be a rich dressing or gravy component, or they can simmer down to fat for flavorful sautéing vegetables.
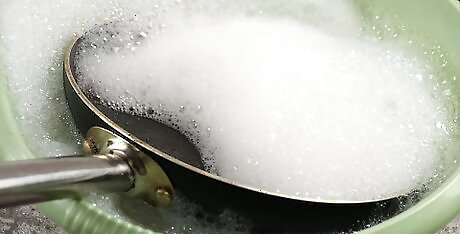
Let the detergent do the work on cleanup. Scorched meat takes time to soften and clean from a pan. "Elbow grease" tires you out and can wear the pan. Once the pan has cooled enough to handle, dispose of excess grease in the garbage (or a can headed for the garbage), not the drain, to avoid clogs and not subject your public works department to sewer-stopping fatbergs. Put a few squirts of hand dishwashing liquid in the pan and allow to sit. Cast iron pans can rust, so don't soak the whole, less-seasoned one, or allow water to remain in the cooking area for days.


Comments
0 comment