
Exposed Light Bulb

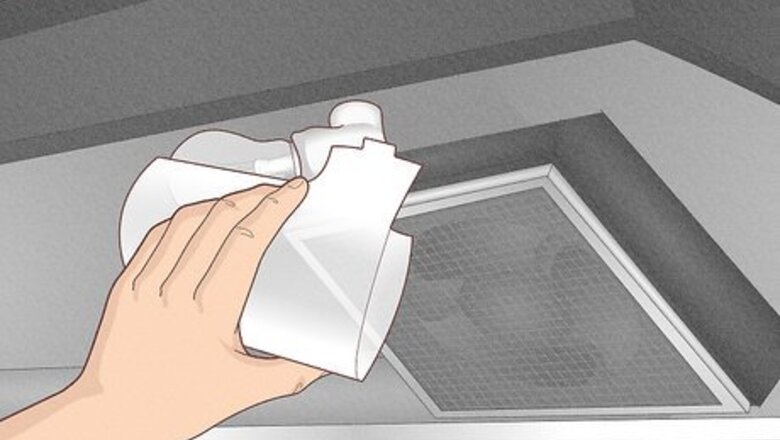
Turn off the light and remove the plastic cover. Most basic range hoods have a plastic cover over the lightbulb. To remove yours, just squeeze firmly near the socket and pull it away. Set the cover aside while you replace the bulb. Now's a great time to wash the cover if it's looking a little dusty or greasy. Clean it with warm soapy water and dry it thoroughly before you reinstall it.
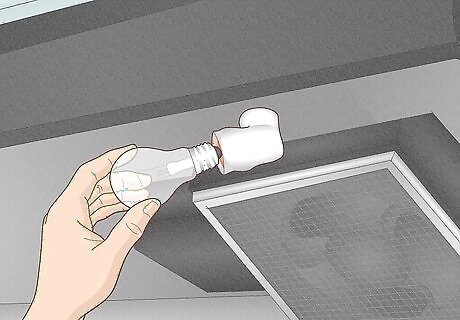
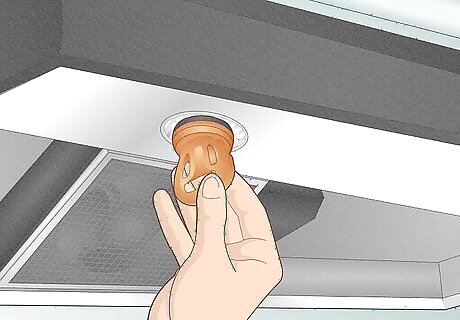
Unscrew the burned-out bulb. Wait until the bulb is cool enough to touch. Then, pinch the light bulb near its base at the socket and gently, but firmly, twist it counterclockwise. Keep unscrewing until the light bulb is out of the socket. Be careful when you handle the light bulb since it is incredibly breakable. If you want a bit more grip, pop on a pair of gloves or tear off a piece of masking tape and stick the ends on the bulb to form a loop. You can grab this like a handle when you unscrew the bulb. If you're removing an old incandescent or LED bulb, you can throw it in the trash, but if the bulb is a CFL, take it to the recycling center since it contains a small amount of mercury.
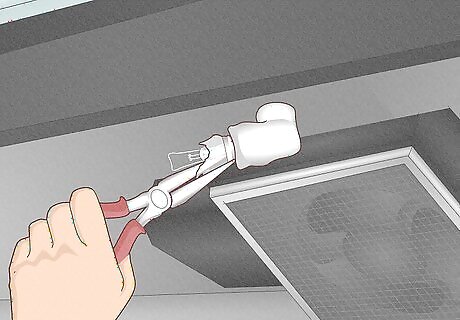
Use pliers or a potato to unscrew a broken bulb if it's stuck in the socket. Put on a pair of gloves and grip the base of the bulb with a pair of needle-nose pliers. Twist counterclockwise to unscrew the broken bulb. Don't have pliers? No problem—cut a large potato in half and push it onto the broken bulb. Then, twist it counterclockwise so the broken bulb comes away from the socket. Be really careful when you remove a broken bulb. You may want to spread an old cloth on your range so the broken glass doesn't fall onto your burners.
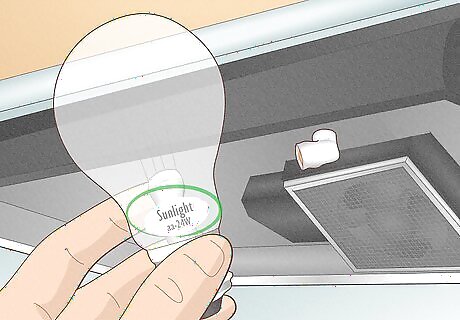
Get out a bulb that's at or below the recommended wattage. Always read the wattage on the side of your bulb or find the bulb information on the inside of the range hood. It will tell you the maximum wattage you can install. It's important to use the right wattage or it may be too hot which can damage the plastic cover. For example, the informational sticker inside the range hood may say, "75-watt bulb max." This just means you need to use a bulb with 75 watts or less. Incandescent bulbs are inexpensive, but they're not the best choice—they're not designed to withstand the heat of the stove so they'll wear out faster. Halogen bulbs are a great choice for highlighting a specific spot on the stove while LEDs last the longest and are the most energy-efficient.
Screw the bulb clockwise into the socket. Press the base of the new light bulb into the socket so the base fits into the threads. Then, twist the bulb clockwise until it's snugly in place. Resist the urge to screw the bulb really tight—you may break the bulb or might make it harder to unscrew when the bulb burns out.
Press the sides of the cover and pop it in place over the new light bulb. Grab the plastic cover and pinch the sides that have the tabs. Position the cover so it's over the light bulb and the tabs are in their slots. Then, release your grip so the tabs slide into place.
Recessed Light Bulb
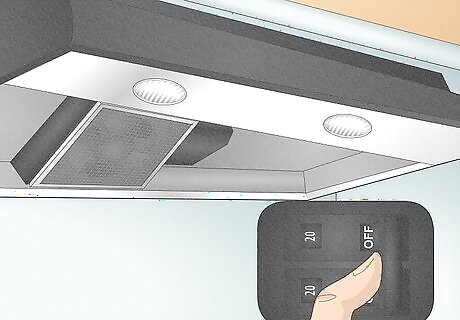
Turn off the light and flip off the power at the circuit breaker. Although you can change the bulb just by turning off the light, some manufacturers recommend switching off the circuit breaker to prevent damage if it accidentally shorts. Either way, turn off the light switch and give the light bulb a chance to cool before you remove it. Your circuit breaker should have each circuit labeled—look for one that says "Stove range," or just "Range."
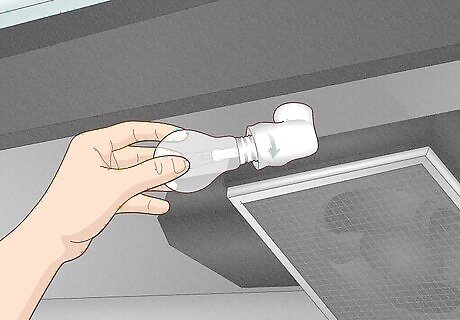
Push a suction cup tool onto the flat lens of the light bulb. Your range hood might have come with a small plastic suction cup tool. If not, you can pick one up from a hardware store or online. Press the suction cup against the flat lens so it sticks. If you've got a small suction cup at home, it will do the job too! You're just looking for a way to twist the bulb out of the socket so you can remove it. If the suction cup doesn't stick to the light bulb, clean the bulb to remove grease so the suction cup will stick to it.

Turn the tool counterclockwise to unscrew the bulb. Look at the bulb—you'll see threads like on a standard light bulb or 2 small pins sticking out of the base instead. For the threaded type that screws into the socket, keep turning counterclockwise until the bulb is out. For the pin-type base, turn the suction tool 60-degrees counterclockwise—the bulb will basically fall out of the socket. If you don't have a suction cup tool, don't worry! Press the pads of your fingers against the flat lens of the light bulb and gently apply pressure. Turn your fingers counterclockwise as you push to unscrew the bulb.
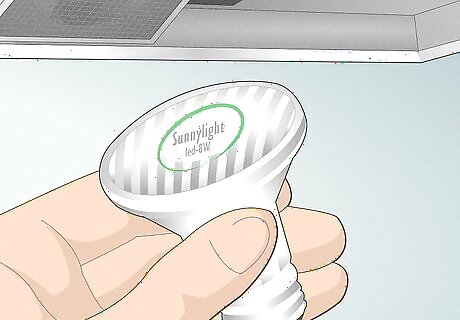
Choose a new bulb that's at or below the recommended wattage. When you replace bulbs, it's fine to switch from a halogen to an LED or vice-versa, as long as you don't exceed the recommended wattage. When in doubt, look on the side of the old bulb for the bulb type and wattage so you know what to replace it with. Halogen bulbs are great if you want to focus light on a specific area of your range while LED bulbs are a good choice if you want a longer-lasting light bulb. Incandescent bulbs aren't a very good option for range hoods since they're not very energy efficient and the heat of the range can damage them.
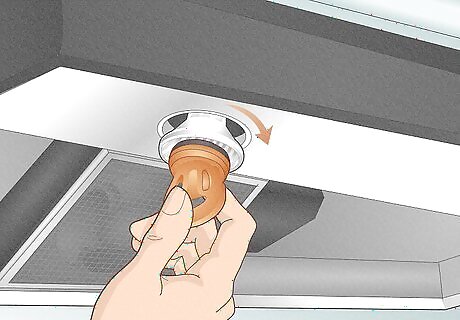
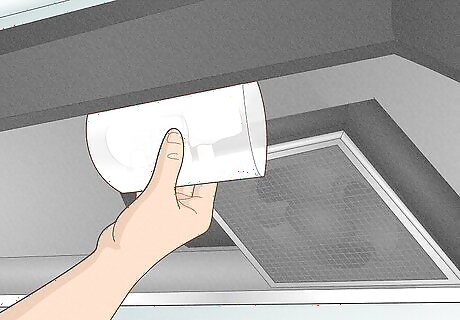
Press the suction tool on the new bulb and screw it in clockwise. Pop the suction tool off of the old lightbulb and push it onto the new bulb. Then, align the base of the bulb with the socket and screw it in clockwise. If your bulb has a threaded base, press it into the socket and turn the suction tool clockwise to screw it in place. For a pin-type base, align the pins on the base of the bulb with the large holes on the socket. Then, push the bulb in and turn it clockwise about 60-degrees so it's secure.
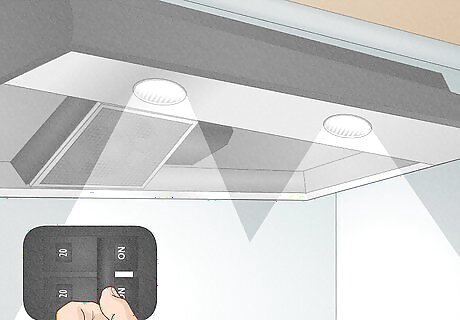
Flip the breaker on at the fuse box and turn on the light. The light bulb should turn on immediately. If it doesn't it may not be screwed in tight enough so turn everything off again and turn the bulb clockwise until it feels snug. Then, turn the light on.


Comments
0 comment