views
Choosing and Preparing Your Stem
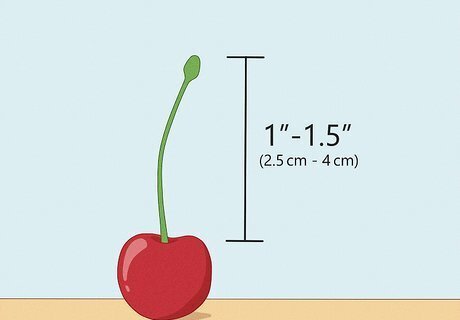
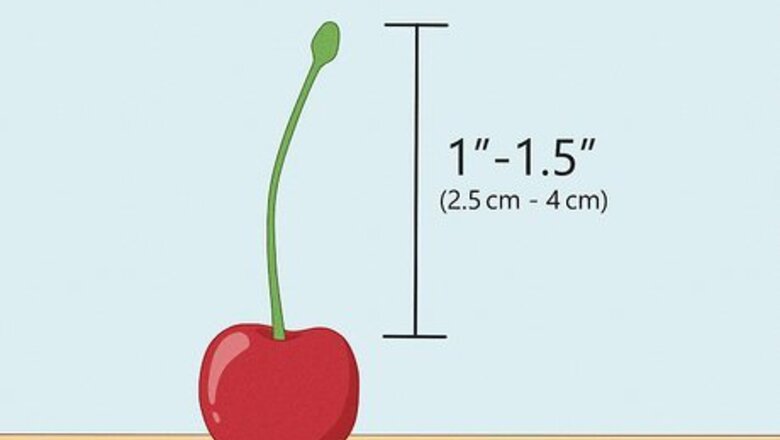
Choose a long, large-tipped stem. The longer your stem is, the easier it will be to tie the knot. Look for a stem between 1 to 1.5 inches (2.5 to 4 cm). You should also look for a stem with larger tips at the ends. This will help you locate and twist the ends with your tongue.

Use a Maraschino cherry if available. Maraschino cherries are best for knots because the syrup makes their stems already soft and pliable. These are also cheap and generally readily available at bars and parties, so they’ll be available when you want to show off this trick.
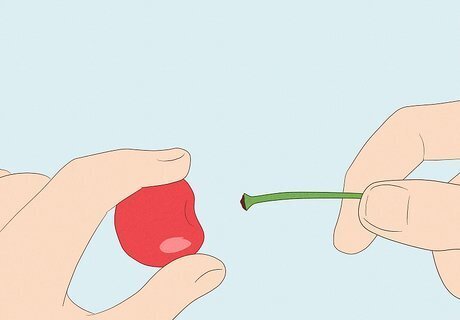
Remove the cherry from the stem with care. Gently pull the cherry off of the stem and try to keep the connecting end of the stem as wide as possible. If you accidentally pull off the wider tip of the stem, find a new cherry and try again.

Soften the stems of fresh cherries first. If you’re using a fresh cherry stem, soften it by holding it in your mouth for 10-30 seconds while chewing and swishing it around. Don’t chew the stem so much that it becomes mushy--you just want it to be malleable. Be careful not to swallow the stem while moving it around in your mouth! If you’re using fresh cherry stems, make sure they’re room temperature. Practicing too much with refrigerated stems can make your tongue bleed.
Using the Classic Method
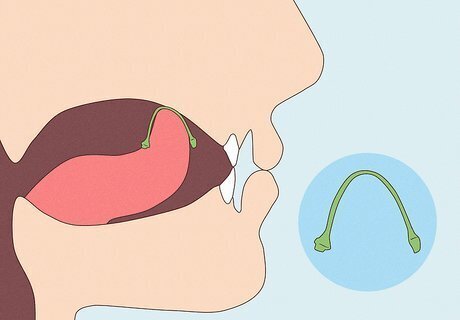
Lay the stem lengthwise on your tongue and push your tongue up slowly. Place the tip of the stem at the tip of your tongue.Because the stem is lying parallel to your tongue, the motion of pushing up will naturally bend the stem in half. Keep pushing your tongue up until it presses the stem against the roof of your mouth--keep it pressed there. During this step, your lips should remain closed.
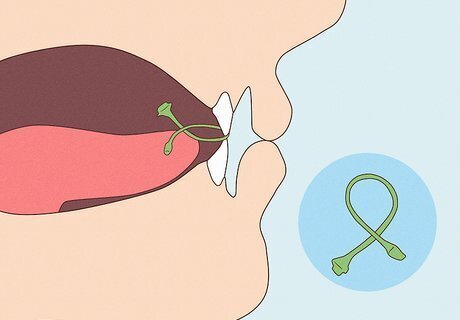
Bite down gently until the two ends of the stem cross over. Hold the stem between your front teeth, where it should form a loop with the ends in an X-shaped crossover. This motion should leave the tips pointing toward the front of your mouth.
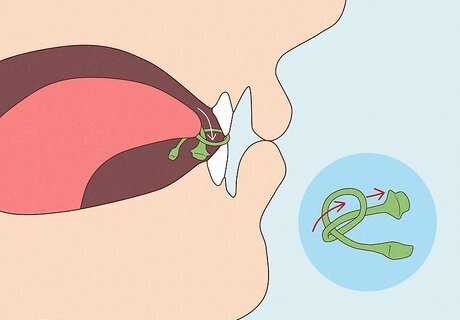
Use the tip of your tongue to push one tip through the loop. While still biting down on the stem with your front teeth, locate and push the longer end of the stem through the loop.
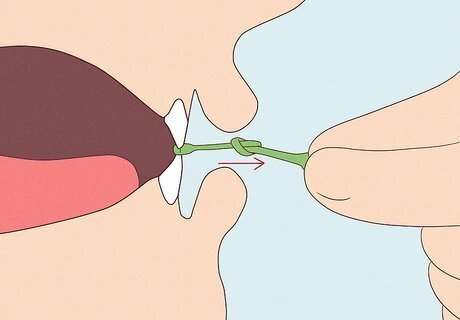
Grab one end of the stem with your fingers. Keep biting down on one end as you pull the knotted stem out of your mouth by the other end. This will tighten your knot and keep it intact before you reveal it. Present the tied stem with a flourish, holding the loop so everyone can clearly see the knot.
Using an Alternative Method

Hold one end with your teeth and then put the other end alongside it. This means that the stem will fold in half like a hot dog, with the left tip crossed over the right. The loop of the stem should face outward, sticking slightly out of your mouth. Both ends may be even at this step, or you may want to make the left tip longer so it will be easier to locate.
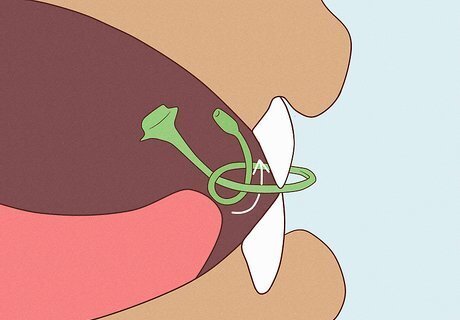
Use your tongue to move one tip of the stem. Locate the end of the stem that’s on top and use your tongue to push it down, then back up through the loop. The tip should hook down first in order for you to push it up into the loop. This will create a knot.
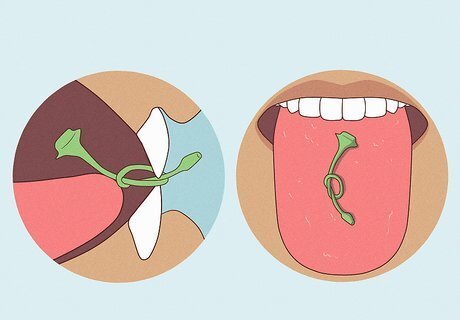
Bite and pull away your teeth. Tighten the knot by biting down with your front teeth, then stick out your tongue to reveal the knotted stem. Be careful not to touch it too much before revealing it, as the knot could come apart. When you reveal the the tied stem, hold it by the loop to showcase the knot and add a little theatrical flourish.


Comments
0 comment