
Jack
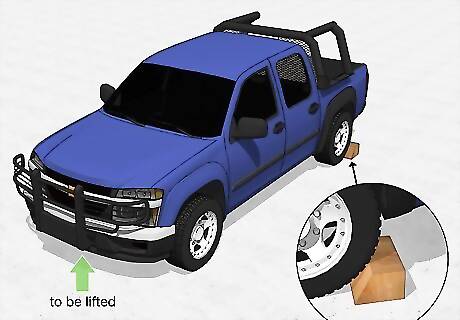
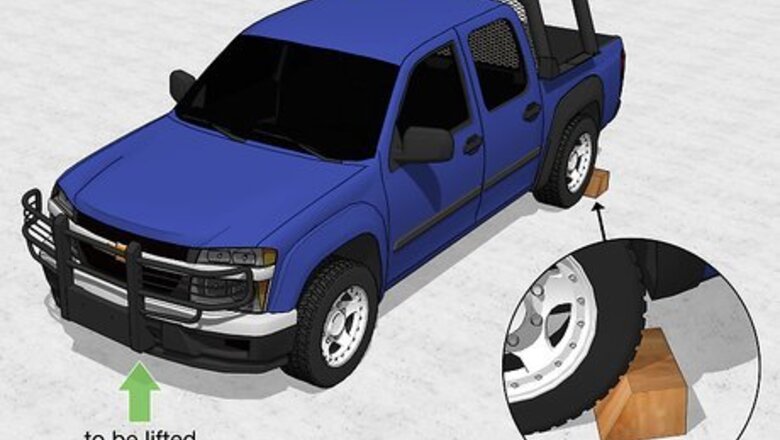
Chock the opposite wheel if you’re raising a vehicle. If you’re raising a vehicle with your jack, you need to secure it so it doesn’t move or roll away while it’s lifted up. A chock is a triangle-shaped wedge designed to secure a vehicle. Place the chock behind the tire that’s on the opposite end of the side you’re raising. It’s super important that you secure the vehicle before you raise it. Even if you have the parking brake engaged, a small amount of movement can cause the jack to move out of place and cause your vehicle to slip off of it. If you aren’t raising a vehicle, make sure whatever object you’re raising is stable and won’t move when you lift it.
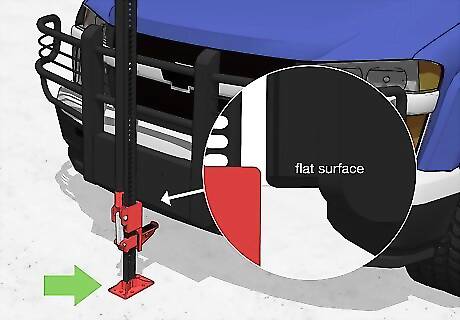
Place the base of the jack on level ground beneath the load. Take your jack and place the base plate on a firm, level, and dry surface beneath the part of the load you want to raise. Make sure the steel standard bar (the rod with the holes) is pointing straight up. For instance, if you’re raising the front of your vehicle, choose a flat, level spot beneath a secure spot at the front of your vehicle. Using an uneven or wet spot can cause the jack to slip out of place while your load is raised, which can be really dangerous.

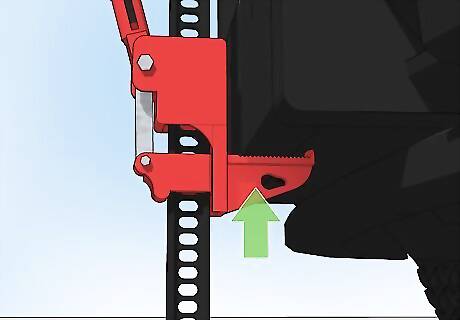
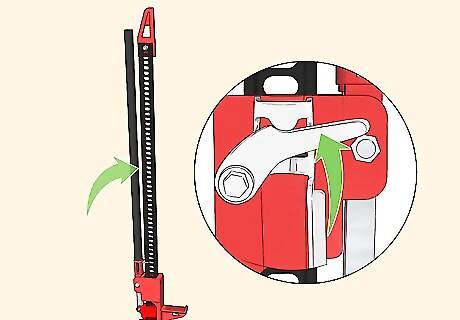
Lock the jack into the up position by lifting the reversing latch. Locate the metal reversing latch near the base of the jack. Pull the latch until it locks in the up position so you’re able to raise the jack. The latch should click or snap into place once it’s in the locked position.

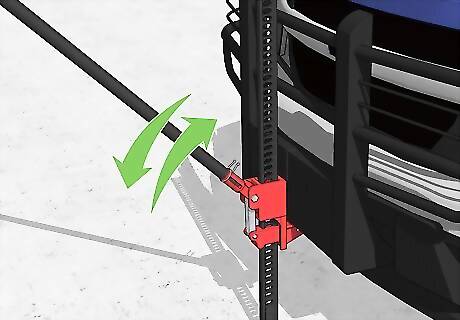
Pull the handle away from the steel bar to release the clip spring. Grab the handle at the end of the jack’s arm. Pull on it until it comes away from the steel bar and the clip spring that keeps it held in place is released. Hi-Lift jacks should be stored with the arm locked in the upright position, so you need to release it from the clip spring that holds it in place before you’re able to use it.
Raise the runner until it’s secure under the load and lock it into place. The runner, also known as a lifting nose, is the metal shelf on the jack that raises the object. Slide the runner up until the top of it is pressing against the bottom of the load that you’re raising. With the jack in the up position and the arm away from the steel standard bar, the runner should easily slide up it. Make sure you choose a secure part of the object that can support the weight of the jack as it’s lifted, such as the frame of a vehicle or an even section of a heavy object.
Pump the handle up and down to raise the load. With the runner secured beneath the load, take hold of the handle at the end of the arm on the jack. Pump the arm up and down to move the jack up 1 slot at a time on the steel standard bar. Keep raising the jack until the object is the height you want it. As the jack moves up 1 slot at a time, it locks into place and is able to keep the load raised securely.
Move the latch to the down position when you’re ready to lower it. When you’re done with your task and ready to lower the jack, locate the reversing latch at the bottom of the jack. Push the latch to move it into the down position when you’re ready to start lowering the jack. Don’t worry, while the jack is locked into place, it won’t just drop down if you flip the latch to the down position.
Grab and pump the handle up and down to lower the load. Take hold of the handle on the jack’s arm. Move the arm up and down just like you did when you raised it to start lowering it 1 slot at a time on the steel standard bar. Keep lowering the jack until the object rests on the ground and you can pull the jack out from underneath it. Make sure you hear the “click” of the pin moving into the slot of the steel bar to know the handle is secure.
Winch

Place the jack on its side with the top clamp in line with the bar. Take your Hi-Lift jack and set it on its side on the ground or at an angle if you’re winching a vehicle uphill. Make sure the steel standard bar with the slotted holes is lined up with the clamp on the top of the jack.
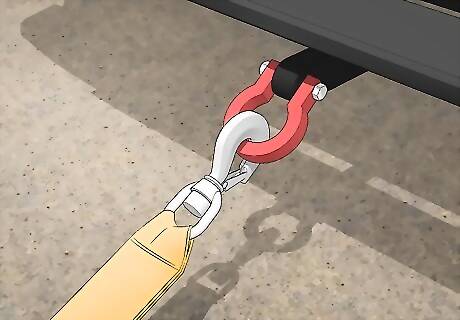
Attach 1 end of a chain or tow strap to the vehicle you’re winching. Take a chain or a tow strap and wrap it around a spot on the frame. Make sure the chain or strap is securely fastened to itself so it won’t come loose. Connect the strap or chain to the metal frame beneath the vehicle and not the fender or bumper, which won’t be able to support its weight. Choose a section on the frame facing the way you want to winch the vehicle. For instance, if the rear of your car is stuck in a ditch, attach the chain or strap to the front of it. The Hi-Lift jack is strong enough to winch up to 5,000 pounds (2,300 kg)! That’s about how heavy a Jeep Cherokee or Jeep Wrangler weighs.
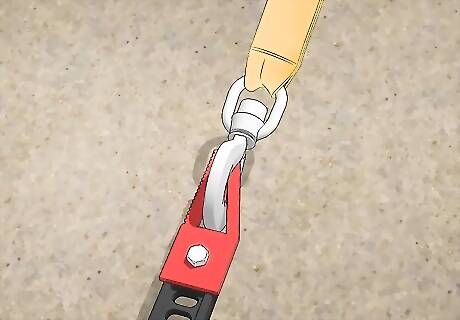
Connect the other end to the top clamp of the jack. Find the top clamp-clevis, which is located on the top of your jack, at the opposite end of the base plate. Take the other end of your chain or strap and loop it over the top clamp so it’s securely attached to your jack.
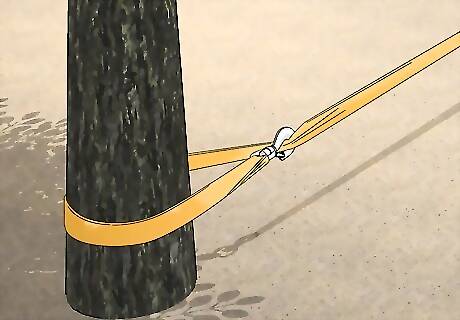
Attach another chain or strap to another fixed, stable object. Take a separate chain or tow strap and locate a sturdy fixed object you can use to winch your vehicle, such as a nearby tree. Wrap the strap or chain around the fixed object and fasten it to itself so it’s secure. If you’re connecting your jack to a tree, use a tow strap so you don’t damage the tree. The bigger the tree, the better, but make sure it’s at least 5–6 feet (1.5–1.8 m) in diameter so it can support the weight.

Connect the other end to the runner on the jack. Take the other end of the chain or strap that’s connected to the fixed object and bring it over to the runner or the lifting nose on the jack. Connect it securely to the runner so you can start winching.
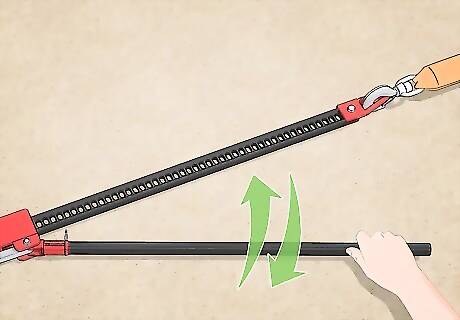
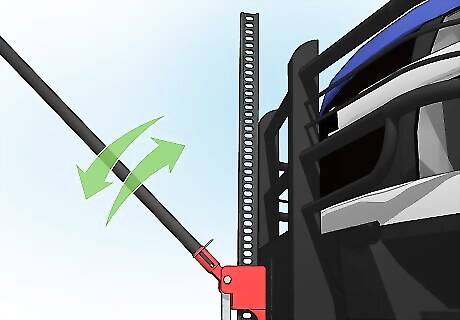
Move the arm up and down to winch the vehicle. Pull the arm of the jack away from the steel standard bar. Start pumping the arm up and down to move the jack 1 slot at a time and start winching the vehicle. Keep pumping until you’re finished winching and then disconnect the straps and chains from your jack, vehicle, and fixed object.
Clamp or Spreader
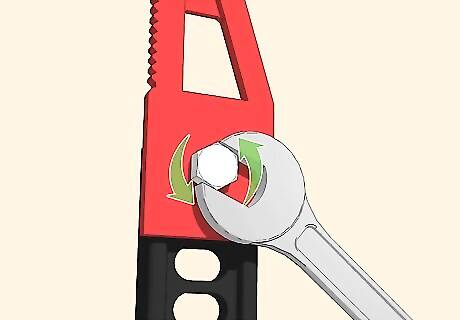
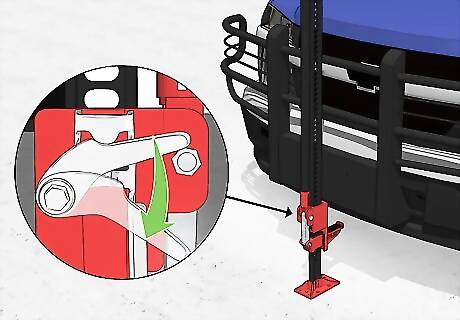
Loosen the bolt on the top clamp of the jack. Locate the clamp-clevis, which is at the top of the jack on the opposite end of the base of the jack. Find the bolt connected to the clamp-clevis and slide it of its slot so you can move the clamp.
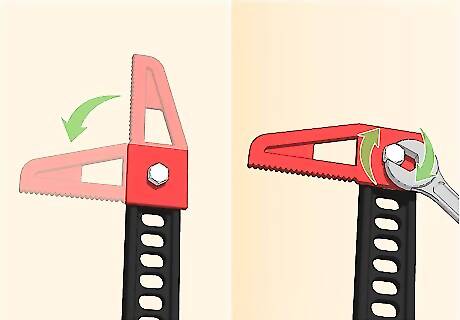
Rotate the top clamp to face the opposite direction, then tighten the bolt. Turn the top clamp a full 90 degrees so it’s facing in the opposite direction. Then, re-tighten the bolt so it’s secure.

Set the latch to the up position if you’re spreading, or down if you’re clamping. If you’re planning to use the jack as a spreader, flip the reversing latch to the up position so the jack opens when you pump the arm. If you’re using it as a clamp, flip the latch to the down position. If you’re spreading an object, you may want to pump the arm to close the runners so you can fit them into place.
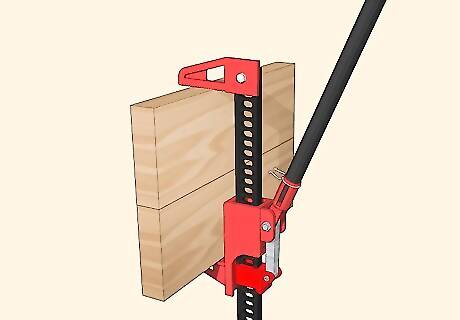
Place the jaws against the object you’re spreading or clamping. If you’re spreading something, place the runner jaws in the space you want to spread open. If you’re clamping, place the jaws on the outside of what you’re clamping so they close around it. For instance, you spread apart vehicle frames, straighten bent tie rods, or even break a stubborn tire bead by using the Hi-Lift jack as a spreader. You could also clamp a piece of wood to another or even to clamp the jack to your vehicle.
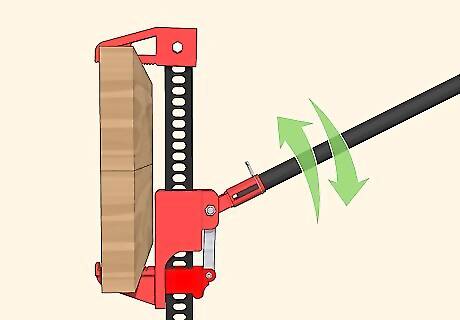
Pump the arm to spread or clamp the jack. Grab the handle at the end of the jack’s arm. Pump the arm up and down to move the jack 1 slot at a time up or down the steel standard bar, which will open or close the jaws, depending on whether you’re spreading or clamping. Keep pumping until you’re finished spreading or clamping. The jack can keep the object clamped or spread for as long as you need it. You can flip the reversing latch and pump the arm whenever you want to remove the jack.
Maintenance and Storage

Use degreaser and a stiff brush to clean the jack. If the jack gets dirty or if the moving parts are clogged up, take a stiff brush and scrub it clean. Use a cleaning solvent or a good degreaser to clean it well and get off any dirt or grime on the surface.
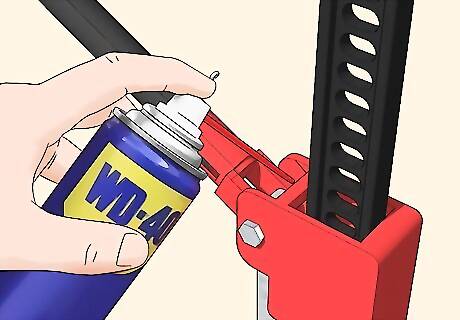
Keep the jack well-lubricated with light penetrating oil. Whenever you clean your jack or if it starts grinding or sticking, lubricate it to keep it performing at its best. Take a light penetrating oil and spray it on the lifting mechanism and any other moving parts on the jack. You could also use a silicone or Teflon spray instead of a light penetrating oil. Make sure you lubricate the steel standard bar, as well as the springs, bolts, and pins.
Lock the latch and handle in the up position when you store the jack. Whenever you’re ready to store your jack, raise the handle all the way to the steel standard bar. Push it until you hear the clip spring engage so it’s secure. You can then store the jack in your vehicle, garage, or closet. Keeping the jack stored with the arm up makes it take up less space and can help keep dust and dirt out of the lifting mechanism.
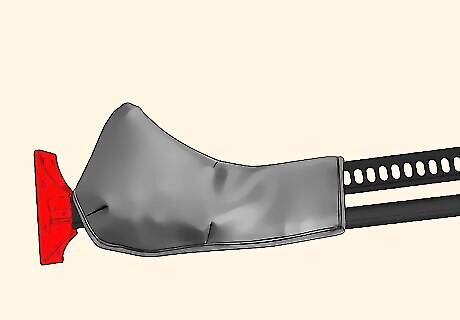
Cover the jack if you store it outdoors. If you plan to keep your jack stored outside or in an outdoor shed, cover it so it’s protected from rust and corrosion. Use a Hi-Lift protective cover or wrap it in a tarp to keep it safe.


Comments
0 comment