
- Braid your natural hair into cornrows that are flat against your head. These braids act like the “canvas” for your crochet extensions.
- Weave each crochet extension into your braid with a crochet latch hook. Fold the extension in half, loop it onto the latch, then pull the loose hair through the cornrow.
- Secure braid-style crochet extensions to your hair by threading the thin end of the braid through the base loop of the extension with a crochet latch hook.
- Remove the bulk of your crochet extensions with a pair of hair shears. Then, slide the leftover extension knots off your natural hair.
Braiding Your Natural Hair

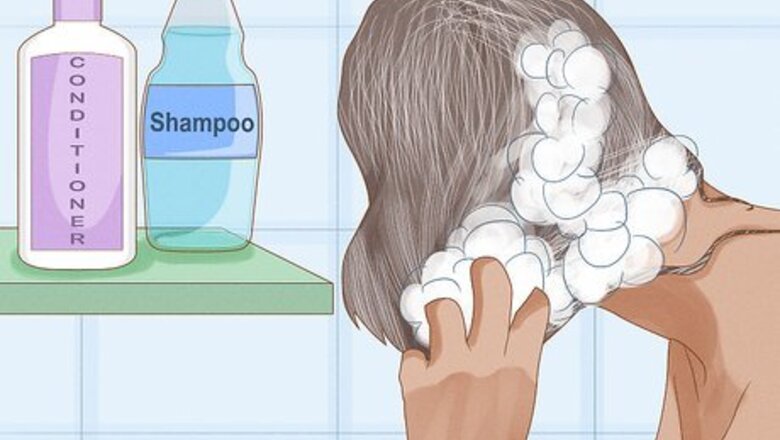
Wash, condition, and moisturize your hair ahead of time. Go through your hair with both clarifying shampoo and moisturizing shampoo, followed by a round of moisturizing conditioner. Once your hair is squeaky clean, use a moisturizing product like mousse or leave-in conditioner to nourish your hair. Although it’s totally optional, some people like to do a pre-shampoo treatment with olive or coconut oil before washing their hair.
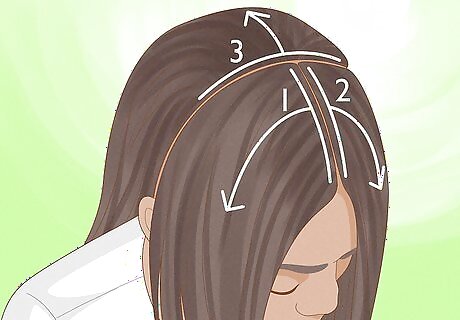
Part your hair into 2 front sections and 1 larger back section. Grab the end of a rat-tail comb and split your hair vertically along your part. Using the same comb, part your hair again, guiding it in a horizontal line from one ear to the other. Clip up the front 2 sections of your hair so you can focus on the larger, back section of hair first. If you have a widow’s peak along your hairline, it could be worth parting your hair slightly unevenly. That way, your widow’s peak looks a little more polished. It might help to stretch your natural hair before you start braiding.
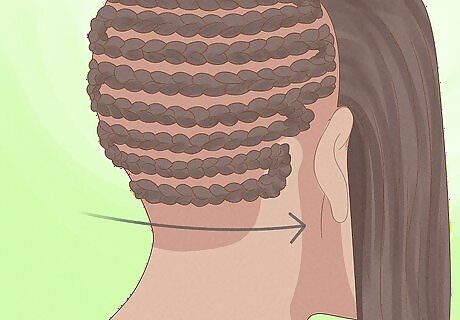
Cornrow the back section of your hair in horizontal lines. Starting along the very bottom of your neck, braid your hair in a horizontal line that’s parallel with your shoulders. Once you braid all the way across your neck, braid the hair into a curve and continue working your way to the other side of your head. Keep snaking this braid up along the back of your head until you’ve used up all the hair in the back section. It helps to part the back portion of your hair into smaller sections before you start making your horizontal cornrows.
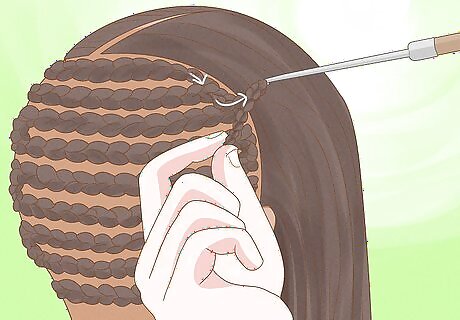
Secure the end of your braid into the nearby braids with your crochet latch hook. Insert your hook beneath one of the horizontal cornrows near the top of the back section. Slide the braid tail through the latch hook, using the hook to “thread” the tail through the base braid. Continue weaving this tail until it’s completely tucked in; this way, your horizontal braids are completely flat against your head.
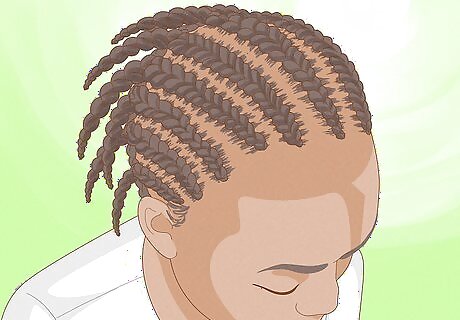
Braid your front 2 sections of hair in vertical lines going back. Unclip your hair in the front and divide it into smaller sections. Ideally, try to make about 15-18 braids along the front of your head that trail all the way to the back (already braided) portion of your hair. Make sure that your braids are spaced out evenly.
Weave the tail ends of your front braids into your back horizontal braids. Like you did before, use your crochet latch hook to tuck the ends of your front braids into the base braids so all your natural hair is flat. Make sure that you’re threading each braid tail into different sections of your hair; otherwise, you’ll create a disproportionately large lump of hair along the back of your head.
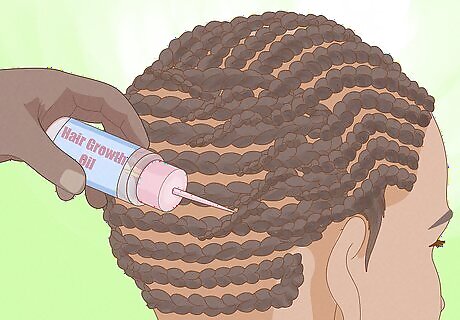
Apply hair growth oil to your braids to promote hair growth. Grab a bottle of hair growth or edge growth oil and squeeze it along the edges of your braids. Feel free to apply the oil all around your scalp, or focus it in areas where you’d really like to target hair growth. Applying oil helps your scalp stay moisturized while your crocheted extensions are in place.
Crocheting the Extensions
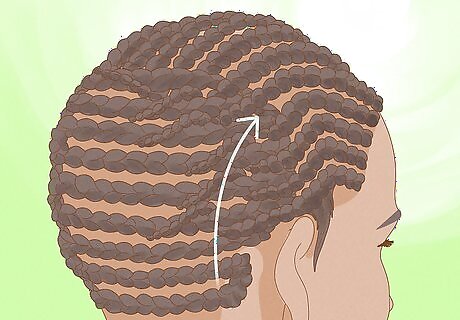
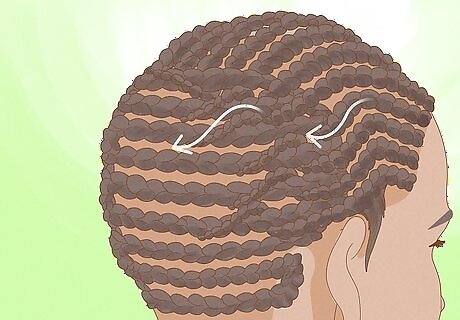
Start with the back section of your hair and finish with the front sections. Find the lowest horizontal braid along the back of your head—this is your starting point. You’ll work your way through the back section of your hair first, followed the front sections.
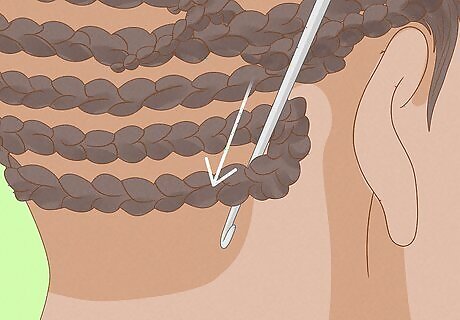
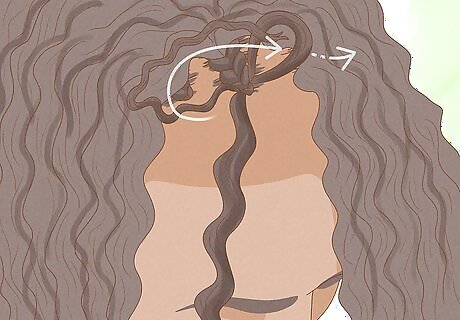
Insert the crochet hook through a braid and latch the hair extension. Stick the hook through the bottom of the cornrow, making sure that latch is poking out from the bottom of the hair. Then, fold a small section of your hair extension in half and loop it onto the latch.

Pull the loose hair or braid through the cornrow by about 3 in (7.6 cm). With the latch closed around the hair extension or loop, pull the hook back under and through the cornrow. Go slowly to avoid snagging your natural hair on the way through. Keep in mind that there may be some resistance if you are crocheting thick, curly or wavy hair extensions. Go slowly to avoid damaging your natural hair or the extensions.
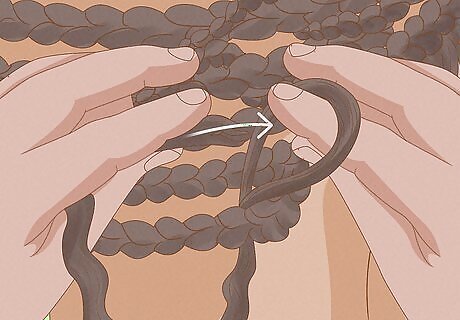
Open up the loop of hair with your fingers and pull the ends through. Slide the loop of hair onto your fingertips and set aside the latch hook. Then, slide the loose ends of the hair extension through this loop and tug it taut to create a knot. To make your extensions extra secure, thread the ends of your extension through the loop twice. If you’re crocheting with braid extensions, insert the crochet latch hook into your natural braid and slide the looped end of the braid extension down the base of the crochet latch hook. Then, hook the opposite end of the braid extension in the latch and pull it through the looped end to secure the extension to your scalp.
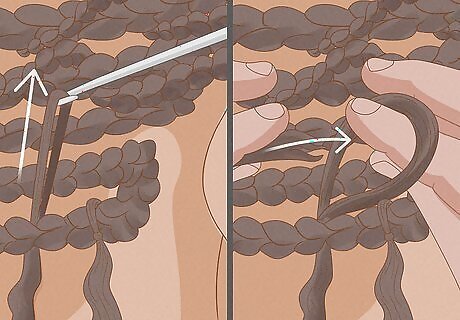
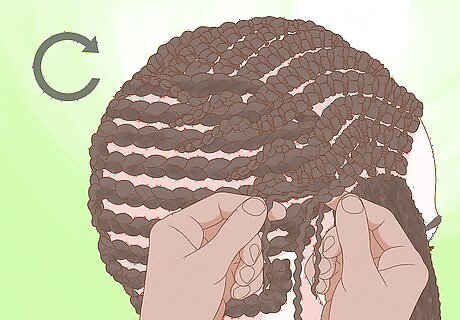
Continue crocheting along the rest of the horizontal braid. Place your fingertip next to the extension you just added—this is the amount of space you want between each braid. Repeating the same technique, use your crochet latch hook to thread a small, folded section of extension further along the braid. Create a loop with one end of the tendril, thread the ends through, and tighten the knot.
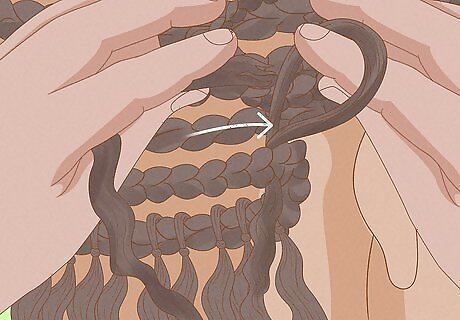
Move up to the next layer to continue adding extensions. Work your way up the back of your head and transition to the front sections. Use the same crocheting technique on the most of these front sections—just be sure to space your extensions a little closer together. You don’t have to use quite as much synthetic hair as you work your way to the front of your head.
Pull just 1 end of your extension through the loop near your hairline and part. Insert the latch hook through the braid and attach the extension piece like you normally would. This time, however, slide just 1 end of the extension through the loop and pull it taut (rather than both ends). This creates a more natural-looking knot along the more visible parts of your hair.

Snip any frizzy or uneven ends to finetune and shape your hairstyle. Grab a pair of hair shears and cut away bad-looking ends. Once you’ve given your hair a quick tune-up, your beautiful new look is ready to go!
Removing the Crocheted Extensions
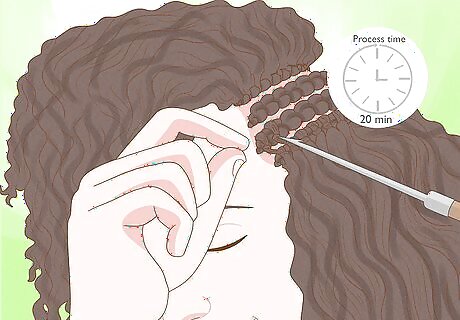
Remove your extensions after 4-8 weeks. Crocheted extensions last for a long time, but they can potentially lead to breakage if you keep them in for more than 8 weeks. Thankfully, this process doesn’t take super long—it can as little as 20 minutes, depending on the style and number of extensions you used.

Snip off the hair extensions without cutting off the base knots. Grab a pair of hair shears and line them up on top of the knotted base of your hair extensions. Then, make your cut, leaving just the knotted bottoms of the extensions in place. It helps to snip off all the extensions before you start removing the knots from your natural hair. You can also snip off most of the extension (rather than the entire strand) and undo the knot by hand.

Undo the end of your natural braid until you come across a knotted extension. Using the end of a rat-tail comb, separate the end of your natural hair from its braid. Keep unraveling the braid until you reach the first knotted extension base.
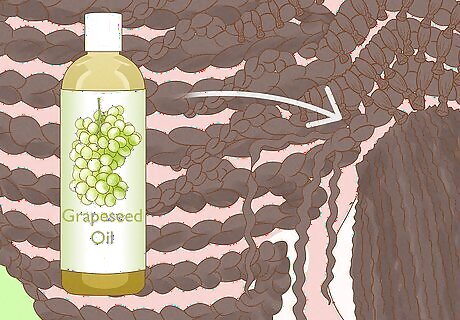
Coat the knot with grapeseed oil and slip it off your natural hair. Apply a lot of oil to the extension so it slides off your natural hair without any trouble. You might need to shimmy the knot a little bit before it slides off.
Repeat this process until all of the extension knots are removed. Keep snipping off your extensions directly above the knots, undoing your braids, and sliding the knots off. Chances are, some of the knots will fall out on their own, so you won’t have to remove every single extension by hand.


Comments
0 comment