
views
- Access the Brightness and Contrast menu by clicking "Colors" in the menu bar followed by "Brightness-Contrast."
- Drag the Brightness slider to the right to increase the brightness or left to decrease it.
- You can also adjust the brightness using the Curves menu or by changing the exposure.
Using the Brightness Menu

Open an image in GIMP. If you don't have GIMP installed on your computer, you can download and install GIMP for free at https://www.gimp.org/. Use the following steps to open an image in GIMP: Open GIMP. Click File in the menu bar at the top. Click Open. Select the image file you want to open Click Open.

Select the layer you want to adjust. After opening your image in GIMP, click on the layer that needs adjustment in the Layers dock. If you are adjusting the brightness of an image that hasn't been split into layers, the single layer "Background" will be selected by default.
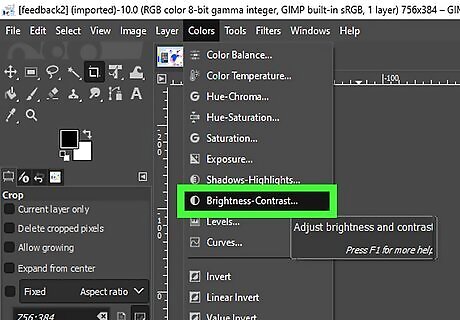
Open the "Brightness-Contrast" dialog box. Use the following steps to do so: Click Colors in the menu bar at the top. Click Brightness-Contrast.
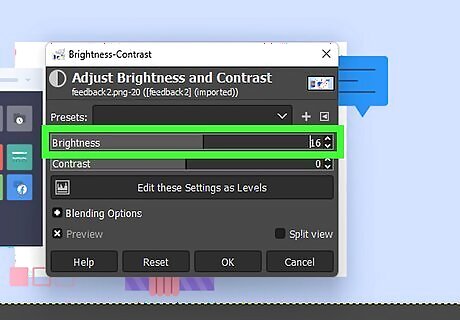
Adjust the brightness of the layer. Use the slider labeled "Brightness" to adjust the layer's brightness. Moving the slider to the left makes the layer darker, while moving it to the right makes it lighter. Note that this transformation will occur uniformly, which means that it will increase or decrease the brightness of each pixel by the same magnitude. For example, if you increase the brightness of a layer that is too dark overall, the finished image will likely have a washed-out appearance. This is because the brightness slider turns the layer's darkest tones (like black) into medium tones, reducing the overall contrast. If an image looks too washed out, try increasing the Contrast slider and brightness. To adjust brightness in a non-uniform manner, you should use the Curves menu instead. This will allow you to adjust brightness while preserving the layer's tonal variety. You can also use the Exposure menu to adjust how the light looks.
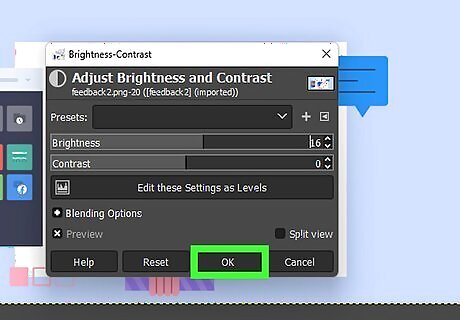
Save your changes. Click "OK" to apply the changes you've made. Remember to save the image before closing GIMP.
Adjust Brightness Using Curves Menu

Open an image in GIMP. If you don't have GIMP installed on your computer, you can download and install GIMP for free at https://www.gimp.org/. Use the following steps to open an image in GIMP: Open GIMP. Click File in the menu bar at the top. Click Open. Select the image file you want to open Click Open.
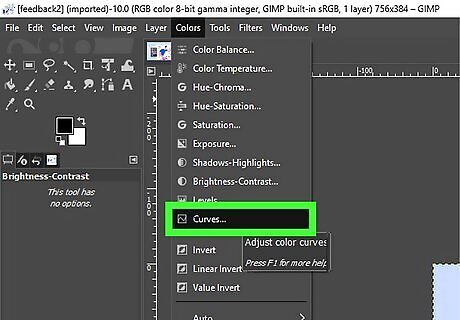
Open the "Curves" menu. Use the following steps to do so: Click Colors in the menu bar at the top. Click Curves.
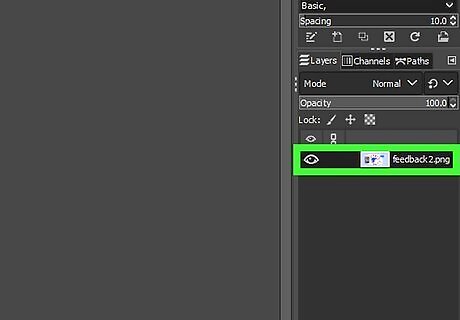
Select the layer you want to adjust. After opening your image in GIMP, click on the layer that needs adjustment in the Layers dock. If you adjust the brightness of an image that hasn't been split into layers, the single layer "Background" will be selected by default.
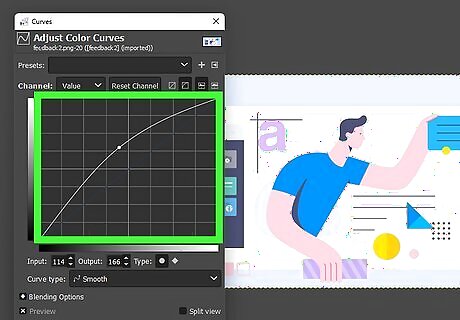
Familiarize yourself with the curves interface. In the "Curves" menu, you will see a 2-axis graph with a line stretching between the lower-left and upper-right corners. The horizontal axis represents the current tonal spectrum of your layer, while the vertical axis represents the adjusted tonal spectrum. The upper-right corner of the graph represents the image's highlights, while the lower-left corner represents the shadows or dark areas. The middle of the graph represents the mid-tones. You can use the Curves menu to adjust the highlights, shadows, or mid-tones of an image without adjusting the entire image uniformly.
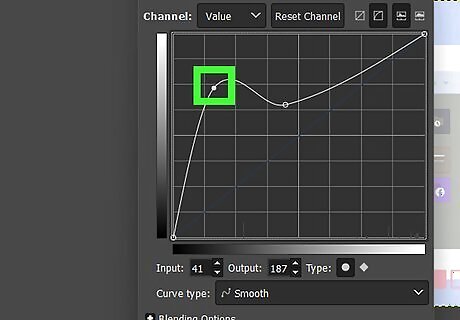
Add a control point to the curves graph. To begin editing your graph, you need to add a control point. To do this, click once at any point along the linear graph. You will see a small circular node appear. This is a control point, which you can use to adjust the shape of the graph. Additional control points can be added later to achieve more intricate shapes. Click in the upper-right corner of the line to adjust the highlights of the image. Click in the lower-left corner to adjust the shadows. Click in the center to adjust the mid-tones.
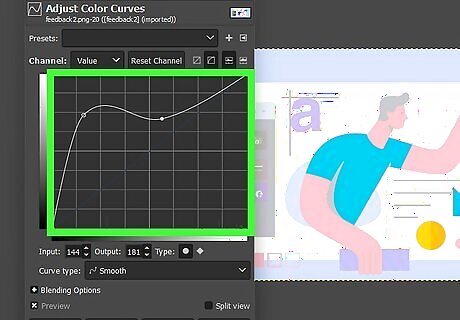
Adjust the shape of the graph. To make your layer brighter, for instance, click on the control point you created and drag it upwards. This will turn the linear graph into an upward curve. This will increase the image tones that you selected while leaving the rest of the color tones unaffected. You can add and adjust more than one control point. For example, create a control point in the upper-right corner and drag it upwards to increase the highlights of the image. Create a control point in the lower-left corner and drag it down to darken the shadows. This is a typical S-curve that creates a really nice contrast.
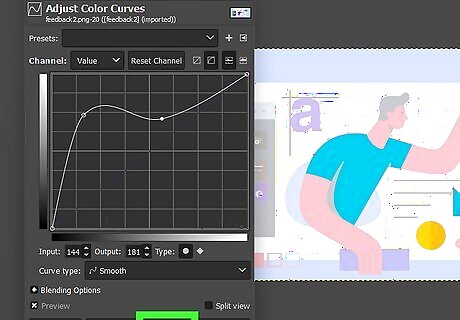
Save your changes. Click the "OK" button to apply the changes you've made. Make sure to save your image before exiting GIMP.
Adjusting the Exposure
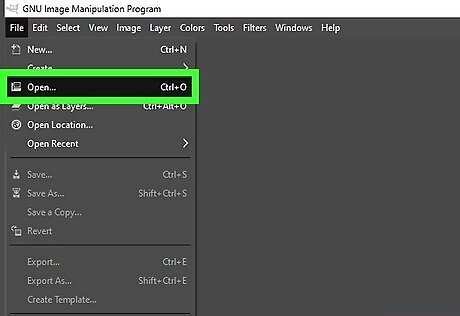
Open an image in GIMP. If you don't have GIMP installed on your computer, you can download and install GIMP for free at https://www.gimp.org/. Use the following steps to open an image in GIMP: Open GIMP. Click File in the menu bar at the top. Click Open. Select the image file you want to open Click Open.
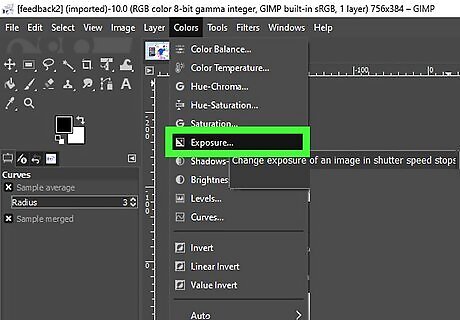
Open the "Exposure" menu. Use the following steps to do so: Click Colors in the menu bar at the top. Click Exposure.
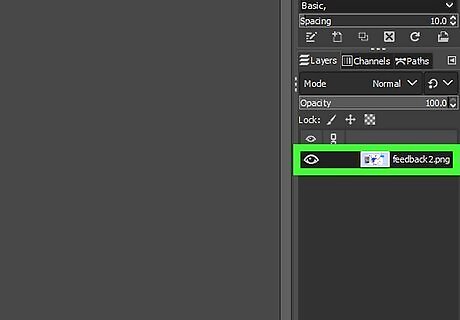
Select the layer you want to adjust. After opening your image in GIMP, click on the layer that needs adjustment in the Layers dock. If you adjust the brightness of an image that hasn't been split into layers, the single layer "Background" will be selected by default.
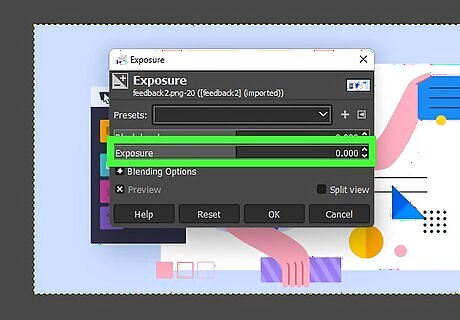
Adjust the exposure level. In photography, the exposure level is how much light was allowed to reach the inside of the camera's shutter. The longer a camera's shutter remains open, the more the light enters the camera's sensor. This makes the lighted parts of an image look bright and shiny. Drag the slider next to "Exposure" to the right to simulate increased exposure. Drag it to the left to simulate decreased exposure.
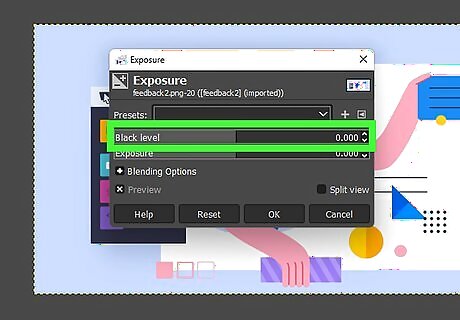
Adjust the black level. The black level will increase the darkness in the shadows and dark colors. Drag the slider next to "Black Level" to the right to darken the shadows and dark colors. Drag it to the right to brighten the shadows and dark colors. Slightly increasing the exposure and black level can create a really dramatic-looking effect.
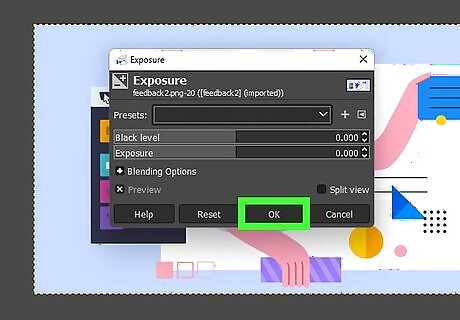
Save your changes. Click the "OK" button to apply the changes you've made. Make sure to save your image before exiting GIMP.



Comments
0 comment