
Coating the Cake Pops

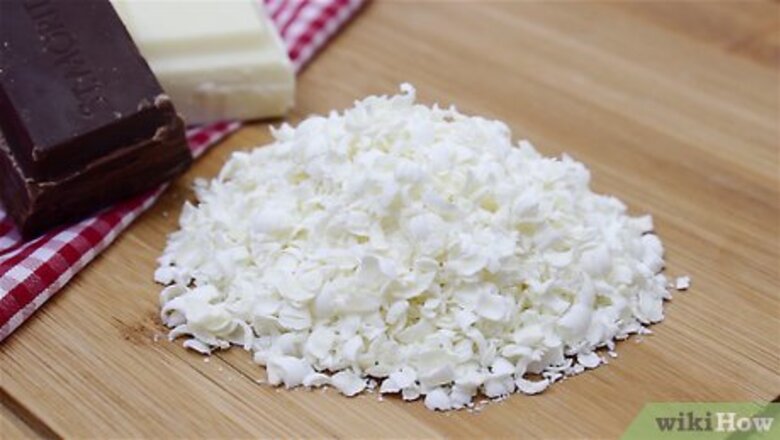
Get candy melts or candy coating made of chocolate. Look for chocolate coating that is broken into chips or pieces. They are often sold at grocery stores and baking supply shops as “candy melts,” “candy coating,” or “candy wafers.” Using candy coating, rather than just melted chocolate, will make melting them easier and quicker. Look for candy coating in a variety of colors. Most candy coating contains shortening, which helps the coating to harden smoothly on the cake pop. Use white candy coating if you plan to dye them. Get 1 pound (450 g) candy melts to coat 25 cake pops. Increase this amount for every 25 cake pops you want to coat.

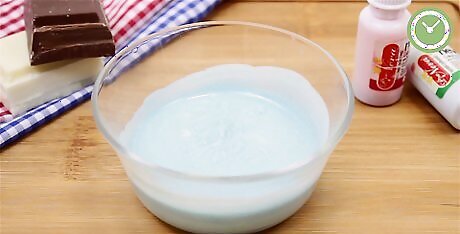
Melt the candy coating in the microwave for a quick, easy option. Place 1 cup (240 ml) of candy coating in a deep, microwave safe bowl. Then, microwave them for 30 seconds. Take them out and stir them with a spoon to avoid scorching. Microwave the candy coating at 30 second intervals until they melt. Always stir them between warm ups so they do not become burnt. Melt them until they are runny and smooth. You do not want them to become clumpy or sticky.

Melt the candy coating on the stove top at low heat if you don't mind stirring it. Place the candy coating in a deep pan. Warm them up at low heat, stirring them constantly with a wooden spoon or a spatula. Only melt them until they appear smooth and runny when you stir them. You can also use a double broiler to melt the candy coating. Pour 1 to 2 inches (2.5 to 5.1 cm) of water in a pot and place a metal bowl on top of the pot. Bring the pot to boil and pour the candy coating in the bowl, stirring them constantly until they melt.

Dye the candy coating with a candy colorant. Look for candy colorant at your local grocery store or baking supply shop. Candy colorant comes in a variety of colors and is safe to use in the candy coating. Regular food coloring can ruin the candy coating. Squeeze 1-2 drops of dye into the candy coating. Then, stir the dye in using a popsicle stick or a spoon. If you’d prefer not to dye the coating, skip this step.
Let the candy coating sit for 5 minutes at room temperature. This will help to prevent cracking. Take the cake pops out of the fridge at the same time and let them rest at room temperature as well. The closer in temperature the candy coating and the cake pops are, the less likely the coating will crack or run.

Dip the cake pops 1 inch (2.5 cm) deep into the candy coating. The coating should cover the entire cake ball and just touch the stick. Dip the cake pop once and then lift it up out of the coating in one smooth motion.
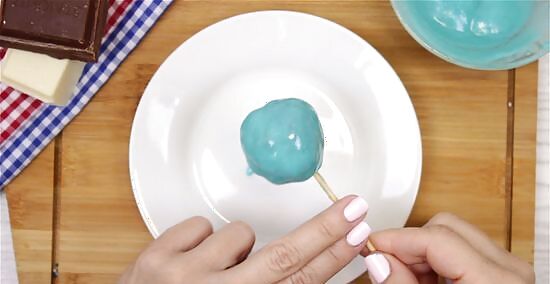
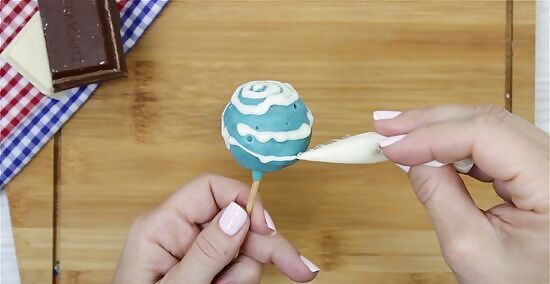
Shake the cake pop lightly to remove excess coating. Let any excess drip back down into the bowl. Flip the cake pop so it is right side up. Then, rotate the cake pop to help the coating even out. If there is a lot of coating on the cake pop, use a toothpick to remove it, running it lightly against the cake pop. Pop any air bubbles on the coating with the sharp point of the toothpick.

Allow the cake pop to harden in a piece of styrofoam. Stand the cake pop up in a block of styrofoam so it stays upright. Let it dry and harden completely. It can take 1-2 hours for the cake pop to dry. Make sure it sits at room temperature and is not touched as it dries to prevent cracking.
Adding Sprinkles, Candy, and Frosting to the Cake Pops
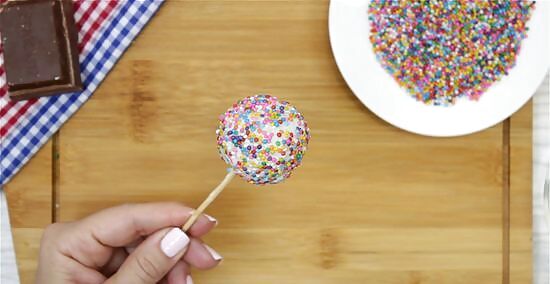
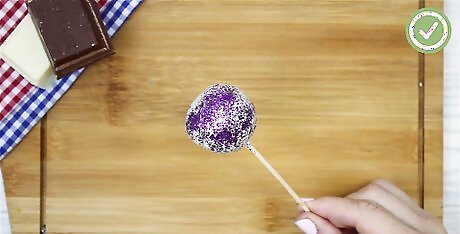
Dip wet, coated cake pops in sprinkles. Put small sugar crystals or sanding sugar in a medium-sized bowl. Then, roll the cake pops around in the sprinkles. Shake out the cake pops to remove any excess sprinkles and stand the cake pops upright so they can dry. Another option is to take a handful of sprinkles and drop them onto the wet cake pops. This can give the cake pops a lighter sprinkle decoration. Put a bowl or plate below the cake pops so you can collect the excess sprinkles and reuse them.

Add chopped nuts or candy pieces to wet, coated cake pops. Place chopped peanuts, walnuts, pecans, or cashews in a bowl. Then, take a wet cake pop and roll it around in the chopped nuts to coat it. Use your fingers to drop chopped nuts on the sides of the cake pop so it is covered. Add chopped candy pieces to the wet cake pops. Roll them around in the chopped candy so they get a nice coating.
Pipe frosting onto the cake pops. Put buttercream frosting in a small piping bag with a narrow tip. Then, hold the coated cake pop in one hand and pipe the frosting onto the cake pop with the other. Spin the cake pop around in your hand as you add the frosting to make a spiral design, vertical lines, or a horizontal line design. Put a plate underneath the cake pop as you pipe on the frosting so it can catch any excess frosting or frosting that drips down. Another option is to put small dots of frosting on the cake pops for a fun design or write letters or shapes with the frosting. Frosting looks best on cake pops that have already been dipped in candy coating.

Layer the cake pop in different colored coatings. Pick 2-3 different colors of candy coating. Melt them in separate bowls. Then, dip the cake pop in the first color and let it harden. Once it has dried, dip it half way into the second color and let it harden. Finally, dip it 1/4 of the way into the third color and let it dry for a layered color look. You may use white for the base color to make the other colors stand out. Try layering colors like blue, red, and white, or green, purple, and pink.
Add shimmering food coloring to the cake pops. Look for shimmering food coloring at your local grocery store or baking supply shop. It usually comes in the form of a spray. Apply a few spritzes of the shimmering food coloring to give the cake pops a nice, even color. Use an iridescent shimmering food coloring for a pretty, shiny sheen to the cake pops. Shimmering food coloring looks best on cake pops that have already been dipped in candy coating.
Putting Themed Decorations on the Cake Pops

Make halloween inspired cake pops. Create ghost cake pops by shaping the cake pops in small ghost cake molds. Then, dip the cake pops in white candy coating and add eyes by piping on black frosting. Make black cat cake pops by forming the cake pops into the shape of a cat’s head. Then, dip them in black candy coating and use white frosting to make whiskers, eyes, and a nose. Prepare candy corn cake pops by forming the cake pops into triangles. Layer the cake pops in white, orange, and yellow candy coloring.
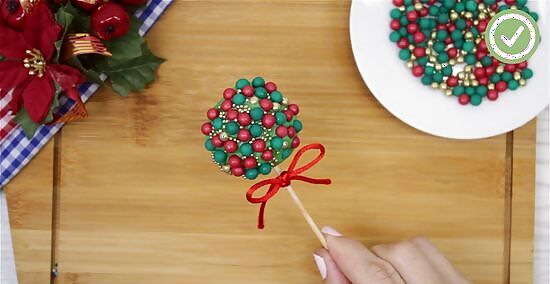
Create holiday cake pops. Make the cake pops festive for Christmas by dipping them in green or red candy coating. Add gold colored sprinkles to make them feel festive for a New Year's Eve party. Add white candy or nuts to the cake pops for Hanukkah. Buy sprinkles in the shape of common holiday items, such as stars, Christmas stockings, candy canes, or mistletoe. Add the sprinkles to the coated cake pops while they are still wet so the decorations can harden.
Make cake pops for a baby shower. Coat the cake pops in colors that fit with the color scheme of the baby shower. Use colored sprinkles or candy on the cake pops that go with the color scheme. Light blue and yellow are popular colors for a baby shower. If you’re feeling very crafty, draw a rattle or baby bows on the cake pops with frosting. Color the cake pops for a gender reveal party, using pink for a girl and blue for a boy.

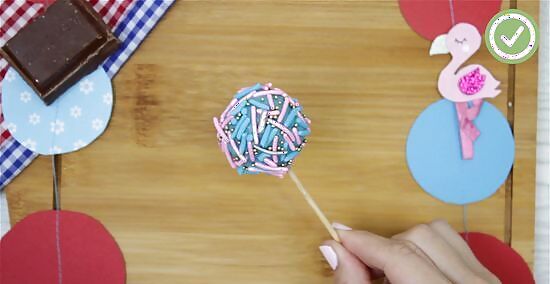
Decorate personalized cake pops for a birthday. Use confetti sprinkles to decorate the coated cake pops. Write the person’s initials on the cake pops using frosting. Draw a symbol or image that the person likes, such as stars, hearts, or smiley faces. Use sprinkles in the shape of a heart or a star to decorate the cake pops for a birthday.


Comments
0 comment