views
Blocking the Windows 10 Upgrade Offer
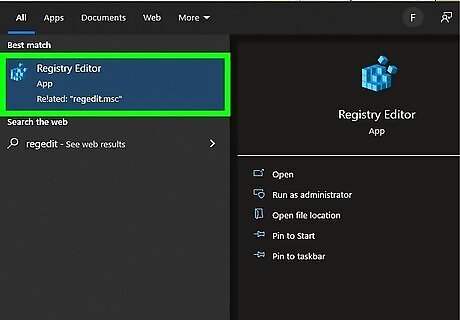
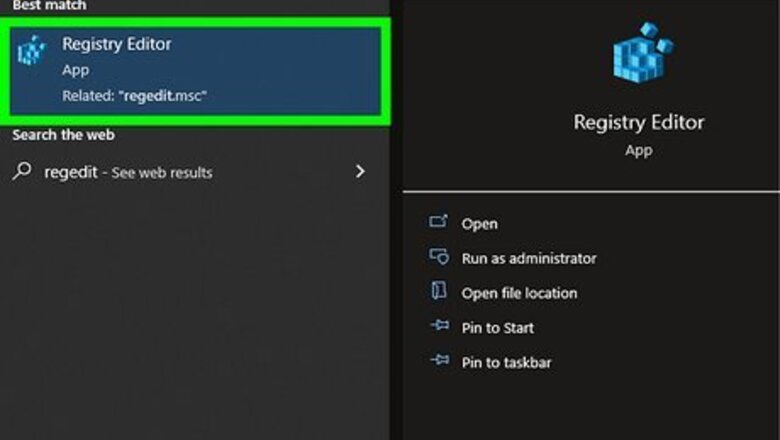
Open the Registry Editor. You can do this by clicking the Start menu icon to open your Start menu, then click Run and type "Regedit." Finally, click the executable app result. Click Yes when prompted. Before the app runs, you'll get a pop-up asking if the program "Registry Editor" can make changes to your device. You'll need to allow this by pressing Yes to continue.
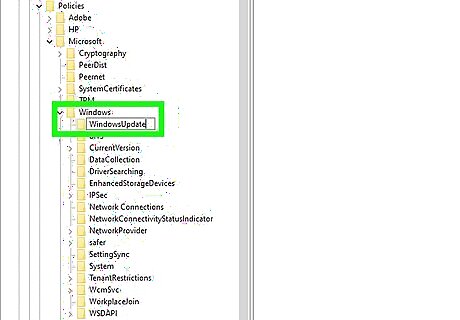
Navigate to "HKEY_LOCAL_MACHINE\SOFTWARE\Policies\Microsoft\Windows\WindowsUpdate." Do this by clicking the downwards-pointing arrow next to each location (HKEY_LOCAL_MACHINE, Software, Policies, etc) to see more options.
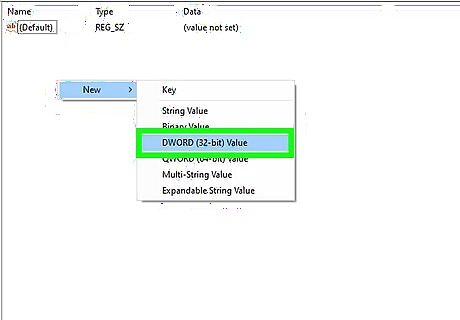
Right-click in the right panel and select New and DWORD value. The panel on the right shows the files in the "WindowsUpdate" folder that you navigated to. Once you have selected New > DWORD value, a new window will pop up.
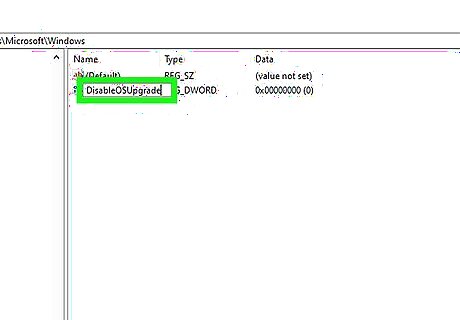
Enter the name "DisableOSUpgrade" and press ↵ Enter. This will add the new entry with a name you can recognize.
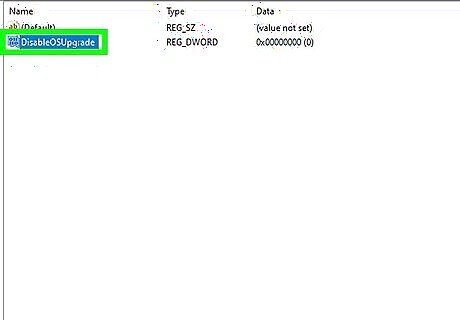
Double-click the new entry. The window will open again.
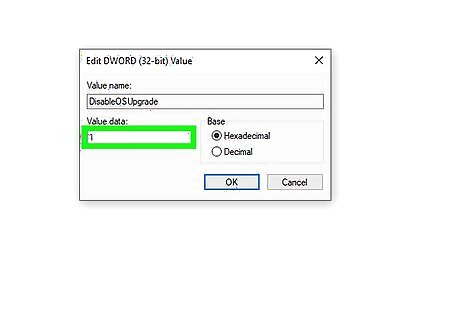
Enter "1" in the Value data field. After you change the value, you can close the registry. You don't need to restart your computer because the changes apply immediately after you close Registry Editor. If you're not sure what else you can do to prevent these updates from happening, you can check out your other options.
Disabling the Windows 10 Reminders
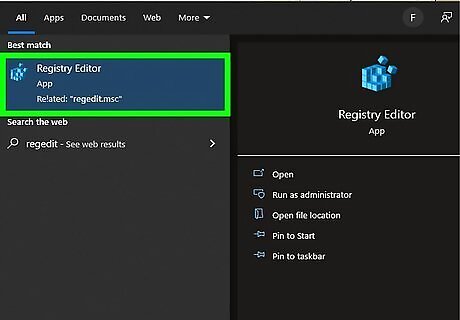
Open the Registry Editor. You can do this by clicking the Start menu icon to open your Start menu, then click Run and type "Regedit." Finally, click the executable app result. Click Yes when prompted. Before the app runs, you'll get a pop-up asking if the program "Registry Editor" can make changes to your device. You'll need to allow this by pressing Yes to continue. If you're unable to block the Windows 10 upgrade offer, you can at least disable the nagging reminders to upgrade using this method.
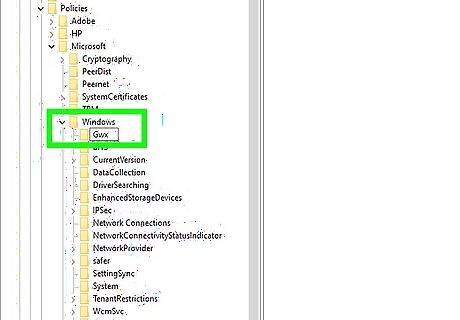
Navigate to "HKEY_LOCAL_MACHINE\SOFTWARE\Policies\Microsoft\Windows\Gwx." Do this by clicking the downwards-pointing arrow next to each location (HKEY_LOCAL_MACHINE, Software, Policies, etc) to see more options.
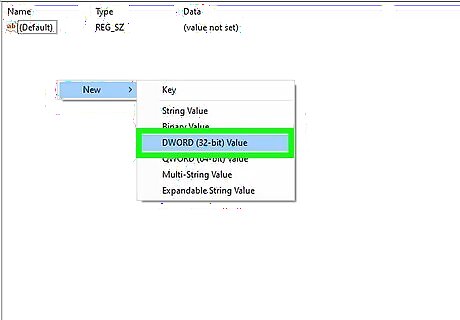
Right-click in the right panel and select New and DWORD value. The panel on the right shows the files in the "Gwx" folder that you navigated to. Once you have selected New > DWORD value, a new window will pop up.
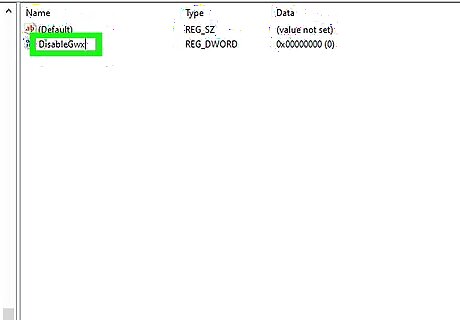
Enter the name "DisableGwx" and press ↵ Enter. This will add the new entry with a name you can recognize.
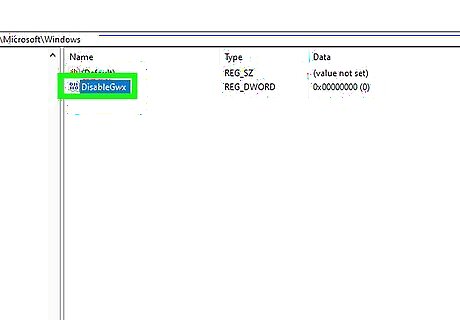
Double-click the new entry. The window will open again.
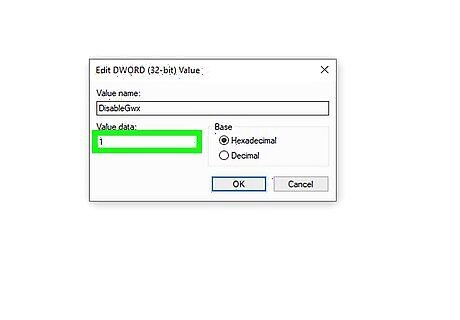
Enter "1" in the Value data field. After you change the value, you can close the registry. You don't need to restart your computer because the changes apply immediately after you close Registry Editor.


Comments
0 comment