views
Beginning to Frost
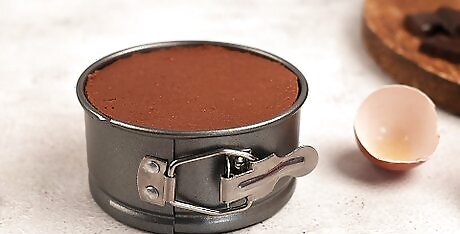
Let your cake cool. The biggest mistake you can make when frosting your cake is using a hot cake and cold frosting. If your cake is even slightly warm, it will melt the icing which will then run over the edges and soak into the top layer, making it soggy. Further, if you use cold frosting it won’t be smooth enough to spread and will bring up a lot of crumbs. Always wait for both your cake and your frosting to reach room temperature. This may take several hours of waiting but is necessary for a completely smooth cover of frosting. If you are leaving your cake to cool on the counter, place a slice of regular sandwich bread on the top of the cake. This will keep it moist and protect it from going stale.
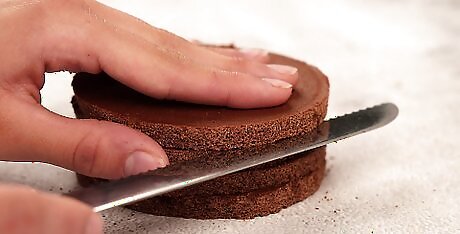
Make the cake flat. When you baked your cake, likely the center rose into a small dome. While this is perfectly normal, it prevents your cake from having a completely smooth layer of frosting as the dome will eventually lead the frosting to slide towards the sides. To keep this from happening, use a serrated edge knife (cake knife preferably) to slice a thin layer horizontally off the top of the cake, so that the top and bottom of the cake run parallel to each other. When possible, cut the top layer of the cake off while the cake is still in the pan. This will help you to get a more level surface. If you are making a layered cake, cut the top layer off of all the layers of cake you will be using.
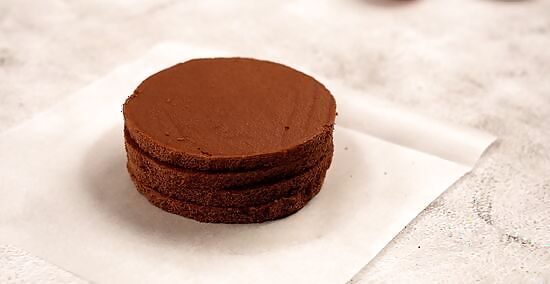
Set up the cake. When your cake is cooled and cut to size, prepare it for frosting by placing it on a round piece of cardboard or cake bottom. Add strips of wax paper about 2” thick to the edges of the cake along the bottom. When you finish frosting the cake, the wax paper will be removed and reveal a smooth bottom. It is easiest to frost your cake on a spinning cake stand, which are available at most kitchen, craft, and cooking stores. Get your cake frosting tools, including an offset spatula and bench scraper to smooth the icing. Don’t use a knife or rubber spatula, as these may be easy to use but will not give the desired smooth frosting you’re looking for. If you want, you can use a piping bag with a smooth frosting attachment to add the first layer of frosting. You can also add different tips to the piping bag afterwards to add decoration to your cake as well.
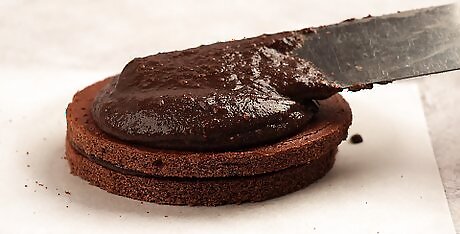
Add the crumb coat. The crumb coat is a rough layer of frosting that is used to seal in the crumbs so that your frosting can be smoothed easily. To add the crumb coat, use an offset spatula and spread a thick layer of your room temperature frosting to the top and sides of your cake. As you spread the frosting over the cake, move the spatula in the same direction (rather than back and forth) so that any loose crumbs are tucked under the frosting rather than brought to the surface. Keep your spatula from ever touching the cake to minimize the chance of crumbs getting stuck to it and appearing at the surface of your frosting. Place the crumb-coated cake in the fridge for at least thirty minutes before adding additional layers of frosting. EXPERT TIP Mathew Rice Mathew Rice Professional Baker & Dessert Influencer Mathew Rice has worked in restaurant pastry kitchens across the country since the late 1990's, and currently owns Pink Door Cookies in Nashville. His creations have been featured in Food & Wine, Bon Appetit, and Martha Stewart Weddings. In 2016, Eater named Mathew one of the top 18 chefs to follow on Instagram. In 2018, he appeared in season 18 of the Food Network's Beat Bobby Flay and won his episode. Mathew Rice Mathew Rice Professional Baker & Dessert Influencer Mathew Rice, pastry chef, adds: "With a crumb coat, you just want to make a super, super thin layer of frosting all over the entire surface, and then you chill it. What that does is it traps all the crumbs in that part of the frosting. So when you go back to frost it, all of the crumbs are locked in that layer, and they’re not gonna show in your final coat."
Frosting Your Cake with an Offset Spatula
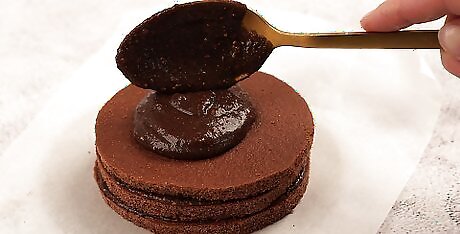
Add a dollop of frosting. To make the icing easier to spread, it may be helpful to warm it slightly or add a tablespoon of corn syrup and mix well. Then, take your offset spatula and add a large dollop to the top center of the cake.
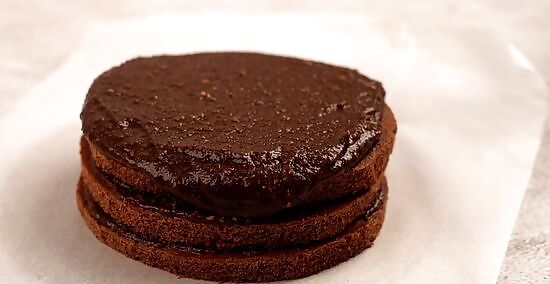
Spread the icing. Use your spatula to spread the frosting outwards from the center. You can spin the cake plate to make this easier. Don’t worry about getting the frosting perfectly smooth yet, just make sure that the crumb coat is completely covered.
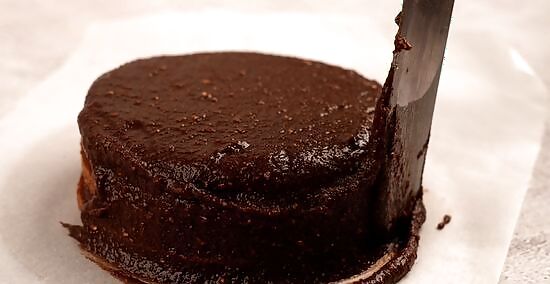
Frost the sides. Add a bit of frosting to the center of one of the sides, and work in one direction to spread it outwards. Keep your spatula parallel to the sides of the cake as your spread, adding more frosting when necessary.
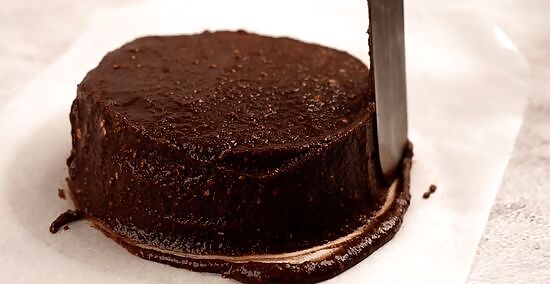
Smooth the frosting. Take your spatula back to the top of the cake, and work slowly back and forth across the surface to smooth it. Do the same to the sides, wiping off any excess frosting when necessary. When you are sure your cake is just right, remove the wax paper strips from the bottom and enjoy your perfectly smooth cake!
Frosting a Cake Using the Upside-down Method
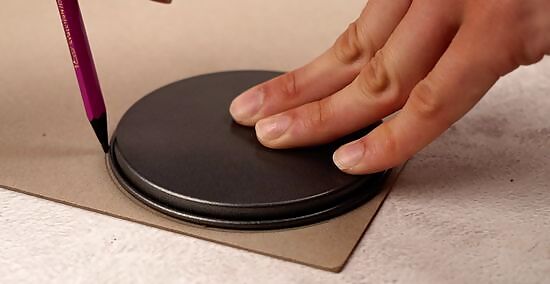
Cut a cardboard bottom. Measure the size of your cake using the bottom of your cake pan and cut a piece of cardboard the same size. Tape this with a single piece of tape to your spinning cake plate.
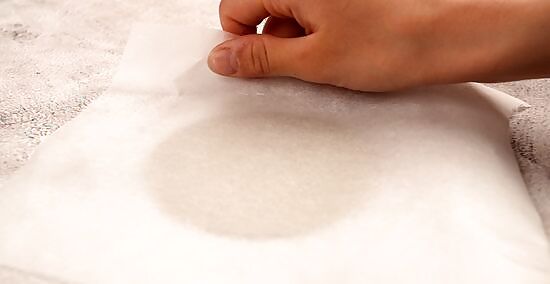
Add wax paper. Cut a large piece of wax or baking paper and place it over the cardboard and cake plate. It should completely cover the plate, and leave edges sticking out on the sides. Tape these to the bottom of the cake plate so that the paper doesn’t slide around while you’re frosting.
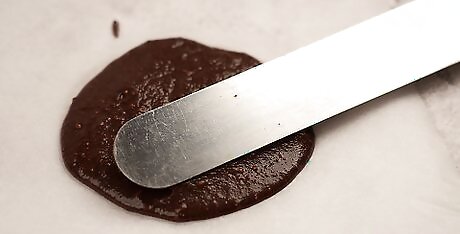
Spread your top layer of frosting. Use your offset spatula to spread a thick layer ½-1” thick of frosting directly to the wax paper, Completely fill in the area of the wax paper under which the cardboard cutout is placed. If necessary, add a little extra frosting around the edges.
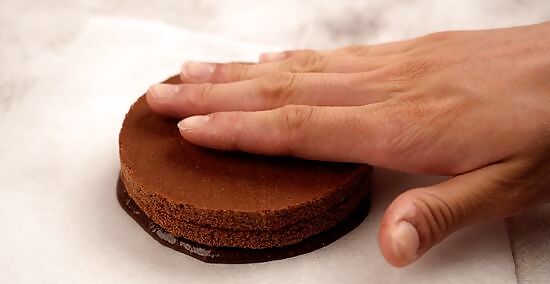
Place your cake on the frosting. Remove your crumb-coated cake from the fridge, and flip it over onto the frosting. Make sure to place it slowly over the frosting, centering it so that the entire cake is placed on it.
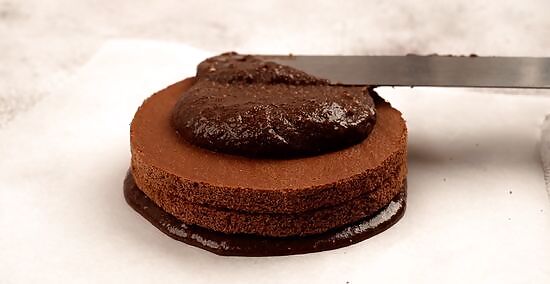
Frost the sides. Add a significant amount of frosting to the sides of the cake using your offset spatula. Add more than you will probably need, as you will be wiping the excess off with your bench scraper after it has been coated.
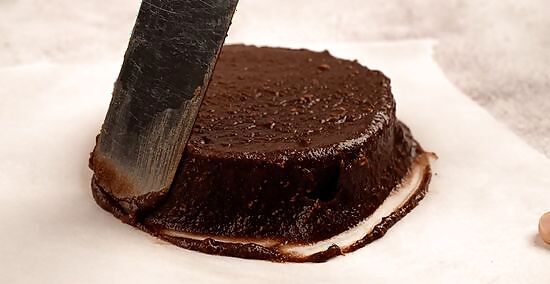
Smooth the sides. Take your bench scraper and hold it steady to the sides of the cake as you slowly spin the cake plate. As extra frosting gathers on the scraper, wipe it off and dip it in warm water. Wipe off any excess that might be on the wax paper on the bottom as well.
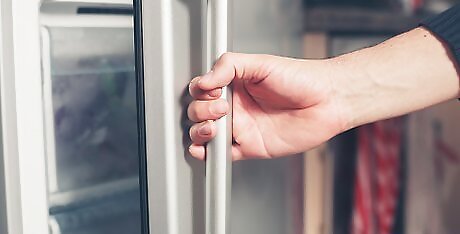
Refrigerate or freeze your cake. Without shifting or adjusting the cake at all, place the whole cake plate into your fridge or freezer and allow the frosting to set. Depending on the temperature, this could take anywhere from half an hour to several hours total.
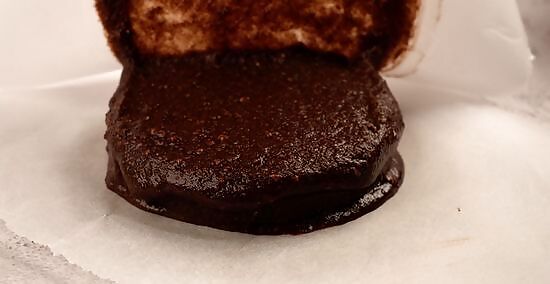
Finish your frosting. When the frosting is firm to the touch, remove your cake from the fridge. Un-tape the wax paper from the sides and slide the cake off the cake plate. remove the cardboard cutout on the bottom, and flip your cake over onto the cake plate. Then, slowly peel back the wax paper to reveal a perfectly smooth surface. If your frosting begins to peel off with the wax paper, it hasn’t been cooled enough. Replace the cake with the wax paper/frosting back in the fridge for at least thirty more minutes. If there are any holes in the frosting from air bubbles, use your offset spatula to fill in the spaces with a bit of warmed frosting, and smooth over afterwards.
Frosting Your Cake with a Paper Towel
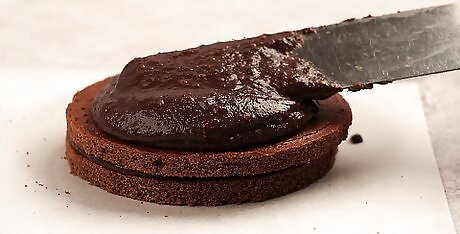
Add your first layer of frosting. Remove your cake with the crumb coating from the fridge, and add a dollop of room-temperature frosting to the top center with your offset spatula. You could also choose to pipe a layer of frosting on with your smooth cake piping tip if you want. Frost the top of the cake working from the center out. Then, add a layer to the sides of the cake as well. Don’t worry about this first layer of frosting being perfectly smooth. Try to keep it as level as possible though, smoothing out any ridges that might arise.
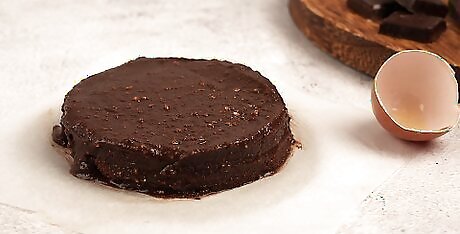
Let the frosting dry. Leave your cake uncovered on the counter for 15-20 minutes until the frosting is dry to the touch. If you need to, you can leave it to set for longer.
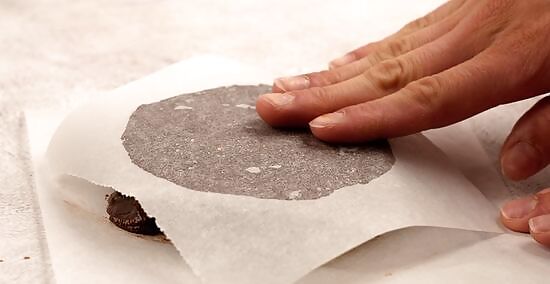
Smooth the tops. Take a paper towel or a piece of wax paper and place it on the top of your cake. Use your fingers to smooth the frosting, using the paper as a barrier. Move the paper to the sides and repeat the process to smooth the edges of the cake as well. For a completely smooth cake, use wax paper. If you would like a small pattern to show through, use a paper towel with the ridge-side down. Only place the paper and smooth it with your fingers a single time. Lifting and replacing the paper on the same section of cake will expose the wet underlayer, and just smear the frosting.
Using Decorative Techniques
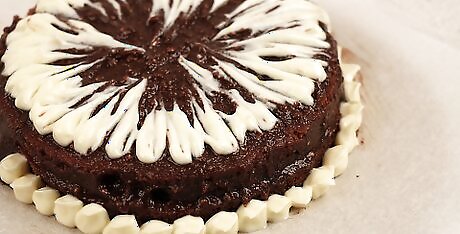
Create a feathered pattern. Use a contrasting color of icing to pipe stripes across the top of your cake in even rows. Then, take a long toothpick and make even lines perpendicular to the ones you just piped. Make every-other line in the opposite direction. This will create a lovely marbled or feathered appearance to the top of your cake.
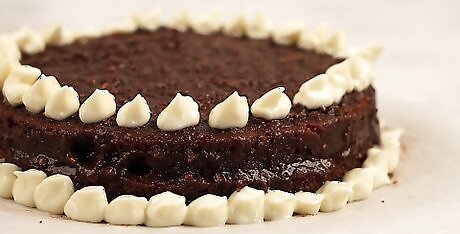
Try piping on designs. Use your traditional cake piping bag with different tips to add pretty designs to the top of your cake. You can create a repetitive pattern, writing, or small shapes with a piping bag. If you don’t have a piping bag, try using a traditional ziplock bag with the tip cut off. For example, you can decorate a camo cake by piping green, brown, and black blobs of frosting over a base layer of white frosting. EXPERT TIP Aly Rusciano Aly Rusciano wikiHow Staff Writer Aly Rusciano is a Creative Writer based outside of Nashville, Tennessee. She has over ten years of experience in creative, academic, and professional writing. Aly’s writing has been nationally recognized in the Sigma Tau Delta Rectangle and featured in Blue Marble Review, The Sunshine Review, PopMatters, and Cathartic Literary Magazine. She graduated from The University of Tennessee at Martin with a BA in English, focusing in Creative Writing and minoring in Theatre. Aly Rusciano Aly Rusciano wikiHow Staff Writer “If you’re not sure which piping tip will give you your desired effect or pattern, use a coupler. Cut a hole across the tip of your piping bag and place the first piece of the coupler inside. Then, place your chosen piping tip over the coupler on the outside of the bag. Screw the final piece of the coupler over the tip. Now, you can switch out the piping tip without taking out all the buttercream!”
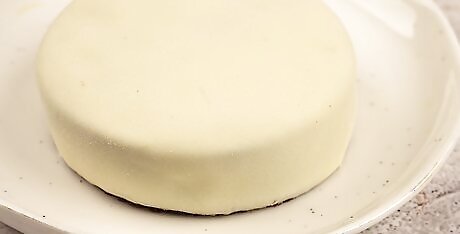
Use colored fondant. Purchase or make your own colored fondant - a sugar-based dough-like frosting that can be shaped and spread for seamless application. Coat your entire cake in a layer of fondant, or use it to form small figures and details to place on top of your cake.
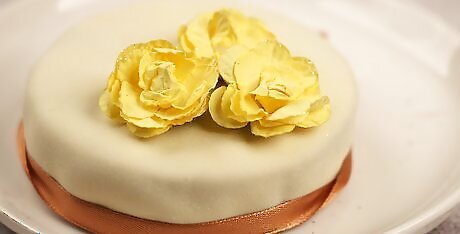
Add fresh flowers. Once you have completely frosted your cake, add fresh flowers for a fresh appearance. Fresh flowers give the appearance of a lot of effort but are an incredibly simple addition to your cake.
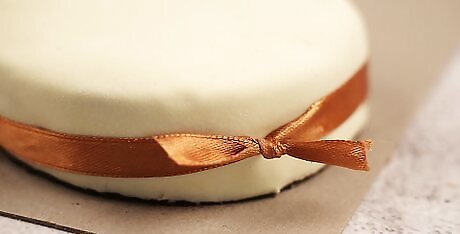
Add a ribbon border. You can choose to use real ribbons for a satiny look or create strips of ribbon out of fondant to add to the border. Ribbons are especially effective on a cake with several tiers, such as a wedding cake.


Comments
0 comment