views
Sketching the Painting
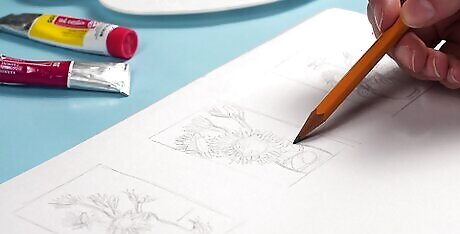
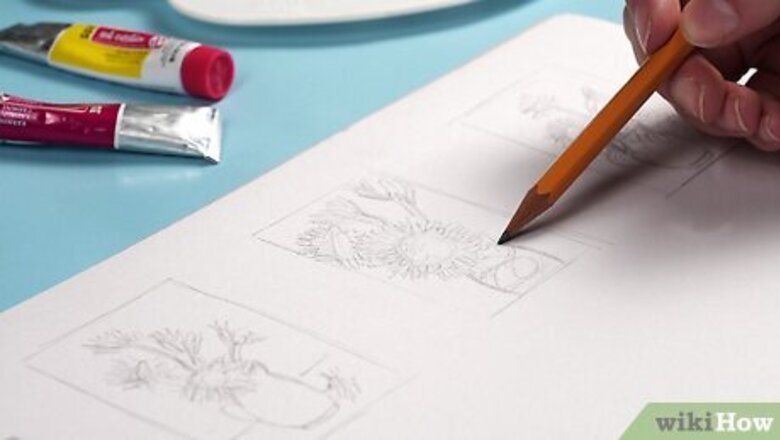
Sketch a "notan" of the painting in your sketchbook or on scrap paper with a gray pen and a black one, or a pencil and a pen using the pencil as the gray. If it's a square, that's a square. If it's rectangular or oval, decide if it's going to be vertical "portrait" orientation or horizontal "landscape" orientation. Do the notan drawings very small, just to place the light, dark and medium areas on the design. They can range from a large postage stamp to a business card size - the idea is to see it as if it was at a distance or a thumbnail. Do lots of them till you find the best design without worrying about the details.
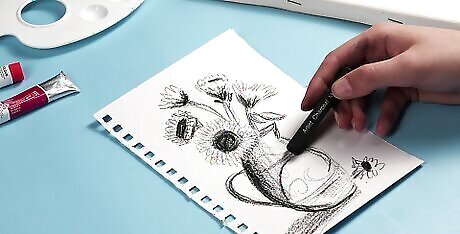
Using charcoal or the pencil, make a value drawing in your sketchbook. It can be quite detailed and shaded carefully or just loose to show you where the shadows and highlights are. This partly depends on how detailed and realist you want the painting with. A looser painting style can have a sketchier value sketch, but should still have one with more than "white middle and black" so that you can tell where there are at least five values - white accents, light value, medium, dark, black accents. Some painters like to not use pure black and white but just use "light, light middle, middle value, middle dark, dark" for the five values. It depends on the effect you want. If you don't like the sketch keep trying different versions of it till you get one you like. In the sketch, make sure the light falling on the person, objects or landscape elements is all going in the same direction. Pay attention to where the shadows go. They should all go the same direction and are shorter when the sun or lamp is high, longer if it's later or earlier in the day and the sun is low (or lamp is low). Directional lighting will make all the objects look more three dimensional. Draw the shapes of the shadows carefully and most of your subjects will look three dimensional at that point. This makes for good Impressionism or realism. If you want to do an abstract, do the pencil sketch loosely and work out where you want particular effects like spattering or strong texture strokes. Or skip the sketch stage on paper and proceed to the next. Sketch the subject on the canvas board, canvas paper or canvas pad. Use charcoal or your violet pastel pencil. Mark up the exact proportions of the canvas on the board or pad if it's not exactly the same shape, so everything's placed the way it is in the planning sketches. Do this drawing as pure outlines. You can get detailed for realism by marking up eyes, mouth, any important shapes on it or you can keep it very simple just to the main shapes and main shadow shapes. Either way it should look like a Paint By Numbers canvas when the sketch is done. If you make mistakes, wipe off the charcoal or pastel pencil with a damp cloth, let that area dry and draw it again. Very correctable.
Getting Started Oil Painting
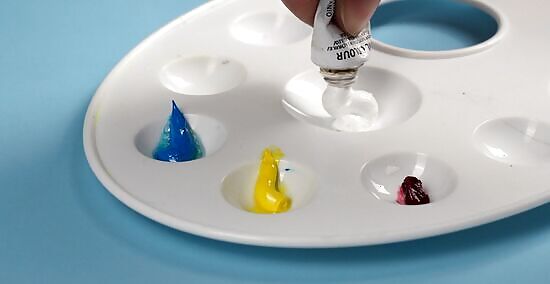
Squeeze out a little of the paint on your palette and mix your colors. Set out your yellow, blue, red and a larger dab of white with some distance between them. Optional, use Burnt Sienna as well. Leave all the other colors in the box if it was a gift set.
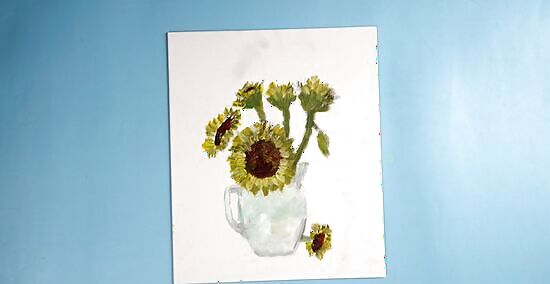
Paint the color study "Alla Prima." Just paint right over the sketch into the areas of each color. Because this doesn't need to be detailed, you can try painting the color study with the palette knife or painting knife. If you don't like any of your color choices, use the palette knife to scrape off that bit and put the mixed-up paint off to the side on your palette in case you need some muddy brown. The mix of all three primaries will harmonize throughout the painting and so the mixed up paint can be separated and mixed with a little more to turn it into pale or dark browns and grays. No waste with a simple primary palette. Keep playing with the Color Study until you like it as a simple, bold painting done with a fairly big brush and not much detail. If necessary, do more than one of them till you work out what mixtures and colors you like. You're doing this little practice painting with the paint right out of the tube. It doesn't need either thinner or oil for this technique. If you like the look, you can do the big painting the same way just by using the palette knife and tube paint with bold strokes onto the canvas, no extra oil and no thinned out layer. That's a style of oil painting that's fast and powerful.
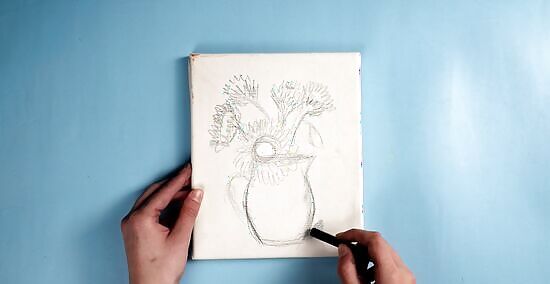
Draw the outline using a soft pencil or a thin stick of charcoal. On a landscape painting, using a violet pastel pencil is a very good choice because that color blends well with all the landscape colors without darkening or staining light colors as much as black. Charcoal and the violet pastel pencil are both easily corrected with a damp tissue or rag, so don't worry about making changes to the sketch! Draw it in, if you get it wrong wipe off the wrong bit and try again.
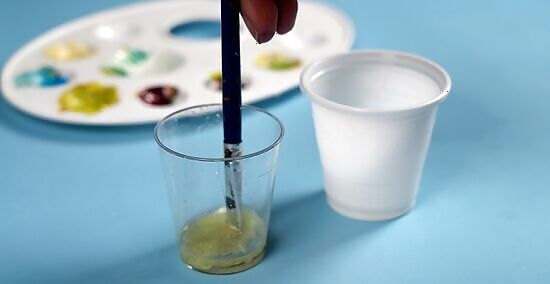
Prepare some oil in a cup and some thinner in another one. Wipe your brushes and palette knife clean. Wash the brush you used if you used it for the color study, using the turpenoid - just dip it in the thinner and squeeze it out with a painting rag.
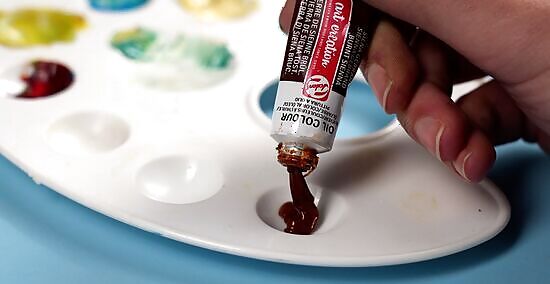
Put a small dab of Burnt Sienna on your palette. Or if there isn't any white or much white in the three-color mud mix, use that for your brown thin layer. Thin it out by dipping your brush into the thinner, turpentine or turpenoid or Sansodor (the Winsor & Newton brand is good). Dip the wet brush into a little bit of paint and squeeze it around till you have very thin, transparent paint that's light. Paint in the light areas on your painting following the notan. Using a little more paint, do the medium light and successively darker areas with the Burnt Sienna, still thinning it till it's like ink in texture. Even the dark areas should have a fair amount of paint thinner in them. The more thinner you use, the faster this transparent Burnt Sienna value layer will dry. Wow. The transparent value painting in Burnt Sienna usually looks pretty cool at this stage. It's still easy to change if you got it too dark somewhere or too light somewhere. Take a rag and wipe off the part you don't like and redo it the right value, or add a little more color. Or wipe out and change the shape. Gee, you thought oil painting had to be perfect, nope, it's very easy to correct and make changes all the way through. This stage will dry pretty fast, within a few minutes to half an hour. The thinnest parts may be touch dry by the time you finish the other corner. It only needs to be touch dry.
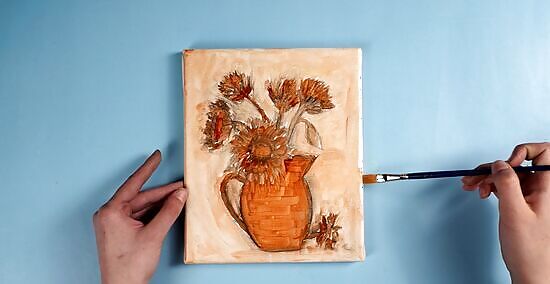
Remember the rule "Fat Over Lean." This is structural. That first layer - the value sketch you paint over - was very lean - almost all turpentine or turpentine substitute, very little oil. Just the amount of oil in a little bit of staining paint to make it show up. It looks almost like watercolor on paper at that thinner layer. You can do successive washes in different colors if you want a fun technique at the "wash" layer. The next layer is "Alla Prima" or paint right from the tube the way you did the color study. That's sort of medium fatness, like someone who's not fat or skinny. After that, the more oil or Liquin that you add to the paint, the fatter it is. The problem of Lean Over Fat is that the oiliest layers dry the slowest, so the faster drying paint should be under it. Otherwise the outside will dry before the inside and the inside might remain squishy and sealed. Worst case, a painting that has Lean over Fat can slide off the canvas on a hot day, losing all paint cohesion. This happened at least once to a past student of a teacher who told the story. Never use oil pastels under oil paint because their oil formula includes mineral oil that never dries. You can optionally add oil pastel marks on the last layer of an oil painting when it's touch dry.
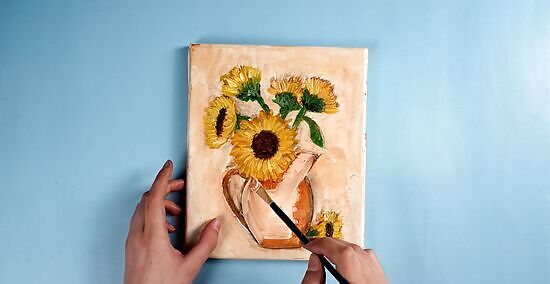
Block in the colors in general for major areas first, then add a little more paint to make details lighter or darker, redder or yellower or bluer. Mix your colors half on the palette, half on the canvas. Start with getting the main areas of light and shadow blocked in with the right general colors, then add in more paint to modify them. Shade gradually and blend them gently where you want the paint to be smooth without showing much brush strokes. Dab on lots of it and leave it where you want strong textures like an Impressionist painting, or use knife strokes to make bold textures. Contrasting smooth textures and bold ones so that some parts of the painting are raised "impasto" texture and others are smooth and carefully painted is very lively. So vary the amount of "alla prima" texture you put on. Mix some of the oil into the paint if you want to lay it on thin and brush out the brush strokes to keep it smooth. As long as it's still wet, you can mix more oil or more paint in to make that layer fatter or thinner. But if it starts to dry or skin over, don't put anything leaner over what has fat in it. Unless you want a really ugly special effect, like painting a zombie's face and putting a big pocket of fat in on the cheek, then letting it dry wrong, then ripping it open to have the paint skin dangle down and the clump of brownish-red fat paint hit the air and dry solid, maybe dripping over the rip. Almost any mistake can be turned into a special effect once you know how it works.
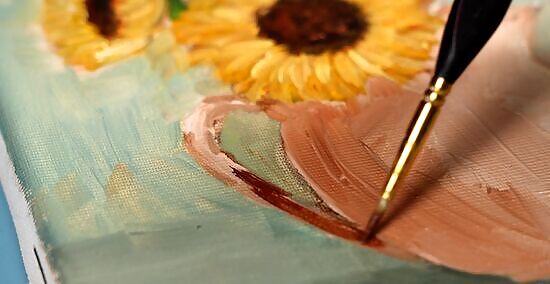
Make changes as needed, for oil paints stay wet for days. This means you can paint all day, fool around with it, go to bed, put an empty box over the palette so your cat won't walk in it, start over tomorrow and keep making changes while it's wet. Use the palette knife to scrape off whole areas of it before it dries and start over. Oil paint's slow drying time allows plenty of changes before you decide it's done and let it dry.
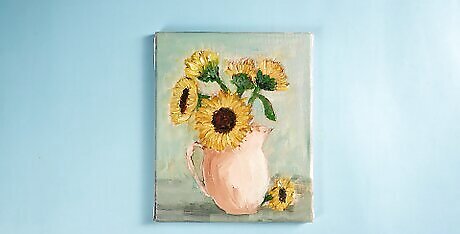
Leave it to dry. It would take at least two weeks unless you used Liquin as your medium. Liquin dries faster than paint from the tube, so use at least a bit of it into all the paint so that it all bonds well. It's not fat, but oil right from the tube is. You can also get alkyd oils that have alkyd (the main ingredient of Liquin medium) right in the tube paint, where the painting may take only a couple of days to a week to touch dry depending on how thick the paint is. You can help to speed up the drying process for oils a little by storing the painting in a warm, well-ventilated and well-lit room.
Finishing Up
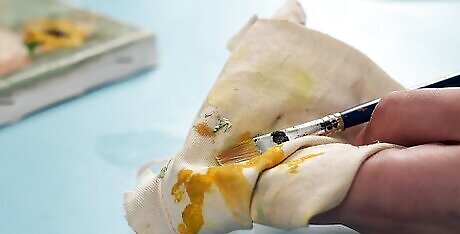
When you finish a day's painting session, clean your brushes by dipping them in the thinner and then use the painting rag to squeeze the paint out of them. Repeat several times till almost all the paint is off before swishing them in thinner, otherwise it wastes thinner. Store your painting rags and supplies away from any open flame or electrical circuits or heaters or anything that can start a fire. Seal them in a metal can if you have one handy. If you store your palette with paint squeezed on it in the fridge, it will slow the drying and you can use the squeezed out paint longer. But don't let anyone mistake it for food.
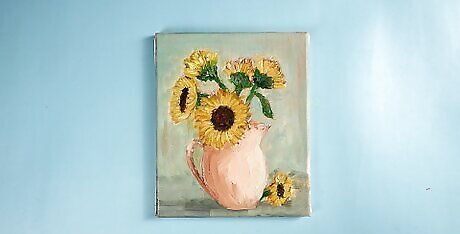
Store wet paintings somewhere safe that's free of dust, dark and cool if possible. You can build a vertical drying rack with a home built cabinet where you put peg board panels a couple of inches apart to lean one wet painting into each slot. If you do a lot of oil painting, this is a good DIY project to leave you more garage space. Since you are creating fumes with the thinner, it's a good idea to use the garage and other areas that people don't spend as much time in or have very good studio ventilation. Storing them in vertical slots reduces the amount of dust that falls on the painting while it's drying, it'll mostly accumulate on the top edge instead of the front of the painting.
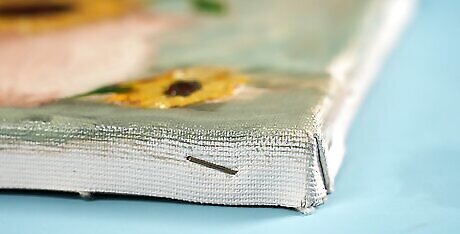
With a "Gallery" canvas that is an inch and a half deep, you don't need to frame an oil painting. Just paint the sides too, either wrap the painting around or paint them black or put a design, do something fun with it. Then you don't need to buy a frame to either sell it in a gallery or give it as a present, it's ready to hang when it's dry and varnished.
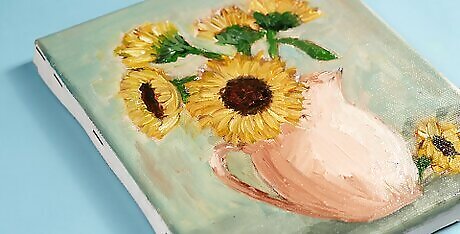
Wait at least a month after the painting is touch dry to use retouch varnish and give the painting a temporary shiny, finished look. Some colors dry matte and flat, others shiny, it can be annoying till the varnish is on. Then wait another eleven months to add Damar varnish or any other removable conservator varnish and let that dry for a few days. Your painting will now last longer than you will.


Comments
0 comment