views
Steps
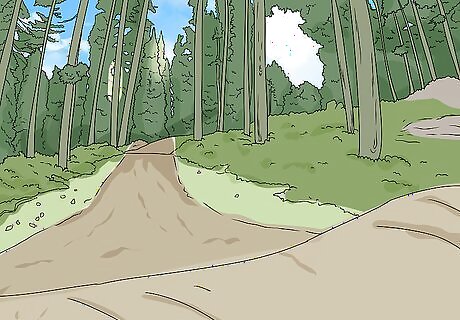
Start with a lightweight track or trail bike for easier control. Dirt bikes come in several varieties, from track to motocross bikes. Track bikes are the least expensive since they lack instruments like oil lights, speedometers, and temperature gauges. Trail bikes often have these extra features. These bikes are a little heavier, but they are still good for a smooth, stable ride. The most important part is to choose a bike you’re comfortable with. Some people prefer smaller, lighter bikes, while others are more comfortable on heavier ones. You can successfully learn with either option. If possible, try out different bikes to find one you’re comfortable riding. Many dealerships will let you take test rides if you ask, although this policy varies from place to place for liability reasons. Motocross bikes are the lightest type available. They’re designed for speed instead of handling, so stay away from them until you have more experience.
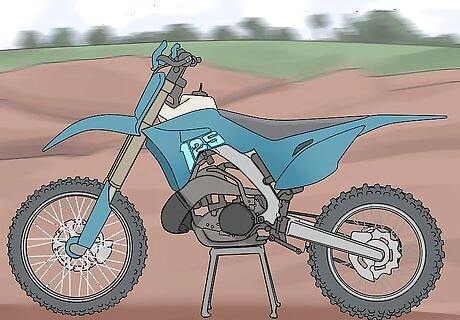
Choose a bike that has a 4-stroke engine. Dirt bikes either have a 2-stroke or 4-stroke engine. The 4-stroke engines are a little heavier and more expensive because they have more moving parts. The advantage is that they are easier to control, making them the better option for most inexperienced riders. Avoid the trap of throwing down money for a powerful 2-stroke bike that isn’t suited to beginners. The 4-stroke engines tend to last a little longer than 2-stroke engines but are more expensive to repair due to the number of parts. A good starting point is a 125cc 4-stroke engine. If you still wish to go with a more powerful bike right away, look for a 50cc 2-stroke engine.
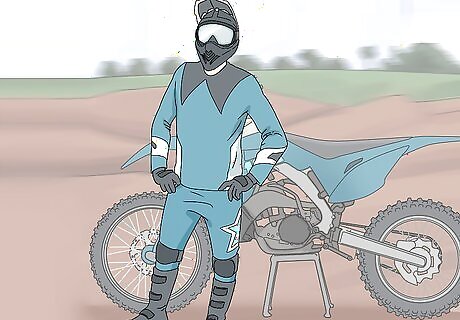
Purchase a helmet, padding, and other protective gear. A basic riding outfit consists of a long-sleeved shirt, pants, boots that go up past your ankles, and gloves. You can buy specialty dirt bike clothing that offers extra protection against abrasions. All bikers also need a pair of dirt bike goggles and a full face helmet. After you have this gear, get extra pieces of padding to protect yourself in case of an accident. Purchase elbow and knee guards as well as a chest protector. These are must-haves to reduce the risk of serious injuries. A neck brace is helpful, but you don’t truly need it unless you plan on doing jumps or riding dangerous tracks. Braces are bulky, but they protect you against spinal injuries.
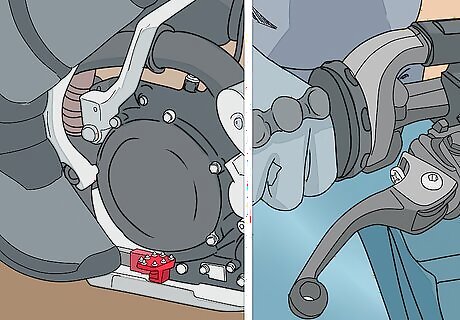
Locate the brakes near the right handlebar and foot peg. Before you ride, get to know your bike. The brakes are always on the right side of the bike. The lever in front of the right handlebar operates the front tire brake. The rear brake is somewhere below that. Look for the peg where you rest your foot when sitting on the bike and you will see a small pedal right in front of it. The color of the foot peg and front brake pedal vary from bike to bike. Yours may be red, blue, or silver. Regardless of the color, the pedal stands out so you can always reach it.
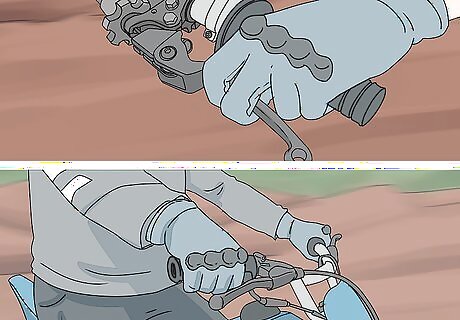
Find the clutch and throttle used to make the bike move. Both of these components are on the handlebars. The throttle is the right handlebar grip, which you pull back to accelerate. The clutch is the lever ahead of the left handlebar. You use it in conjunction with the throttle to control the bike’s acceleration and deceleration. Working the clutch and throttle at the same time is important, so make sure you know where they are. You’re much more likely to hurt yourself if you try riding before you identify them.
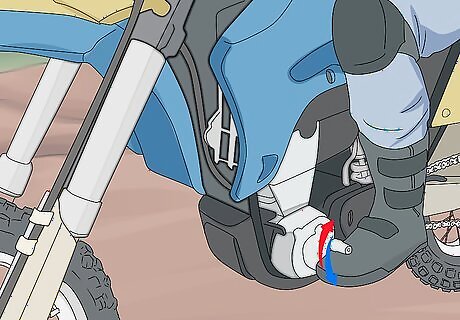
Use the shifter pedal on the left side of the bike to change gears. The pedal in front of the left foot peg is the gear shifter. You will need to use it to put the bike into motion and control its speed. Shifting gears correctly allows you to go faster while reducing the strain on your bike. Make sure you know how the shifter functions before you start riding. To shift into first gear, you press your foot down on the shifter. Shift from first gear to neutral by pulling the shifter up halfway. It will click a little bit. To shift into second gear and up to fifth gear, pull the shifter up repeatedly. It will click audibly each time.
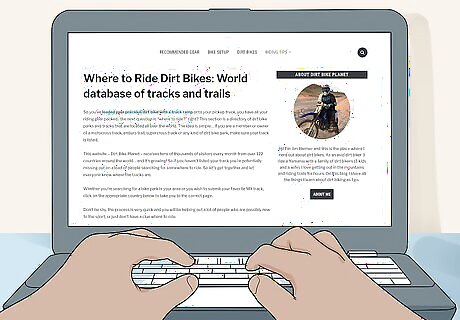
Search for locations in your area that are legal for riding. Riding your dirt bike around can get you into trouble if you aren’t careful. Many bikes aren’t street legal, and many off-road areas are restricted by law. Avoid assuming that you can ride anywhere you please. To find the rules in your area, search online to read up about street and trail regulations. Also, speak with other riders and law enforcement in your area. If you wish to ride your bike in city streets, you need to upgrade it according to your local laws and get a permit from the government. You can also purchase hybrid bikes that work on both streets and dirt trails. Be respectful of other people, whether they are fellow riders or people walking on the trails. Always equip your bike with a spark arrestor to avoid forest fires. Many laws around the world make this mandatory. You may also need a silencer to follow sound regulations.
Mastering the Basic Riding Positions
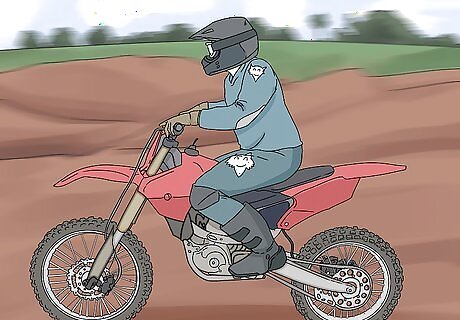
Practice proper driving form with your knees bent and your back curved. Sit on the bike as close to the gas tank as possible. Plant the balls of your feet on the foot pegs, making sure your knees are bent with the bike held firmly between them. Lean forward so your back curves slightly, then lift your elbows. Also, squeeze your core muscles tight. This sitting position is best for long, smooth sections of terrain. Use it to conserve your energy for tougher sections. The best way to master this basic riding form is on a parked bike with the engine off.
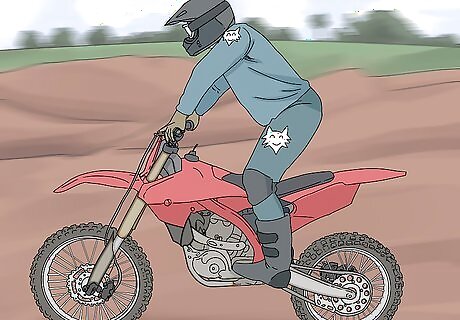
Stand with your legs bent slightly when crossing rough terrain. Your legs act as suspension when you cross uneven, bumpy land. To master this form, stand up on the balls of your feet. Lift your butt, keeping your knees slightly bent and squeezed up against the gas tank. Keep your core muscles tight as much as possible. When you do this correctly, you will be able to shift your weight backwards, forwards, and side to side to compensate for uneven ground. Standing up can be difficult at first and gets tiring. Keep practicing so you can handle long stretches of rough terrain safely.
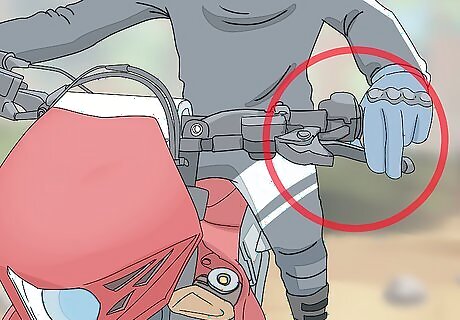
Maintain a loose grip on the handlebars with your fingers. Most riders start by wrapping their hands around the grips, keeping their thumbs underneath them. They then place their forefingers and middle fingers on the levers. This may seem counterintuitive at first, but it allows you to quickly hit the clutch and brake levers with your strongest fingers in case of an emergency. Many beginners are taught to hold onto the throttle with all of their fingers, then reach out to the levers as needed. This can stop you from accidentally operating the clutch or brake. The 2-finger grip is very useful to master, but you can stick with an alternative grip if you feel more comfortable doing so.
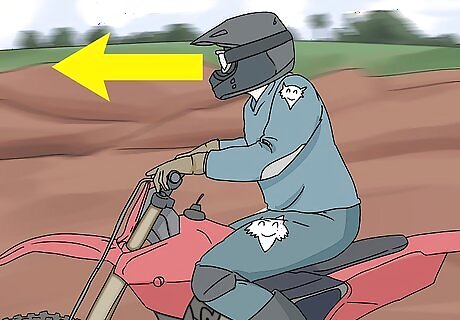
Keep your head up and always look forward. Get into the habit of trusting your peripheral vision. Look straight ahead of you as much as possible. Let your peripheral vision pick up anything to your sides. Avoid looking down at the bike. Fixating on dangerous objects, like logs and corners, increases your chances of hitting them. You may think you’re preparing to handle these obstacles, but you end up guiding your bike straight towards them.
Starting the Engine
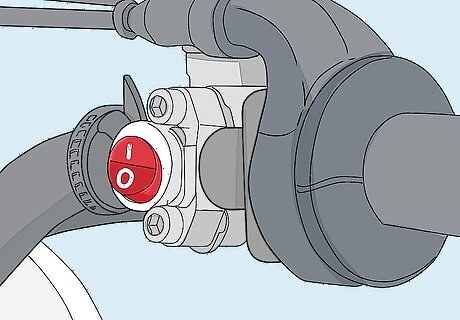
Flip the red switch to activate on the bike's battery. Before starting the engine, you need to activate the battery. Many bikes have a red switch on the right handle. Some models may have an “on” button instead. All you need to do is press it to start the battery. If your bike doesn’t have a switch or button, it may have a key slot. Place your key in the slot, then turn it to the on position. Once you turn your battery on, all of the lights should activate.
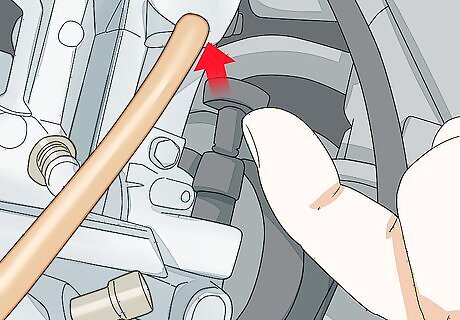
Pull out the choke to start the bike in colder temperatures. The choke is typically on the left side of the bike, near where your leg rests while you’re in a seated position. This device “chokes” air into the engine to increase the gas flow. During cold days or after a lack of use, the engine needs more gas to start. On some bikes, you pull the choke by flipping a switch located underneath the battery. If you have used your bike earlier in the day, you don’t need to pull the choke.
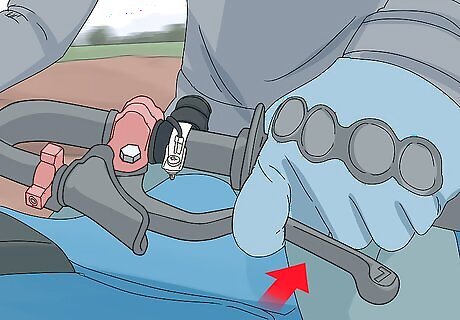
Pull in the clutch all the way. The clutch is the lever on the left handle. It’s in the same spots as the left handbrake on bicycles. Pull the lever all the way in and hold it in place while you start the bike. Bikes for kids often do not have a clutch. Instead of using the clutch, you shift the bike into neutral.
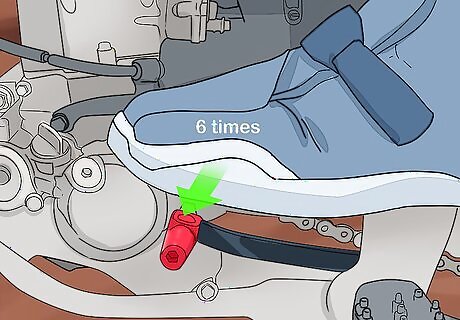
Hit the gear shifter down 6 times to get into first gear. While you are seated on the bike, extend your left foot toward the front peg. Reach the gear shifter right in front of it. Push the shifter all the way down repeatedly while you hold onto the clutch. This method works the same way for a child’s bike, except it puts the bike automatically into neutral. Rock the bike back and forth. If it moves freely without locking up, you're in neutral.
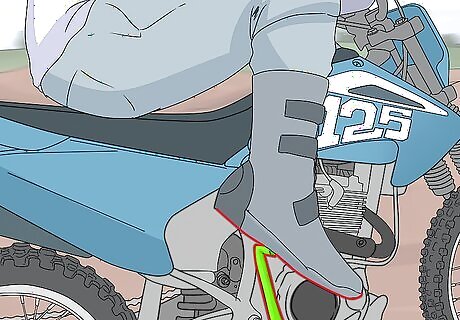
Kickstart the engine using the metal lever on the right. The kickstarter typically is a silver lever near the bottom of your right foot when you’re seated on the bike. Grab the lever by hand and flip it away from the bike. Then, plant your foot on the left foot peg and stand up. Finish by stomping your right foot down on the lever. Many modern bikes have a button that starts the engine electronically. Press it to turn the bike on.
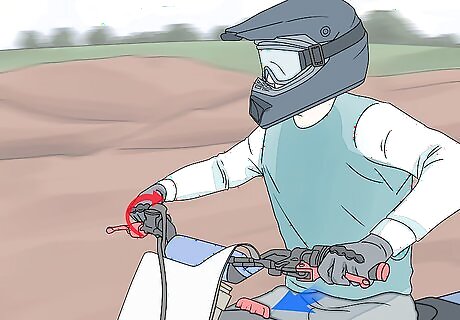
Release the clutch as you pull back the throttle. The key to starting the bike is to do both actions slowly and at the same time. Ease the throttle back as you begin letting go of the clutch. The bike will start moving. You can then stop the bike and push the choke back in before you start driving. On a children’s bike, you will need to lift the gear shifter up to transition from neutral to first gear. Do this when you’re ready to move the bike. Hold onto the clutch! If you let go, the bike will stall. Similarly, if you pull the throttle back too fast, the bike will shoot up and loop out. To perfect this motion, you can practice it in the air before you drive.
Riding the Bike
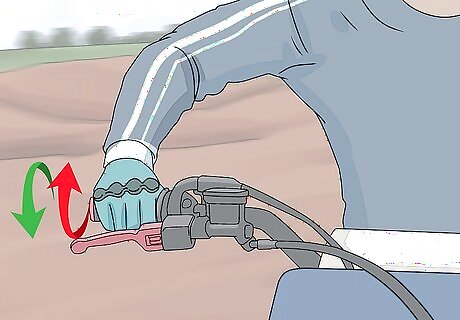
Turn or release the throttle to control the bike’s speed. Roll the throttle back towards you to rev up the engine. Ease off the throttle to slow down. When you need to stop, you can simply let go of the throttle. It will spin back to its original position. Aim on turning the throttle about ⅓ of the way back once you have completely let go of the clutch. Keep a hand on the throttle at all times, but never panic. Some riders freeze up when they get too fast. Stay loose to keep control of the bike.
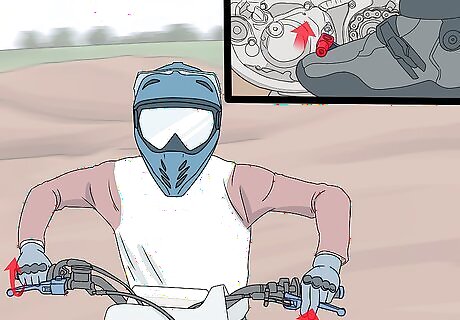
Use the shifter to change gears when the engine works too hard. You start off in first gear, and as the bike builds speed, the engine gets louder. When you bring the throttle about ¾ of the way back, the bike won’t go any faster. You have to press the clutch in and pull the gear shifter up at the same time to keep going. Remember that adult dirt bikes go as high as fifth gear, so you may need to do this a few times. There is no display telling you what gear you are in, so you have to listen and get a feel for how the bike operates to know when to shift. The same rules apply when slowing down, except you push the gear shifter down.
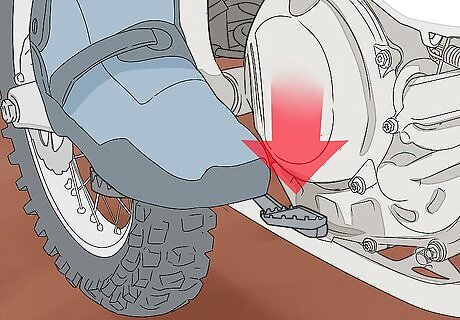
Hit the back brakes to slow down or stop. To slow the bike, lay off the throttle and shift down as needed. Step lightly on the brake pedal to slow the bike. Stop the bike by reaching first gear, then pulling in the clutch. Press down on the brake pedal to bring the bike to a halt. Using the clutch prevents the bike from stalling as it slows. You can also tap the handbrake to slow the bike, but avoid relying on it. Many beginners make the mistake of squeezing it hard. Since it operates the front wheel, the bike comes to a sudden halt, but you keep going over the handlebars.
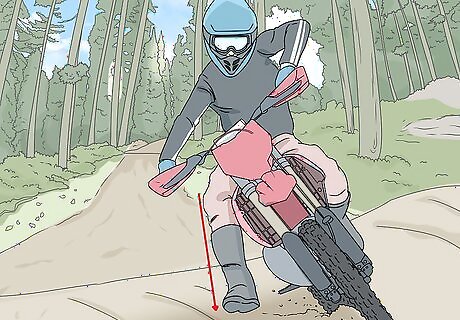
Lean to the side to maneuver around corners. When you come upon a corner, lean the bike in the direction of the turn. Put your inside foot down to help you turn. Shift your body over so the outside edge of the seat is directly under you. Keep your weight on the outside peg as you go through the turn. Stick your elbows out so they are parallel to the handlebars. This will give you more control over the bike. Putting your foot down also allows you to steady the bike in case you take the corner too sharply.
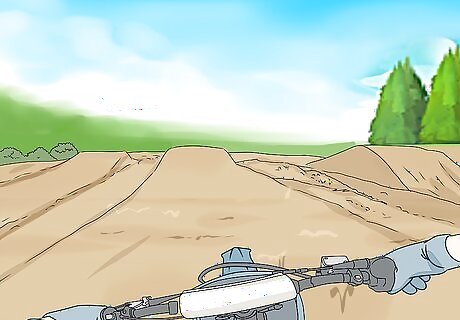
Practice driving on rough terrain when you get comfortable riding. Dirt bikes are designed for rough terrain. Their lifted frames offer plenty of control and don’t take as much damage as other vehicles would during a crash. Head to rocky ground or a motocross track, then stand up on your bike as you drive. Try different types of terrain to improve your driving. Sand dunes feel different than dirt hills, and each type of terrain requires different skills. Find out where you like driving!


Comments
0 comment