
Installing the 1Weather App

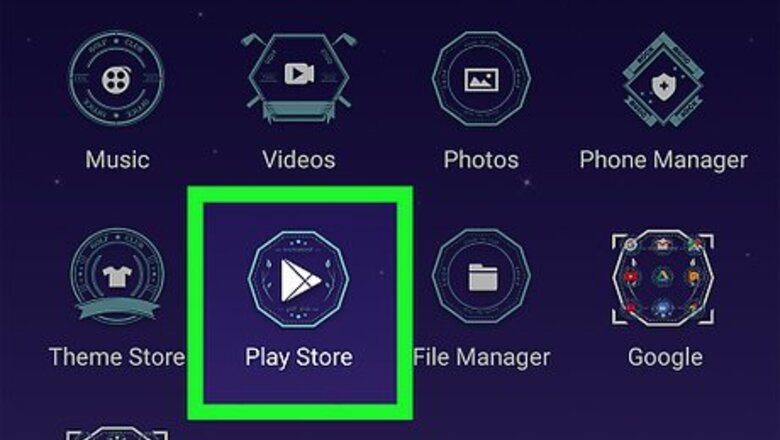
Tap the Play Store icon on the device home screen or application drawer. This will launch the app. The Play Store icon looks like a small white bag with a play symbol in the middle.
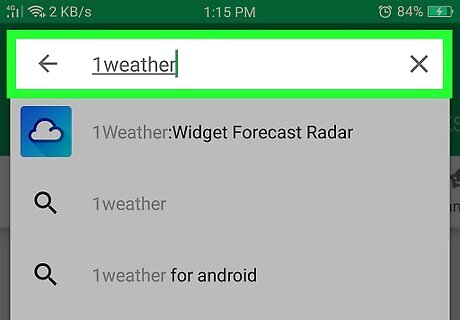
Search for 1Weather. Tap the magnifying glass in the upper right-hand side of the screen. Type in “1Weather,” with no quotes, and hit the magnifying glass at the bottom right-hand side of the on-screen keyboard to proceed with the search.

Install 1Weather. The first search result at the top of the page should say “1Weather Widget Forecast Radar,” inside of a white box. In the upper right-hand corner of the box should be 3 dots rising vertically. Tap the 3 dots. A small box will appear that says “Install”. Tap it, and a Permissions page will appear. Tap “Accept,” and the installation process will begin.
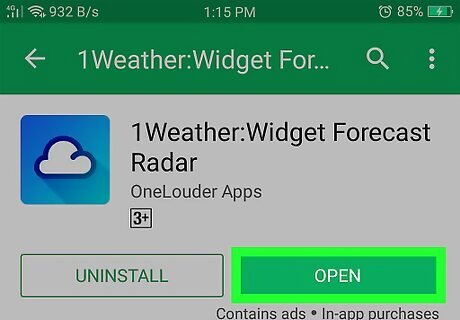
Launch 1Weather. From the top of the screen, slide a finger down to bring out the black notification bar. There will be a notification informing you that 1Weather was successfully installed. Tap the notification to open.
Learning the Options in the Context Menu
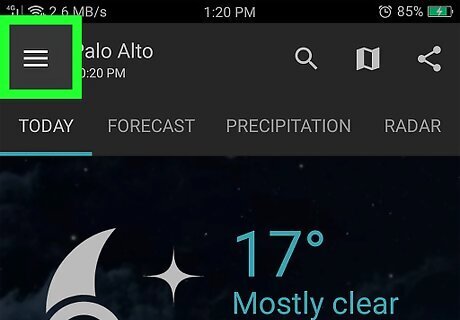
Open the context menu. When the app loads, there will be 3 menus at the top of the app. You will also see 3 vertical dots on the top right-hand side. Tap the vertical dots to open the context menu.
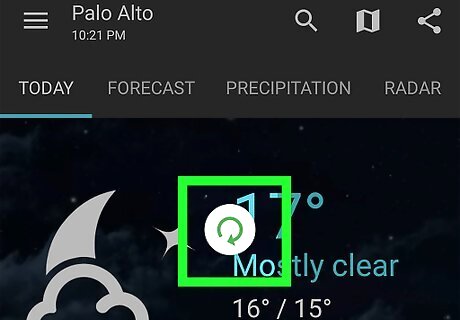
Refresh the weather. Tapping the top option “Refresh,” followed by the current time, will refresh the app to the current time and weather forecast.
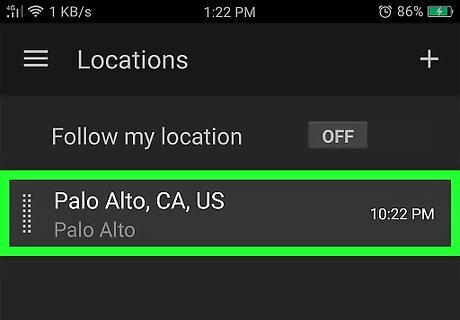
View, add, delete, and label locations. Tap the second option down to open up the Locations menu. This will display all the current weather forecast for the areas that have been added to the app. There will be a + sign on the upper right-hand side of the page, from which new locations can be added. Pressing and holding on a location and tapping the trash can that appears in the upper right-hand corner will remove the selected location from this list. Tapping on a location will open a menu that will allow the user to label the specific location and, in addition, turn notifications on and off by checking and unchecking the boxes to the right of “Warnings,” “Watches,” and “Advisory.”

Watch weather videos. Tap the Videos options to open a list of 16 videos. These videos contain information on a wide variety of weather phenomenon. Tap to open.

Open the Settings menu. Tapping “Settings” will open another menu with 4 options on it: Tapping “Notifications” will open 3 different notification options (refer to Part 3). You can also set the Auto Refresh rate from this menu. Tapping “Appearance” will allow the user to set a picture as the background of the main app screen. Checking the checkbox next to “Show weather facts” will enable a small box that will open when the app does. It will show a different interesting fact each time. Tapping “Language & units” will open up a menu that will allow the user to select the language and units that the app displays its weather information in. The final option, “Other,” has settings for signing into Facebook, refreshing the current weather when the app starts up, and displaying data and network information. Check the checkboxes to the right of each option to select it.

Upgrade to the Pro version. Hate the ads in the app? Buy the Pro version by tapping the “Get rid of ads” option, currently $1.99.
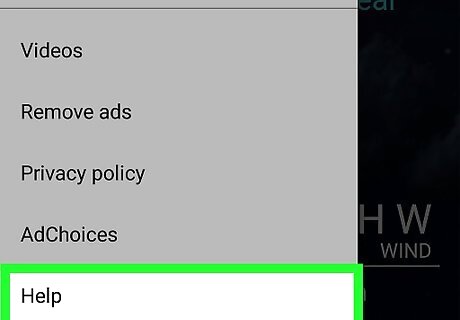
Tap the Help option to open a help menu box. This contains 4 different help menus. View FAQs Report location/temp issues Request Feature Cancel support
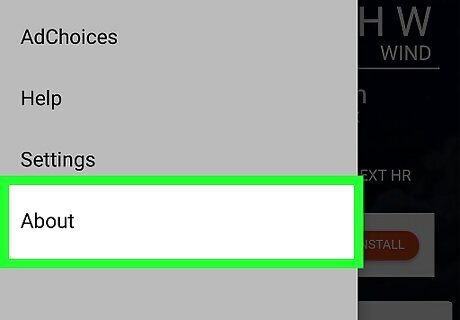
Learn more about the app. Do this by tapping the “About” sections. This will show the app version and licensing information.
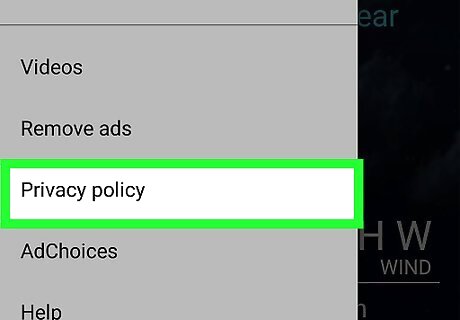
Read the Privacy Policy. Do this by tapping “Privacy Policy.” The app’s Privacy Policy will open on a new web page.
Choosing Notifications

Open the context menu and select “Settings.” A menu with 4 different notification options will appear.
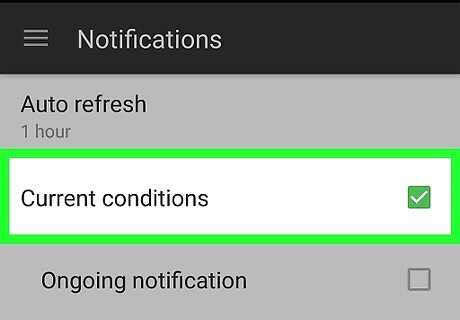
Get notifications for Current Conditions. Checking the box to the right of “Current conditions” will activate 7 options under it. Checking the box next to “Ongoing notification” will activate a temperature notification in the device notification bar. Tap location to choose which locations weather to display in the device notification bar. Temperature color controls what color the temperature is displayed in on the notification bar. Notification theme controls what color all the information is on the notification bar. “Feels like” temperature will provide a small temperature notification on the notification bar to display what it actually feels like outside. Tapping the Rich notification option enables rain chance, high/low temperatures for the day, wind speed, and a noon/evening/night/morning forecast, inside the notification bar. Notification priority controls how far down on the notification list the 1Weather notification will be. Setting to Maximum will keep it always on top. Whereas setting it to normal will allow the notification to move up and down depending on other notifications.
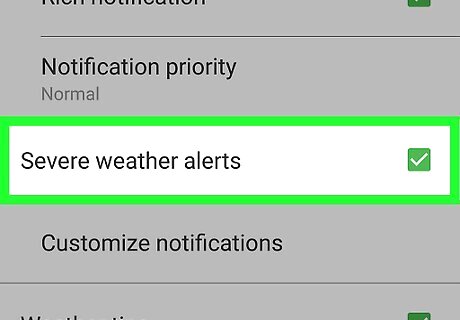
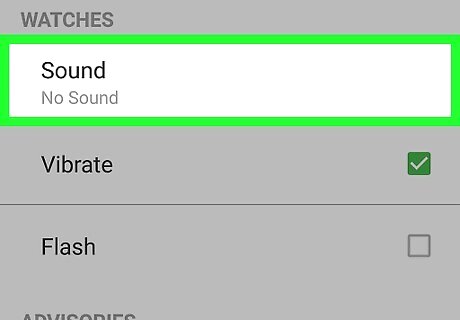
Receive notification for Severe Weather. Checking the box to the right of “Severe weather alerts” will activate notifications for these, and activate one option below: “Customize Notifications” allows the user to set 3 different types of notifications for different types of weather. These are Sound, Vibrate, and Flash for weather Warnings, Watches, and Advisories. Check the boxes next to each option to activate.
Get notifications for new videos. Checking the box next to “New video notifications” will activate notifications for these and one option below. Tapping “Sound” will allow the user to set the notification sound for when new videos are added to the application.
Using the 1Weather App
Turn on your device’s GPS. Make sure your GPS is turned on when the app is activated for accuracy. To turn on the GPS, go to the device app drawer, located on the device home screen. Scroll to find the Settings menu, which should look like a small gear icon. Tap to open. The GPS settings can look different on different devices at this stage. Look for “GPS” or “Location” from the menu given. Once found, tap to open. There should a toggle on the upper right-hand side of the app. Tap to enable the GPS.

Launch 1Weather. Tap the app’s icon from your home screen or app drawer to launch it.

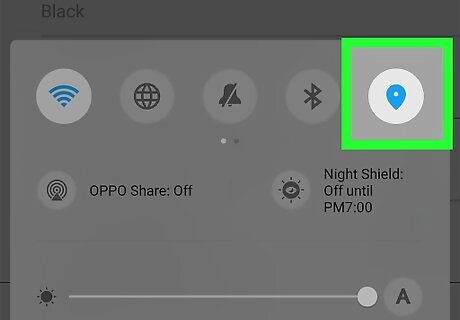
Add a location. On the app home screen, tap 3 vertical rising bars. It will open a side menu on the left-hand side of the screen. It should have the current location listed at the top; this will have a small blue circle next to it. Under this will be a button that says “Add location” with the + sign to the left of it. Tap the + sign. Enter the city name, zip code, and airport code to search for a new location to add. As the criteria is being entered, the app will begin trying to predict the location being entered. When the desired location comes up on the list below the search bar, tap it to add to the location menu. Tapping the icon at the top of the app, to the right-hand side of the search bar, will tell the app to look for the current location based on GPS or an Internet connection. When the process has finished, the result will appear under the search menu. Tap to add to the location menu.
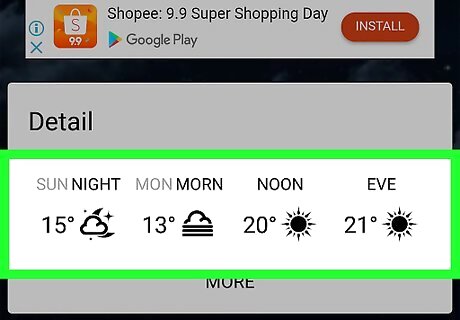
Choose the pertinent information you want to view. On the app home page, there should be 6 small icons lining the bottom of the page. Each of these are pages containing different weather information. The first page, starting on the bottom left, contains the current temperature, high/low for the day, “feels like”, wind speed, visibility, humidity, UV Index, pressure, dew point, and the % chance of precipitation in the next hour. The second page will have a summary of the current weather and pressure systems in the region. In addition, there should be a 10-day forecast with a summary of weather conditions for each day. The third page will have 2 different tabs at the top: Hourly and Extended. The Hourly tab will display basic information for the next 7 hours of weather at the current location. This is a basic view of temperature and weather icons only. The Extended tab will show the 7-day forecast with temperature ranges for each day and the chance of precipitation on each day. The fourth page will show a 7-day forecast specifically for precipitation, and what percentage of chance there will be for each day. The fifth page is a Google Map overview of the current GPS, or selected location. There should be 3 options in the lower right-hand side of the map, followed by a clock. The first button on the left will maximize the map to full screen. The second button controls the layers that will be displayed on the map. These include a Base Layer, Weather Layer, a Weather Layer Opacity slider, Severe Weather Layer, Sick Weather Layer, and Other. The Base Layer allows the user to choose from a Terrain Layer or a Satellite Layer. The user may select whichever type of weather is most important to track.One selection can be made at a time from the Weather Layer, and Severe Weather Layer, without issue. However, the Sick Weather Layer must be selected, and viewed, by itself as it will reset the other two layers to their default positions. The slider controls the transparency of the Weather Layer as it is displayed on the main map. The Other layer controls the displaying of the maps zoom and map marker features uncheck to remove from the map display. The third button will pause the displayed forecast at a chosen time displayed on the clock. Above the clock there are + and - buttons. These are used to zoom in and out on the map, based on the current selected location. The 6th and final page contains information on the time until sunset, as well as when it will rise. Under this it displays the current Moon phase, as well as the dates of the next full Moon and Waning Gibbous, on the left/center/right respectively.

Share the weather. On the app home screen, to the left of the 3 vertical dots, is a Share menu. Tap this to open the menu, and chose the method of sharing. The default options are Facebook and Google+. Tap on the “More” button at the bottom to share using other apps (Messaging, Bluetooth, etc.).


Comments
0 comment